
There's nothing quite like the feeling of stepping out of a beautiful shower… right into a puddle on the floor. It's more than just annoying; it’s a red flag. That puddle is telling you that a crucial part of your shower enclosure is failing, putting your bathroom’s safety and integrity at risk. The unsung hero in this story is a high-quality splash guard for shower door, the small but mighty component designed to keep water exactly where it belongs.
Why Your Shower Is Leaking and How to Fix It
Think of that stunning frameless shower as a luxury car. It might look incredible, but without all the right parts working together, its performance is compromised. A persistent puddle on your floor is a clear warning sign, and it’s about more than just a wet floor—it’s about preventing the costly, long-term headaches that water damage brings.
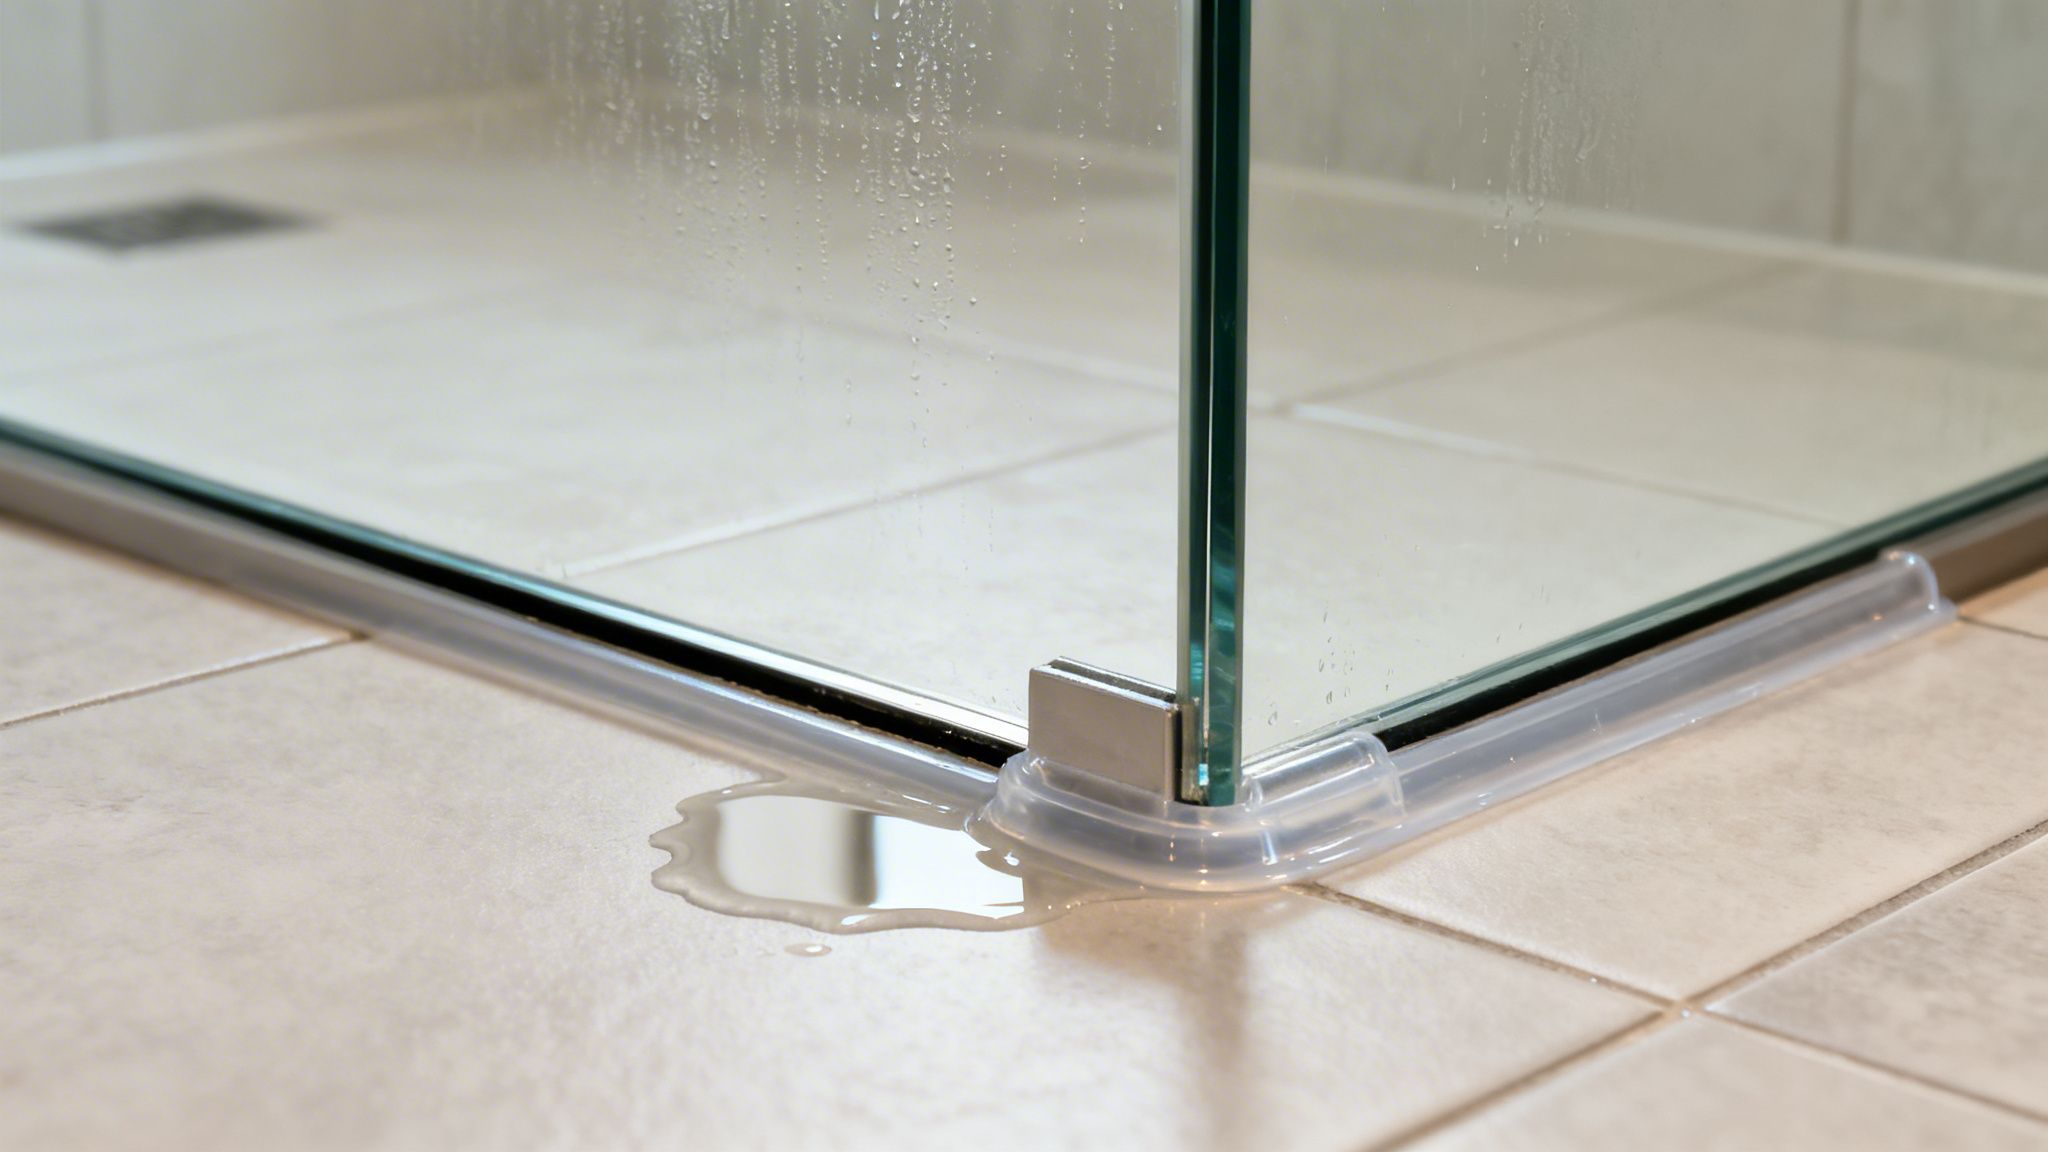
Here in the humid climate of Southwest Florida, unchecked moisture is basically an open invitation for mold, which can cause serious health issues and structural damage. If the problem is bigger, like a shower leaking through the ceiling, you need to get to the root of the problem fast.
The Real Impact of a Small Seal
A high-performance splash guard is the definitive fix for this all-too-common problem. This small component isn't just an optional extra; it's non-negotiable for a few key reasons:
- Protects Your Investment: It’s the first line of defense, stopping water from seeping into your floorboards, subfloor, and drywall, which can save you thousands in repairs.
- Enhances Safety: A dry floor is a safe floor. Splash guards eliminate the very real slip-and-fall hazards that stray water creates.
- Preserves Aesthetics: It helps maintain that clean, pristine look you love by preventing ugly water stains and mineral buildup on your tile and grout.
It’s no surprise that the demand for these components is on the rise. We're seeing significant growth in the market for shower door seals and guards, right alongside the boom in bathroom renovations. This is especially true here in the South, where shower door sales climbed a staggering 12% in 2023, driven by new construction and luxury remodels in areas like Naples. You can get more insights on the shower door seal strip market trends on takyhardware.com.
A leaky shower is often just a symptom of a much larger issue. In homes built before 2010, an estimated 55% experience problems with leaky showers, which is why modern solutions like quality silicone sweeps have become so essential.
Properly installed seals are particularly vital for the sleek frameless shower doors that are so popular in modern homes. Our guide on proper shower door maintenance offers more tips to help extend the life of your entire enclosure. By tackling the root cause of leaks now, you ensure your bathroom remains a sanctuary of style and safety, not a source of constant stress.
Choosing the Right Splash Guard for Your Shower Door
Picking the right splash guard for your shower isn't just a minor detail—it's the final piece of the puzzle that ensures your beautiful new shower actually keeps water where it belongs. Think of it as the gasket on an engine; even the most powerful engine is useless if it can't hold a seal. The right guard is virtually invisible and works flawlessly, while the wrong one means you’ll be mopping up puddles after every shower.
The first thing to consider is the type of shower door you have. A guard isn't a universal part. Its design has to complement the door's mechanics, whether it's frameless, semi-frameless, or framed.
Matching the Guard to Your Door Type
A sleek, all-glass frameless door has completely different sealing needs than a traditional framed one. The goal is to find a splash guard that works with your door, not against it.
For Frameless Doors: These minimalist doors rely on precision. To maintain that clean, hardware-free look, we typically use a clear polycarbonate L-strip. This small, rigid piece attaches to the wall or an adjacent fixed panel, creating a firm stop for the door. A soft, clear sweep along the bottom seals the gap without drawing the eye.
For Semi-Frameless Doors: As a hybrid, these doors give you a bit more flexibility. They usually have a frame around the enclosure but not the door itself. This setup works well with a compressible vinyl bulb seal that squishes against the curb for a tight fit, or a T-shaped sweep that slides into a small channel on the bottom of the door.
For Framed Doors: These doors are the most straightforward. Their full metal frame almost always includes a built-in channel designed for a specific seal. A simple magnetic strip for closure or a snap-in vinyl seal is usually all it takes to create a perfectly watertight barrier.
The Critical Choice: Materials
Once you know the type of guard you need, you have to choose the material. This decision is especially important here in Southwest Florida, where humidity is a constant battle. The two main players are silicone and vinyl, but from a professional standpoint, there's a clear winner.
We consider a high-quality material to be a non-negotiable part of any shower project. Premium silicone has become the industry standard for a reason—it’s exceptionally durable, stays flexible, and naturally resists the mold and mildew that thrive in our climate.
We've seen vinyl seals turn yellow and brittle in just a couple of years, especially when exposed to direct sunlight and certain bathroom cleaners. Silicone, on the other hand, holds up. It remains clear and flexible, which is precisely why it dominates the market, accounting for 65% of all seal strips sold in North America.
To help you visualize the differences, here’s a quick comparison of the most common materials.
Comparing Splash Guard Materials
| Material | Durability | Flexibility | Mold Resistance | Best For |
|---|---|---|---|---|
| Silicone | Excellent | Excellent; doesn't crack or yellow. | High | Frameless doors and humid climates where longevity is key. |
| Vinyl | Fair | Good initially, but can harden over time. | Low to Moderate | Budget-friendly installs or framed doors with protected channels. |
| Polycarbonate | Excellent | Rigid; used as a hard stop, not a flexible seal. | High | Creating a durable, clear dam or L-strip for frameless doors. |
Ultimately, choosing a premium material is the best way to protect your investment.
The global shower door market, which was valued at US$ 18.8 billion in 2023, is driven by homeowners who expect performance to match aesthetics. This is especially true in the U.S. South, where spending on home renovations is climbing by 15% annually, according to market analysis from TMR.com. People are investing in high-end fixtures like frameless doors, and they expect every component to last.
For a solution that looks great and performs for years to come, a premium silicone guard designed for your specific door is the only way to go. You can explore our range of custom shower door products to see how these essential components fit into a complete, beautifully designed shower system.
How to Measure for a Perfect Fit
When it comes to a splash guard for your shower door, fit is everything. Think of it like a custom-tailored suit—an off-the-rack version might cover you, but it's the perfect fit that looks sharp and actually works the way it’s supposed to. It’s the same with your shower. "Close enough" is a recipe for a persistent leak, and it completely undermines the clean, high-end look of a frameless door.
Getting that perfect, watertight seal really comes down to three critical measurements. Nailing these numbers is the single most important part of the job. Even a tiny error creates a gap, and trust me, water will find it. This is where professional craftsmanship makes all the difference, turning a potentially frustrating project into a flawless, long-lasting solution.
The Three Core Measurements
Before you even think about ordering a new splash guard, grab a tape measure and something to write on. Let's walk through exactly what you need to measure to get this right the first time.
- The Gap: First, measure the space between the very bottom edge of your glass door and the top of the shower curb. This is the vertical gap your new sweep needs to fill completely. Because floors and curbs are almost never perfectly level, make sure to measure this in a few different spots as you swing the door open.
- The Glass Thickness: Next, you need the exact thickness of your glass door. The vast majority of frameless doors use either 3/8-inch or 1/2-inch thick glass. The splash guard is engineered to grip the glass with serious tension, so a seal made for the wrong thickness will either slide right off or be impossible to get on.
- The Total Length: Finally, run your tape measure along the entire bottom edge of the door where the seal will sit. Here's a pro tip: always add an extra inch to your measurement. You can easily trim a seal for a perfect fit with a utility knife, but you can’t stretch one that’s too short.
I can't tell you how many service calls start with someone guessing these measurements. A seal made for 3/8-inch glass will just fall off a 1/2-inch door. A gap of just 1/16th of an inch is all it takes for water to sneak out and cause damage over time.
This quick diagram shows how different splash guards work with different types of doors.
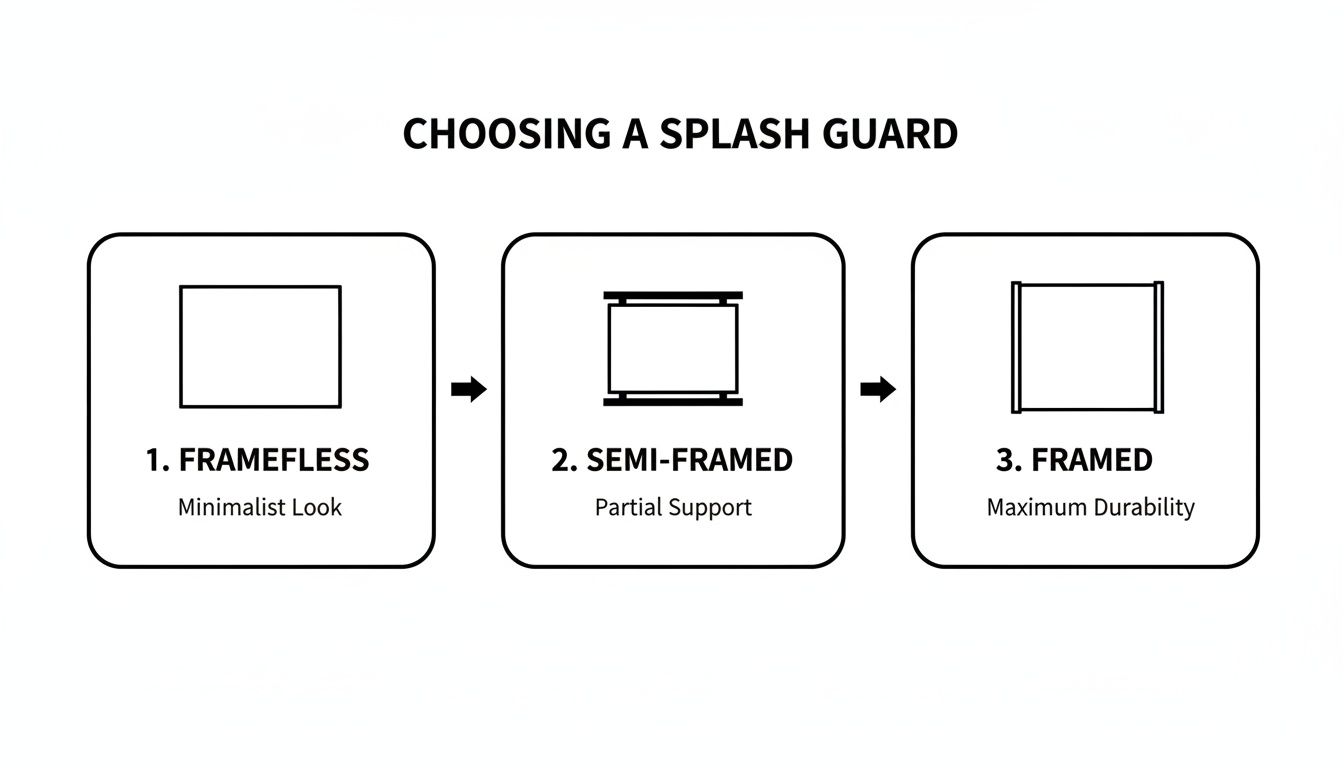
As you can see, the more minimalist the door design, the more critical precision becomes. While taking these measurements yourself is a great first step, turning those numbers into an invisible, watertight seal is what separates a professional installation from a temporary fix.
If you're aiming for that truly seamless, custom look, you can play around with different styles and get some great ideas when you design your dream shower door on our site.
DIY vs. Professional Splash Guard Installation
So, you’ve picked out the perfect splash guard for shower door—now comes the big question. Should you install it yourself or call in a professional? It's tempting to go the DIY route to save a bit of cash. But what seems like a simple weekend project can quickly spiral into a frustrating mess of leaks, re-adjustments, and a seal that just won't hold.
When it comes to a beautiful, minimalist frameless shower, a professional installation isn't a luxury; it's a necessity. The entire aesthetic hinges on flawless precision. Even the smallest mistake can ruin the look and, worse, lead to costly water damage down the line.
The Pitfalls of a DIY Installation
Trust me, we’ve seen it all. Going it alone with a splash guard might seem simple, but the common mistakes we see homeowners make can completely undermine the whole point of having one. These aren’t just small cosmetic flaws—they're functional failures.
Here are the most common DIY disasters we're called in to fix:
- Improper Cuts: Trimming a polycarbonate or silicone seal to the exact length and angle is harder than it looks. A jagged or slightly off-kilter cut is like leaving a welcome mat for water to seep through.
- Using the Wrong Adhesive: This is a huge one, especially here in Southwest Florida. The standard caulk from a big-box store simply can't stand up to our intense humidity. It will yellow, peel, and fail, often within just a few months.
- Creating an Uneven Seal: You'd think pressing a strip into place is easy, but getting consistent, even pressure along the entire length is incredibly tricky. Any tiny gap or air bubble becomes a perfect little channel for water to escape onto your floor.
A botched DIY job almost always costs more in the long run. We've had clients who spent more on replacement seals and repairing water damage than they would have on a single, professional installation from the start.
This is a real issue. In fact, leaky showers are a top complaint in 70% of older bathroom renovations. You don't want your brand-new, beautiful shower to become part of that statistic.
Why a Professional Guarantees a Perfect Result
When you hire a certified technician, you're not just paying for a pair of hands. You're paying for experience, specialized tools, and peace of mind. A pro turns the guesswork of installation into a precise science.
An expert installer guarantees a flawless, watertight barrier that is built to last. We use commercial-grade silicone and adhesives specifically engineered to handle the constant humidity and temperature swings of a Florida bathroom. Our technicians have the precision tools to make perfectly clean, exact cuts, ensuring the splash guard for shower door fits like it was made for your specific curb and glass.
The southern U.S. is leading the demand in a shower door market projected to hit USD 6.781 billion by 2030. That's why we’re so focused on precision-installed frameless doors with advanced silicone seals that deliver 99% water retention rates. This is critical when you consider that a staggering 92% of installation failures come from poor sealing—a problem we know exactly how to prevent. You can learn more about the booming glass shower door market's future on shklbathroom.com.
Ultimately, hiring a professional ensures your shower looks pristine and performs perfectly. If you're thinking about a full upgrade, you can see the difference true craftsmanship makes by learning about our frameless shower door installation in Naples, Florida.
Keeping Your Splash Guard Looking Brand New
You’ve just upgraded to a stunning frameless shower, and that nearly invisible splash guard is working its magic. So, how do you keep it looking and performing like it was installed yesterday? The secret isn't complicated—it just comes down to a little bit of routine care.
Think of it this way: you wouldn't let soap scum and hard water build up on your new glass door. The same principle applies to the seals that protect your bathroom floor. Proper, gentle maintenance is the key to ensuring your splash guard stays clear, flexible, and effective for years to come.
The Right Way to Clean Your Splash Guard
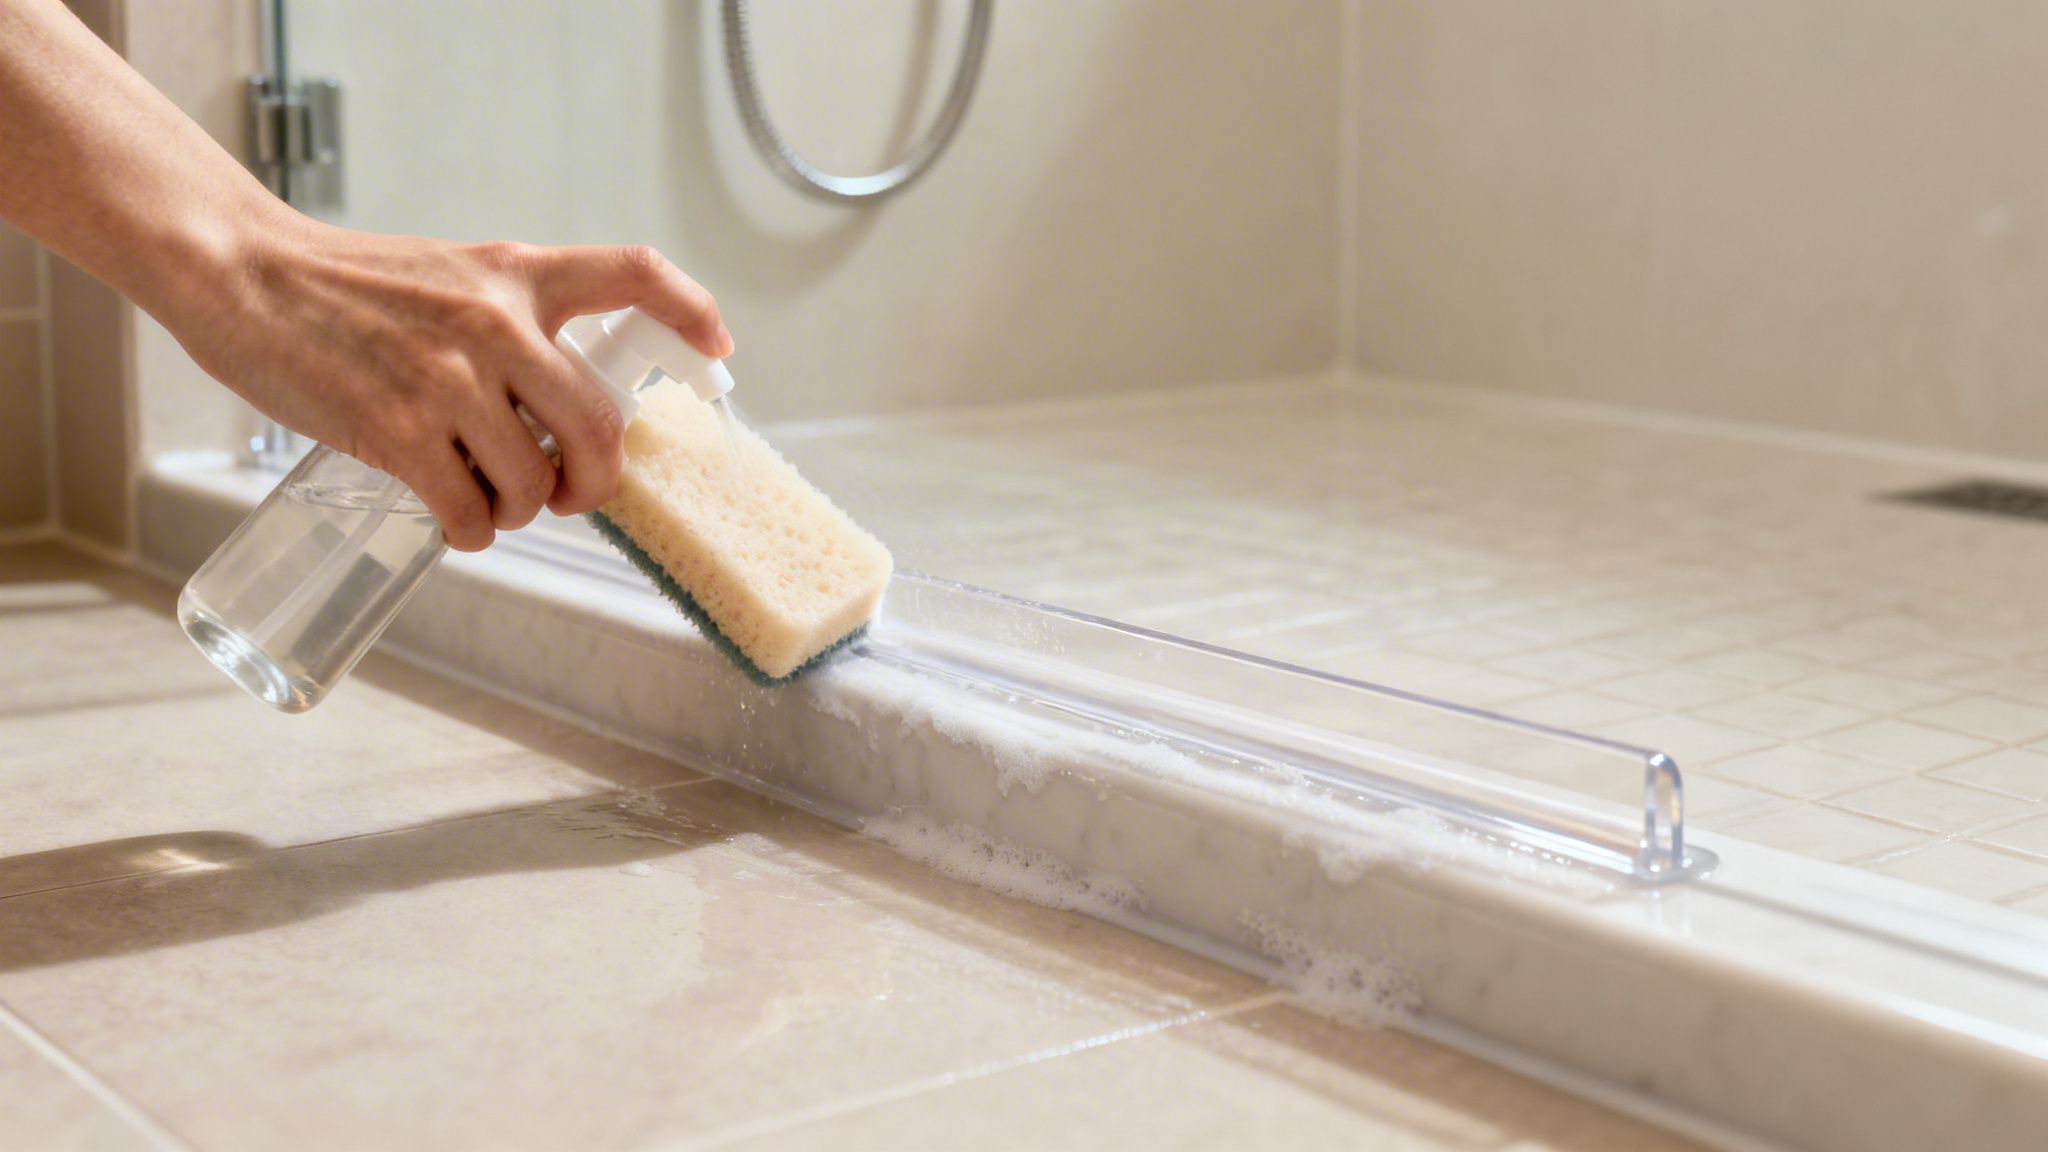
The biggest mistake we see homeowners make is reaching for aggressive cleaners or abrasive scrub pads. This will absolutely ruin your seals, creating tiny scratches that trap grime and can cause the material to cloud up permanently.
Gentle and consistent is the name of the game. You want to stop soap scum and mineral deposits from ever getting a foothold.
- Your Go-To Cleaning Solution: Forget the harsh chemicals. Just mix equal parts white vinegar and warm water in a spray bottle. It’s the perfect DIY solution that cuts through grime without damaging the silicone or vinyl.
- The Right Tools: Always use a soft microfiber cloth or a non-abrasive sponge. Anything rougher is a recipe for disaster.
- A Simple Schedule: Give the guard a quick wipe-down with your towel or a squeegee after your shower. Once a week, give it a more thorough cleaning with your vinegar spray to keep it pristine.
For those stubborn hard water spots that can be a real pain here in Southwest Florida, you may need a little extra help. You can find some effective hard water stain removal techniques that are safe for glass and seals alike.
Here's a pro tip: An ounce of prevention is worth a pound of cure. When you have your shower installed, ask about a protective coating like Diamond-Fusion. This hydrophobic treatment makes water bead up and roll right off, taking dirt and soap with it. It dramatically cuts down on cleaning time.
How Long Will It Last? And When to Replace It
Even the best splash guard won't last forever—it's a high-wear component. But material choice makes a huge difference. A high-quality silicone splash guard is built to last for many years, but a cheaper vinyl seal might give up the ghost in as little as 1-2 years.
It’s time for a replacement when you spot these tell-tale signs:
- Discoloration: The seal looks yellowed, cloudy, or stained, and no amount of cleaning will fix it.
- Stiffness or Brittleness: It's lost its flexibility and feels hard to the touch. A stiff seal won't create a proper barrier against water.
- Visible Damage: You can see obvious cracks, tears, or—worst of all—mold and mildew growing inside the material itself.
Don't wait until you have a puddle on the floor. Swapping out a worn-out seal is a quick and inexpensive fix that protects your bathroom from water damage and keeps your beautiful shower looking sharp.
Frequently Asked Questions About Shower Door Splash Guards
It's totally normal to have a few lingering questions when you're trying to choose and install a splash guard for a shower door. This is especially true for homeowners right here in Southwest Florida, where our combination of high humidity and hard water presents some unique challenges.
Our installers hear the same great questions day in and day out. To help you feel confident in your decision, we've gathered them here with some straight, no-nonsense answers based on years of experience. Getting this right is about more than just a great-looking bathroom—it's about protecting your home from water damage for years to come.
How Much Does a Splash Guard for a Shower Door Cost in Southwest Florida?
The cost really depends on the path you choose. You can definitely head to a big-box store and grab a DIY vinyl sweep for $20 to $40. Just know what you're getting—it's more of a temporary fix than a long-term solution, as those materials tend to yellow and fail quickly in our humid climate.
On the other hand, a premium, custom-fitted silicone seal installed by a professional is a different story. The cost for the seal itself is usually rolled into the total price of a professional installation. While the initial investment is higher, what you're really buying is a permanent solution and total peace of mind. This means getting superior materials that fight off mold, a perfect fit that guarantees no leaks, and expert labor that prevents costly water damage down the road.
Think of professional installation not just as paying for a seal, but as buying insurance against a failed DIY job. The upfront cost is almost always less than what it takes to repair a water-damaged floor or wall.
Can I Put a Splash Guard on Any Frameless Shower Door?
Absolutely. In fact, frameless doors are designed with these seals in mind. The most common options you'll see are a clear, rigid polycarbonate L-strip, which acts like a small dam, or a soft silicone sweep that seals the gap at the bottom of the door. The issue isn't whether you can install one; it's getting the fit just right.
Frameless doors get their clean, minimalist look from incredibly tight tolerances. That means the guard has to be measured and installed with real precision. The goal is an invisible, watertight barrier that doesn't drag or catch when you swing the door open. This is where a pro's touch makes all the difference, preserving that beautiful all-glass aesthetic you wanted in the first place. For more answers to common questions, check out our full FAQ page.
My Current Shower Door Seal Is Moldy and Yellow—What Should I Do?
If your seal is moldy and discolored, it's failed. That's a clear signal that it needs to be replaced right away. The yellowing and mildew are usually caused by one of two things: cheap vinyl that isn't UV-stable or a buildup of soap scum and moisture that has allowed mold to take root. Don't waste your time trying to scrub it clean; the problem will just come back.
Here's the right way to handle it:
- Remove the old seal completely. Carefully pull the old, failing guard off the glass.
- Thoroughly clean the glass and the curb. Use a good mold-killing cleaner to remove every trace of residue. If you skip this, the mold will just grow right back on your new seal.
- Install a high-quality replacement. Your best bet is a seal made from 100% silicone. It's naturally antimicrobial and won't yellow from sun exposure, making it the perfect choice for our sunny Florida bathrooms.
For a permanent, no-fuss fix, your best move is to call a glass specialist. We can come out, properly remove the old seal, deep-clean the surfaces, and install a premium guard that will look great and perform flawlessly for years.
Ready to put an end to puddles and protect your beautiful bathroom? The experts at AmeriGlass Industries specialize in precision-fitted splash guards that deliver a flawless, watertight seal every time. Contact us today for a free estimate and discover the difference professional installation makes!