

Planning a bathroom refresh? That old, clunky shower door is probably at the top of your hit list. The good news is that you can absolutely remove a shower door yourself. It mostly comes down to lifting the doors off their track, unscrewing the frame, and putting in a little elbow grease to scrape away the old caulk.
With a solid plan, this is a project you can knock out in an afternoon.
Why You Should Remove Your Own Shower Door
If you're looking to update a bathroom here in Naples or Fort Myers, that dated shower door is usually the first thing that has to go. Sure, you can always call a pro, but there's a real satisfaction that comes from handling the demolition phase of a reno yourself. It's not just about saving a few bucks; it's about taking ownership of your project right from the start.
Getting that old fixture out of the way is the first real step toward that modern, open bathroom you're picturing. It's how you get that clean, spa-like vibe that so many of us want in our Southwest Florida homes. When you do it yourself, you don't just save on labor—you get to know the ins and outs of your bathroom's construction, which is a huge advantage for whatever comes next.
Setting Realistic Expectations for Your DIY Project
Let's be real for a second. This isn't a five-minute job, but it’s definitely not impossible. For most people, taking out a standard framed or sliding shower door is a weekend task that’s more about patience than raw skill. You’ll need some muscle to lift the glass panels and some focus to dismantle the frame and scrape away that stubborn old sealant.
The real win isn't just yanking the door out. It's getting it out without putting a single scratch on your tile or tub. A careful, methodical approach leaves you with a clean slate, ready for a fresh curtain or a sleek new frameless door.
The hurdles you'll likely run into are pretty standard, and you can prepare for them.
- Stubborn old hardware: Screws get rusted or stripped over time, and caulk that's been there for a decade can feel like concrete.
- Wrangling the glass: Even though it's safety glass, it’s still heavy and awkward. You have to handle it carefully.
- The cleanup: Getting every last bit of old silicone residue off the walls can be a real pain.
Don't worry, though—every one of these issues has a simple solution. This guide is your game plan. We'll walk you through every step and give you practical advice for the tricky parts. Think of this as your chance to kick off your bathroom transformation and prove you’ve got this. You’re not just prepping a space; you’re building the confidence to tackle the rest of your renovation head-on.
Your Essential Toolkit for a Clean Removal
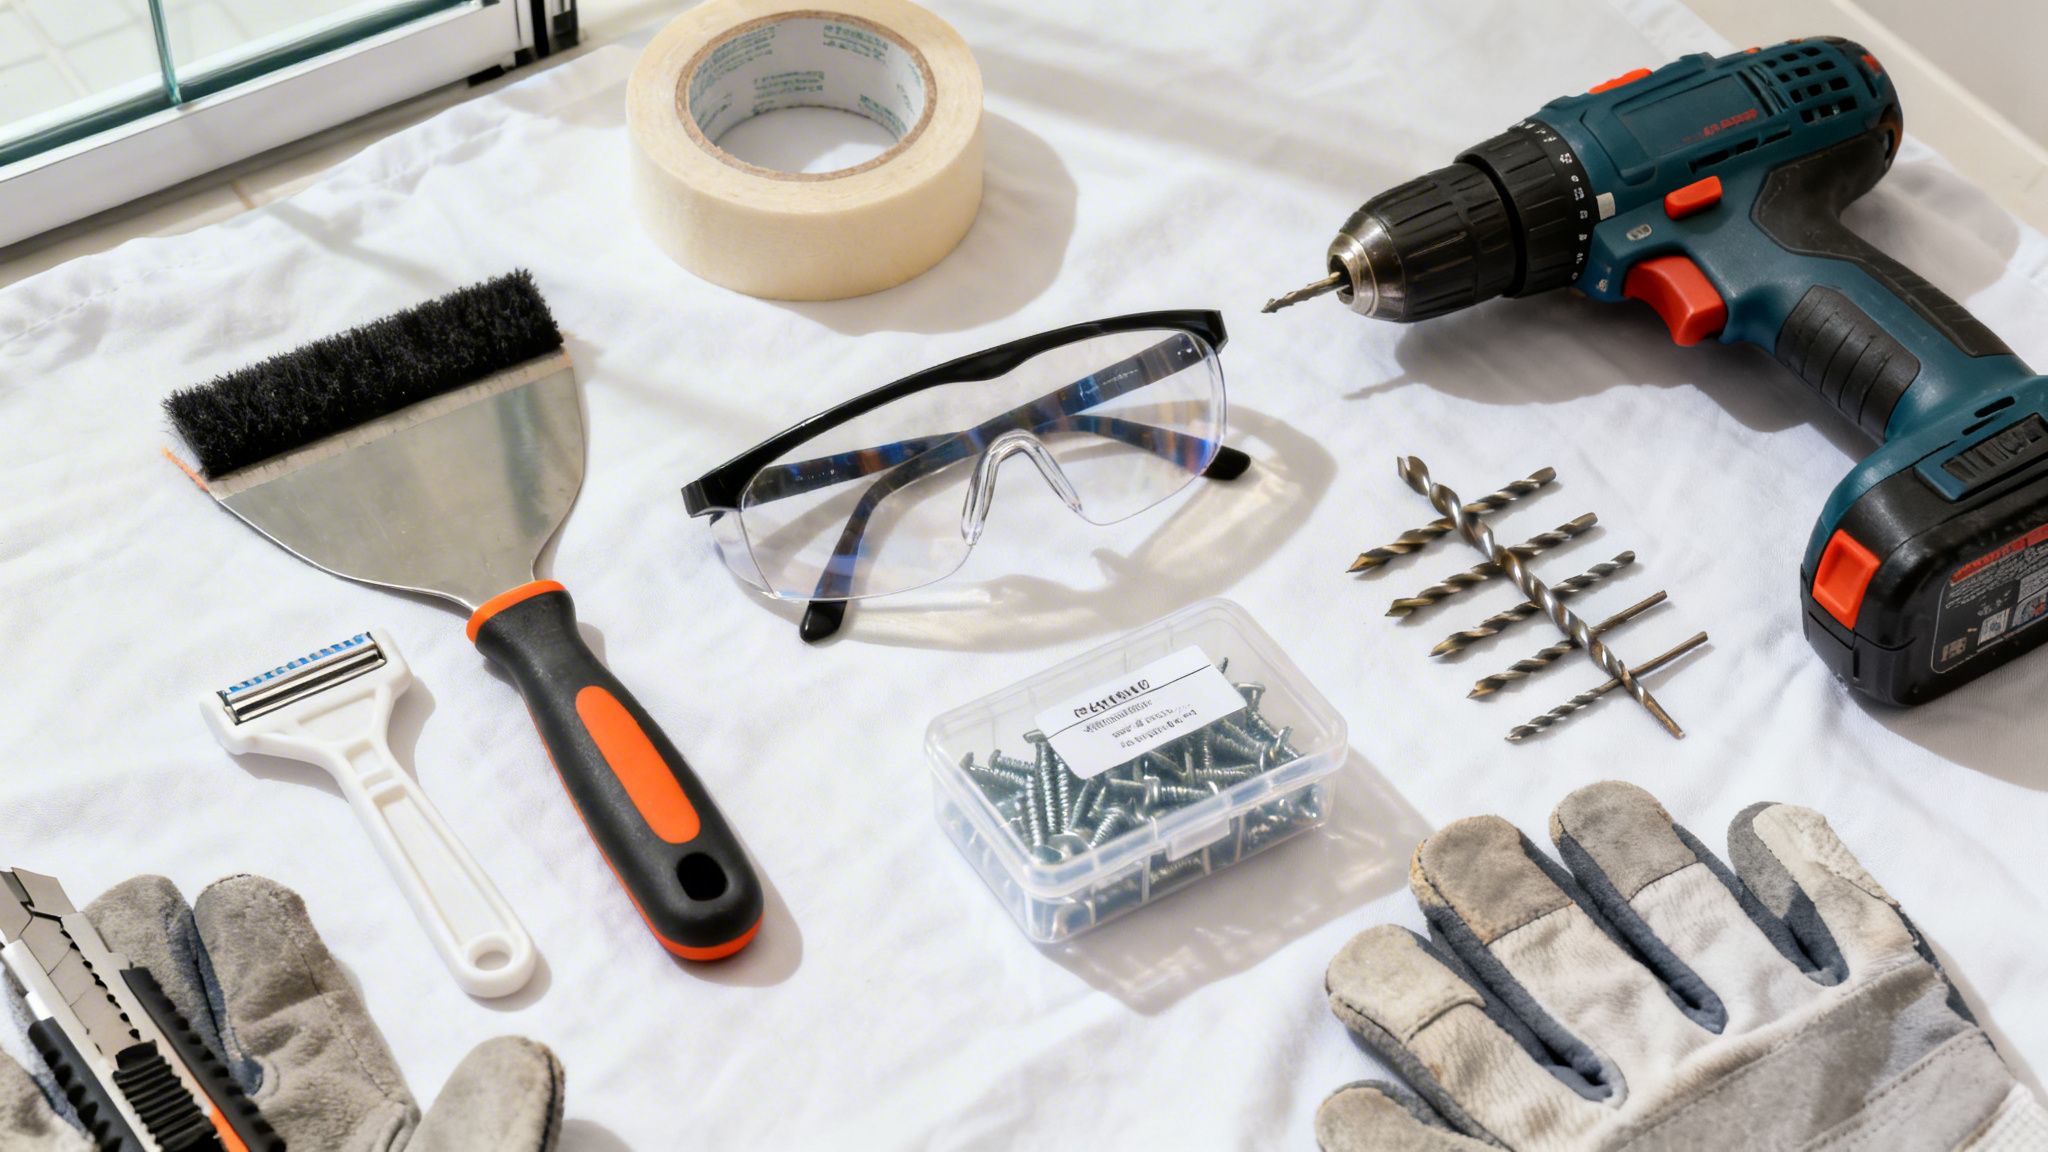
Jumping into any home project without the right gear is a recipe for frustration. When it comes to removing a shower door, gathering your tools ahead of time is the secret to turning a potential headache into a smooth, straightforward job. It’s not just about having a screwdriver; it’s about having the right one and knowing exactly why it matters.
A successful removal really boils down to having a few key items on hand. Think of this as your pre-flight checklist. It's what will protect you, your bathroom, and your sanity, all while preventing those annoying mid-project runs to the hardware store.
Must-Have Safety and Prep Gear
Before you even think about turning a screw, your number one priority is creating a safe, clean workspace. Shower doors are made from tempered glass, which is designed to shatter into thousands of small, granular pieces on impact. It’s a great safety feature, but it also means that high-quality, impact-resistant safety glasses are absolutely non-negotiable.
Just as crucial are a good pair of thick work gloves. They’ll do more than just save your hands from sharp metal edges on the frame; they provide a much better grip on heavy, slick glass panels. Finally, do yourself a huge favor and lay down a thick canvas drop cloth or an old comforter in the tub and on the bathroom floor. This simple act can be the difference between a pristine tub and one with a permanent scratch.
Pro Tip: I swear by this little trick. As you take screws out of the frame, stick them to a strip of painter's tape and label where they came from (e.g., "top track," "hinge side"). This tiny bit of organization is a lifesaver if you ever need to figure out how it all came apart.
The Core Removal Tools
With your safety gear sorted, it's time to assemble the tools that will do the real work. The specifics can shift slightly depending on whether you're tackling a framed or frameless door, but a core set will get you through most situations. For any project, having reliable equipment is a must. If you're building out your toolkit, you might want to see how to find a trusted power tools supplier in Dubai to ensure you have quality gear.
Your primary tools will include:
- A Power Drill or Driver: This will make short work of the dozens of screws holding a frame together. Make sure you have both Phillips head and flathead bits handy.
- A Utility Knife: This is absolutely essential for scoring and slicing through old, hardened caulk. A fresh, sharp blade is your best friend here.
- A Putty Knife or Plastic Scraper: After cutting the caulk, you’ll need this to gently pry the frame away from the tile or surround. A plastic, non-marring version is perfect for fiberglass or acrylic to prevent scratches.
- Caulk Remover or Solvent: While you can often get by without it, a good solvent can make the final cleanup so much easier by softening stubborn silicone residue.
This basic kit will handle most of what you'll run into. But, the type of door you have does introduce some unique needs.
Essential Toolkit Framed vs Frameless Door Removal
The tools you’ll lean on most heavily depend on the kind of door you're removing. Frameless doors, with their thick, heavy glass, require a bit more specialized handling than their framed counterparts.
Here's a quick breakdown of what you'll need for each.
| Tool | Framed Door Removal | Frameless Door Removal | Pro Tip |
|---|---|---|---|
| Drill/Driver | Essential. Used for all frame screws. | Essential. Needed for wall clips and hinges. | Use a low-torque setting to avoid stripping screw heads. |
| Suction Cups | Optional. Can help lift heavy doors. | Highly Recommended. Provides a secure grip on heavy glass panels. | Ensure the glass is clean and dry for the best possible seal. |
| Helper | Recommended. An extra set of hands is always useful. | Mandatory. Never attempt to remove heavy frameless glass alone. | Plan your movements with your helper before lifting the glass. |
| Level | Not Needed. The frame guides removal. | Helpful. Can be used to check if panels were installed plumb. | Can also be used as a straightedge when scoring caulk lines. |
Understanding these small differences helps you show up to the job fully prepared for whatever your specific project throws at you. For more hands-on advice and project ideas, you can always find a wealth of information in our home improvement blog posts. Having everything you need within arm's reach is the first and most important step toward a clean, successful DIY shower door removal.
Removing a Framed Sliding Shower Door
Ah, the classic framed sliding shower door. It's a true bathroom workhorse, but let's be honest, it often tops the list of things to go during a modern update. Taking one out might look intimidating, but it’s actually a surprisingly logical job. The real secret is simply to work in reverse, taking it apart in the opposite order it was put together.
This isn't a demolition job requiring brute force; it's a careful deconstruction. We'll start by getting those heavy glass doors out of the way, then we'll focus on dismantling the frame piece by piece. With a bit of patience and the right approach, you can have it out without a single scratch on your tub or tile.
First, Get Those Doors Off the Track
The first real move is also the most satisfying: getting those heavy doors out. Most sliding doors hang from rollers at the top and are guided by a small piece at the bottom. The trick is to lift them up and then swing them inward.
Start with the inner door (the one closest to the showerhead). Get a good grip on both sides, lift it straight up until the rollers clear the top track, and then gently swing the bottom of the door toward you, into the tub. It's going to be heavy and a bit awkward, so plant your feet before you lift. Once it's free, carefully walk it out of the bathroom and set it down on that drop cloth you prepared earlier. Now, do the exact same thing for the outer door.
A Quick Word of Caution: Don't try to be a hero and rush this part. These doors are always heavier than they look. If one feels too cumbersome, just ask for a second set of hands. Dropping a tempered glass panel is a noisy, messy, and dangerous mistake you don’t want to make.
Dismantling the Top and Side Frame Pieces
With the doors safely out of the picture, all that's left is the metal frame. Look up at the top track; you'll probably see a few Phillips head screws holding it to the vertical side jambs. Grab your power drill and zip those screws out first. The top track should now be completely loose and you can just lift it right off.
Next, turn your attention to the vertical side pieces attached to your walls. You'll find a line of screws running up the length of each one. Carefully back these out with your drill.
- Got Rusted Screws? If you run into a screw that's rusted solid, don't just keep trying to force it—you'll strip the head and create a much bigger headache. Instead, try giving the handle of your screwdriver a few firm taps with a hammer to break the rust's seal. A shot of penetrating oil, left to sit for ten minutes, can also work wonders.
Once all the screws are out, the side pieces won't just fall away. They're still stuck to the wall with a thick, stubborn bead of old caulk. This is where your utility knife earns its keep.
Slicing and Prying the Frame Free
Grab your utility knife—preferably with a fresh, sharp blade—and carefully slice through the caulk along both the inside and outside edges of each side frame. You need to cut deep enough to separate the metal from the tile or fiberglass surround. Be deliberate and keep your cuts straight to avoid marring the wall surface.
After you've scored the caulk lines from top to bottom, switch over to your putty knife. Gently wedge the blade between the metal frame and the wall and start prying. You'll hear the old sealant pop and stretch as it finally lets go. Just work your way slowly up and down the frame until it comes free.
This methodical prying prevents you from gouging your tile or ripping the frame off in a way that could damage the wall behind it. It’s this kind of project that speaks to the massive interest in DIY home improvement; the global shower door market was valued between USD 13.5 billion and USD 18.8 billion in 2023, a clear trend driven by homeowners upgrading their own bathrooms. You can learn more about the growth in the shower door market to see how projects just like this one are making an impact.
Conquering the Bottom Track
You're on the home stretch. The final piece is the bottom track, which is almost always the grimiest part of the job. It's typically held on by just one or two screws and a whole lot of old, gunk-filled silicone. Find and remove any screws you can see first.
Then, just like you did with the sides, use your utility knife to cut through the caulk on all sides of the track. Because this area sees so much water, the sealant here can be particularly nasty. Once it's scored, use your putty knife to pry it up from the tub ledge or shower curb. Go slow, work it from one end to the other, and the entire frame will finally be gone. You're left with a clean slate, ready for the next phase of your bathroom reno.
A Guide to Frameless and Hinged Doors
Frameless shower doors look incredible, giving a bathroom that clean, open, modern feel. But that beauty comes with a price: they are seriously heavy. Unlike a framed door that has support on all sides, a frameless panel is just one big, thick sheet of tempered glass. This means your entire approach to taking one down has to be built around safety and control.
Let me be crystal clear: this is a two-person job. That’s the single most important rule. One person's sole responsibility is to support the glass while the other works the tools. If you try to go it alone, you’re risking a slip, and that can end with an injury or the loudest, messiest crash you’ve ever heard.
Handling Heavy Frameless Glass
Before you even think about touching a screw, you and your helper need a game plan. Who's holding the glass? Who's running the drill? The person supporting the panel needs a solid grip—ideally with a pair of heavy-duty suction cup handles—before any hardware gets loosened.
Most of these panels are attached to the wall with a few metal clips or set in a U-channel. The job is to remove the screws holding these supports, but the order is crucial.
- Start at the Top: Always, always begin with the highest clip. This keeps the panel's weight on the lower hardware for as long as possible, giving you maximum stability.
- Talk It Out: The person with the drill should call out which screw they’re about to remove. The supporter needs to be braced for any tiny shift in weight.
- Watch for Spinning Anchors: Those screws are often driven into plastic wall anchors set in the tile. When you back a screw out, the whole anchor might try to spin in place. You’ll need to apply firm, consistent pressure on the drill to get it out cleanly.
Once the last screw is out, lift the panel away from the wall together. Walk it slowly and carefully to a spot you’ve already cleared, and set it down gently on a thick blanket or some flattened cardboard boxes.
A solid strategy is everything. We once saw a homeowner try to brace a large panel with his shoulder while trying to unscrew a clip. The second that screw came loose, the glass shifted, and he nearly dropped the whole thing. A dedicated helper just makes the entire process safer and way more efficient.
The Specifics of Hinged and Pivot Doors
Hinged or pivot doors, whether they’re framed or frameless, add one more step to the process. The golden rule here is to disconnect the moving door panel first. Don't even think about trying to pull the whole unit off the wall in one go—it’s just asking for trouble.
For a standard hinged door, it's pretty simple. While your partner supports the full weight of the door, just use your drill to remove the screws holding the hinge plates to the wall or to the fixed glass panel. Once the hinges are free, the two of you can carry the door away. Then you can turn your attention to taking down any remaining fixed panels, using the exact same method we just covered.
Getting the sequence right makes for a clean, painless job. This flow chart breaks down the basic steps for a more traditional framed door, showing the simple lift, unscrew, and scrape method.
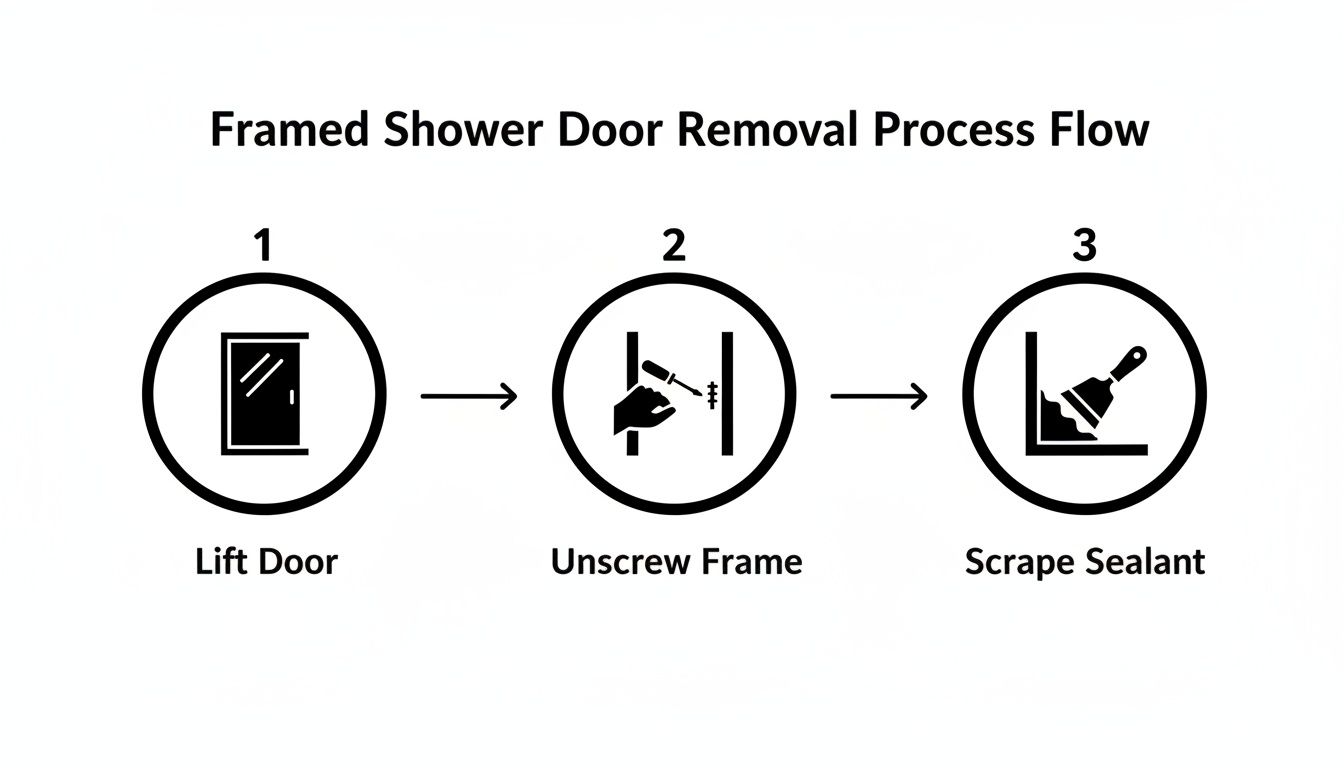
It’s a great visual reminder that removal is all about a methodical process, not brute strength.
Taking on frameless glass might seem intimidating, but with a helper and a good plan, it’s completely doable. Precision and teamwork are your best friends here. If you’re already dreaming up a new look for your space, you can get some great ideas from professionals who specialize in frameless shower door installation in Naples, Florida to see what’s possible. The care you take now sets the stage for a perfect new installation, making sure your bathroom project is a success from start to finish.
Cleaning Up and Prepping the Surface
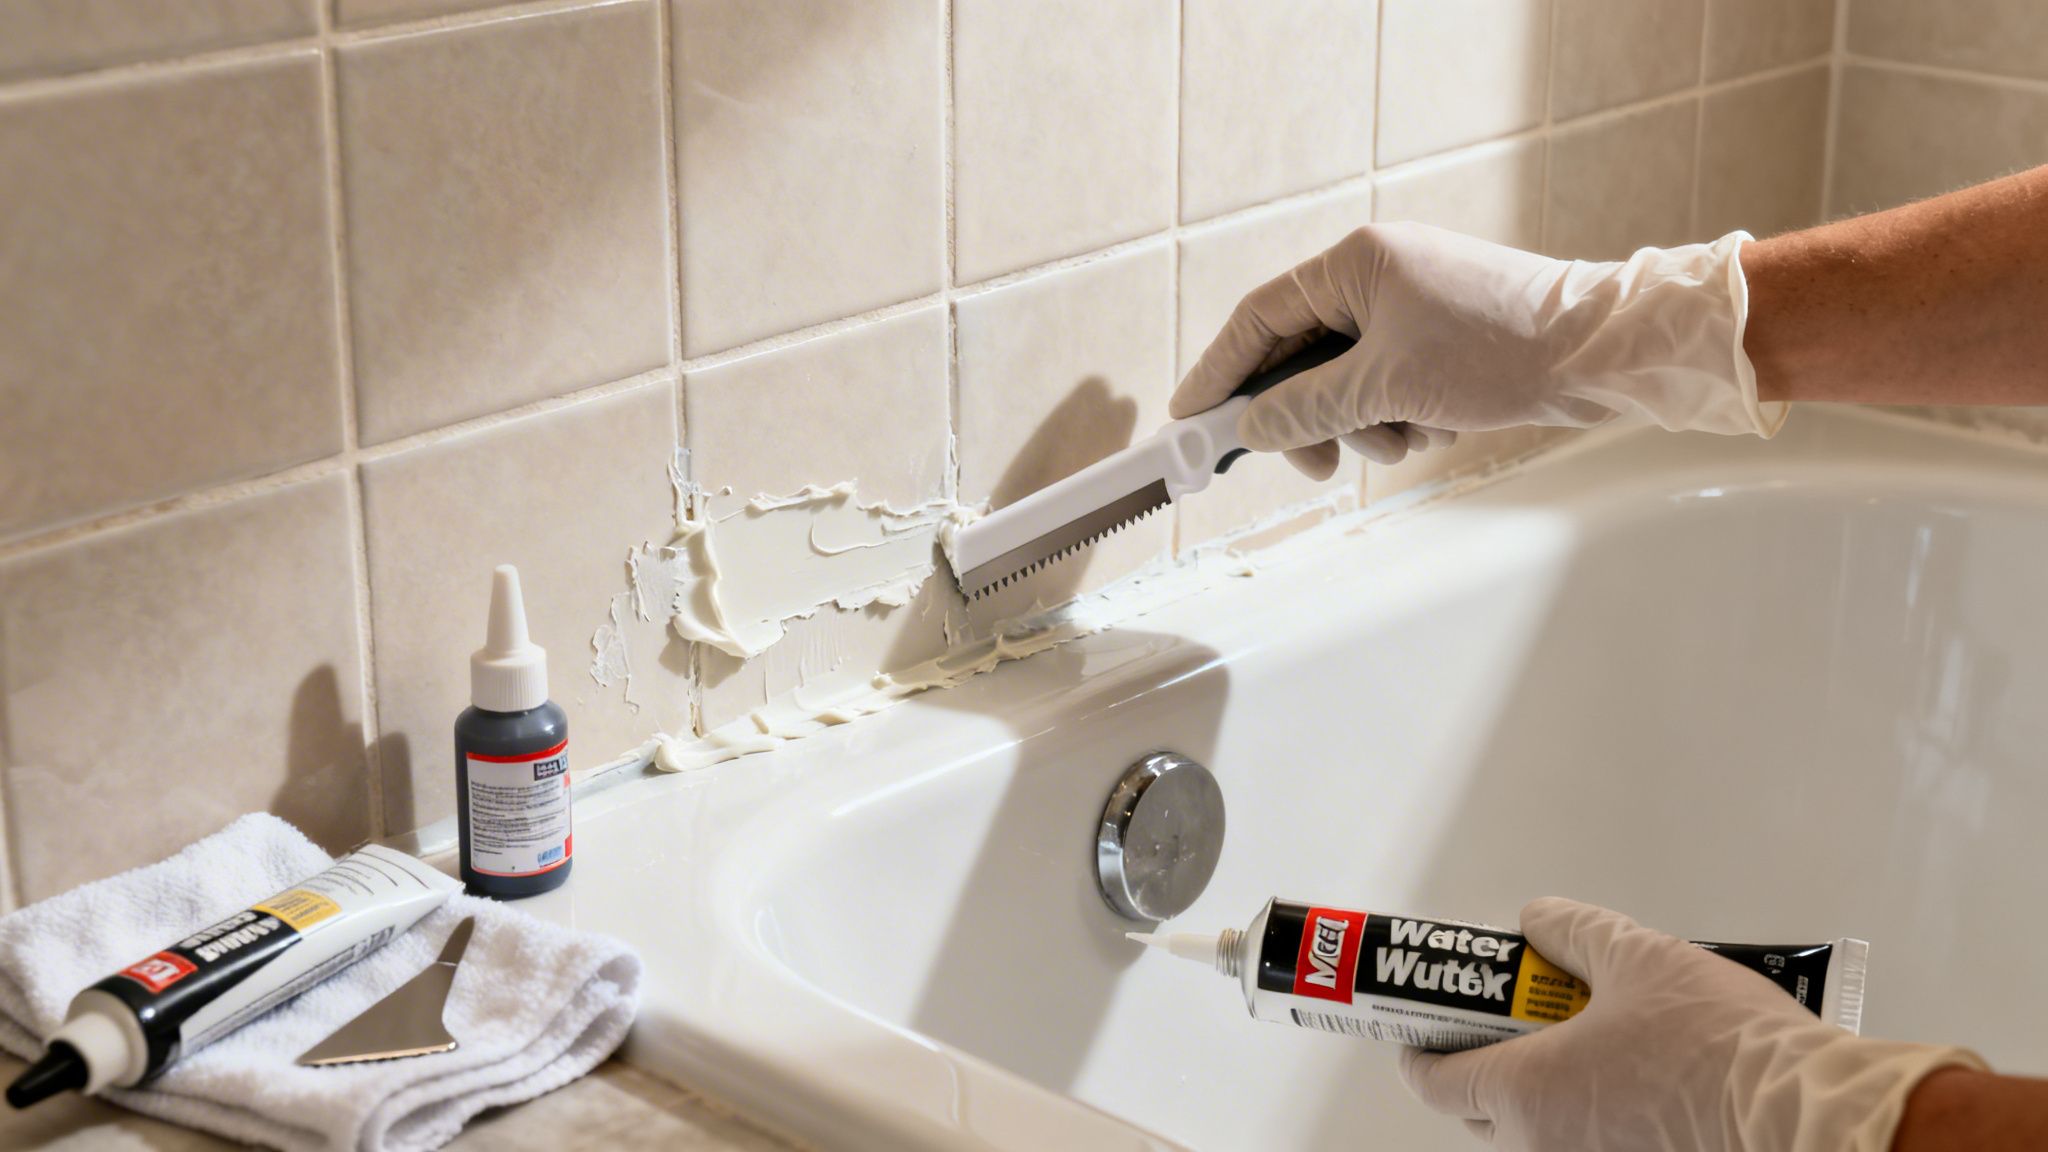
Getting that heavy glass and bulky frame out of the bathroom feels like a huge win. But hold on—the job isn't quite finished. This last part, the cleanup and surface prep, is what really separates a DIY job from a professional one. It’s what sets the stage for a flawless new door or a clean switch to a shower curtain.
This is where you make it look like the old door was never even there. We're talking about tackling that stubborn silicone, patching up screw holes, and getting the surfaces perfectly smooth. Trust me, taking your time here prevents headaches down the road and makes whatever comes next so much easier.
Dealing With Old Caulk and Silicone Gunk
Once the frame is gone, you’ll inevitably be left with a ghost of its past: a grimy, sticky line of old silicone caulk. This stuff is designed to be waterproof, which, unfortunately, also means it’s designed to be a real pain to remove. Rushing this is a rookie mistake that leaves you with a lumpy, ugly surface.
Your best tools for this fight are a plastic razor blade scraper and a healthy dose of patience. I can't stress this enough: avoid metal blades. They will absolutely scratch your tile glaze, acrylic, or fiberglass surround. A sharp plastic edge is the way to go.
Start by using the scraper at a low angle to peel away the thickest bits of caulk. Apply steady, firm pressure, and you'll be surprised how much comes off with just a bit of effort.
For that thin, stubborn film that just won't budge, a commercial silicone remover is worth its weight in gold. Apply it, let it sit and work its magic, then come back and scrape again. The chemical does the heavy lifting, saving your sanity and your knuckles.
While you're cleaning, you might also notice some other pesky deposits. Knowing how to remove hard water stains from your tile or remaining glass is key to getting that truly pristine, like-new look.
Patching Holes for a Seamless Finish
With the caulk gone, your eyes will land on the screw holes left behind in the tile or drywall. You can't just leave these. They're an open invitation for moisture to get in and cause some serious damage. The goal here is to make them vanish.
How you patch them really depends on the wall surface.
- Drywall: This is the easy one. A little spackle on a putty knife is all you need. Press it into the hole, scrape it flush, and let it dry. A quick sanding, and it's ready for primer and paint.
- Tile or Fiberglass: This requires a bit more muscle. You’ll want a two-part epoxy or a waterproof marine-grade filler. These products create a rock-solid, completely waterproof bond. Mix up a small batch, carefully fill each hole, and smooth it over before it sets.
If you're working with tile, try to find a filler that matches your grout color. It's a small detail, but it makes the repair practically invisible and gives you that high-end, finished look. A little extra care here ensures the area is both waterproof and perfect.
What to Do With the Old Shower Door
So now you've got a pile of aluminum and a couple of very heavy glass panels sitting in your hallway. Please don't just drag them to the curb. Both the metal and the tempered glass are recyclable, and handling it responsibly is easier than you think.
Most local recycling centers in the Naples area will happily take scrap aluminum. For the tempered glass, it's always smart to call ahead. Some facilities have specific programs for it, while others don't accept it with standard glass.
Before you move the panels, do yourself a favor and wrap them completely in a thick blanket or tarp. Safety first. Keeping your bathroom looking great is an ongoing job; for more tips, check out our guide on essential shower door maintenance tips. Taking these final steps brings your project to a successful, clean, and responsible finish.
Knowing When to Call a Glass Professional
There's a real sense of accomplishment in a well-done DIY project. But let's be honest, there’s a razor-thin line between a weekend win and a disastrous, expensive mistake. Removing a simple framed shower door is one thing, but knowing when to hang up the tool belt and call in a pro is the smartest decision a homeowner can make. It’s not about admitting defeat; it’s about recognizing when the risks just aren't worth the reward.
Sometimes, a project just gets too big for its britches. A perfect example? Trying to tackle a massive, custom-built frameless glass enclosure. These aren't just big, heavy panels—they're precision-engineered systems. Every piece is perfectly balanced, and one wrong move can bring the whole thing crashing down. We're talking serious injury from exploding tempered glass and major damage to your tile, tub, or vanity.
Red Flags That Scream "Get an Expert"
Certain situations should immediately stop you in your tracks. If you run into any of these issues, it's time to pause and get a professional opinion.
- Massive or Tricky Enclosures: Is your door part of a multi-panel system? Is the glass exceptionally thick and heavy? The second you feel out of your depth with the weight or complexity, the risk of injury skyrockets.
- Signs of Hidden Damage: You pop off the first piece of trim and find mushy drywall or rotted wood. That’s a tell-tale sign of a slow leak that's been happening for years. A pro won't just yank the door off; they'll assess the water damage and tell you what needs to be fixed before a new door goes in.
- Weird Hardware or Mounts: If you see fasteners you can't identify or the frame seems integrated into a delicate tile mosaic, stop right there. A specialist has seen it all and has the right tools to get it out without destroying your bathroom.
The real value of a pro isn't just their muscle. It's their experience. They can spot problems a homeowner would miss—like a wall that's out of plumb or a shower curb that isn't level—that will cause huge headaches for your new installation.
The Payoff of Professional Removal
Hiring a licensed and insured glass professional buys you peace of mind. It’s that simple. They take on all the liability of handling large, dangerous glass panels, protecting you and your property.
They’re also incredibly efficient. A job that might take you an entire weekend, complete with multiple trips to the hardware store, they can often knock out in just a few hours.
Best of all, they leave you with a clean, perfectly prepped surface ready for your new shower. It’s the kind of professional start that ensures the rest of your bathroom project goes smoothly. For homeowners in Southwest Florida looking to make a change, getting some expert advice is the best first step. You can get a clear plan and see some beautiful new options by requesting a no-obligation consultation and free estimate from our team.
Common Questions About Shower Door Removal
After years of helping homeowners across Naples and Southwest Florida with their bathroom projects, we’ve heard just about every question there is when it comes to removing old shower doors. Some questions pop up over and over, whether you’re a first-time DIYer or a seasoned renovator. Here’s some straight talk to help you plan your project.
Can I Really Do This Myself?
If you're tackling a standard framed sliding door, you can probably handle it solo—as long as you can comfortably lift the glass panels. But when it comes to frameless doors, the answer is a hard no. Those heavy, awkward sheets of unsupported glass absolutely require a second person. It's not just about strength; it's about safety and control.
How Long Is This Going to Take?
For a basic framed door, most people can get it done in about 2 to 4 hours. That gives you time for careful disassembly, fighting with a stubborn screw or two, and doing the first pass of scraping away the old sealant.
If you’re dealing with a more complex frameless or hinged door system, you might want to block off a whole afternoon, especially if it's your first time.
Honestly, the biggest wildcard here is the old caulk. If you’re dealing with silicone that’s been hardening for a decade, you could easily add an extra hour of patient scraping to the job. Don't rush it—getting the surface perfectly clean is non-negotiable for whatever you plan to do next.
What's the Worst Part of the Job?
Ask anyone who's done it, and they'll tell you: the cleanup. Getting every last bit of that old, gummy silicone off the tile or fiberglass is by far the most tedious part.
It’s not physically difficult, but it demands patience. A good caulk remover and a plastic razor blade will become your best friends.
Do I Need to Buy a Bunch of Expensive Tools?
Not at all. The good news is you can get this done with tools you likely already have. A power drill, a utility knife, and a putty knife will handle about 90% of the work.
The only specialty tool we really recommend, especially for frameless doors, is a pair of heavy-duty suction cup handles. They’re not expensive, and they give you a much safer, more secure grip on the glass.
For more answers to common questions, check out our detailed shower door FAQs.