

You've got a clean frameless shower, the glass looks sharp, and the last thing you want to do is take a drill anywhere near it. That hesitation is reasonable. A glass shower door isn't a forgiving surface, and one bad hardware choice can turn a polished bathroom detail into a constant annoyance.
A common starting point involves wanting a towel within reach, avoiding wall-mounted clutter, and preferring not to alter the glass at all. A no drill towel bar for a glass shower door sounds like the obvious answer.
Sometimes it is. Sometimes it isn't.
The part that gets skipped in most guides is what happens after installation, especially in a hot, damp bathroom in Southwest Florida. A towel bar can look secure on day one and still become the weak point of the enclosure later. That's where the important decision gets made.
The Beauty of Glass and the Fear of the Drill
A frameless shower changes the feel of a bathroom fast. It opens the room, shows off the tile, and gives the whole space the kind of clean finish people usually associate with a higher-end remodel. That's why homeowners get protective of it. Once the glass is in, they don't want extra brackets, random clips, or a rushed DIY fix disrupting the look.
That concern isn't overthinking. It's part of protecting an expensive visual feature. If you've already chosen a minimalist enclosure because you want the bathroom to feel open and refined, even a small hardware decision matters. The same design logic that makes frameless glass appealing also makes people wary of permanent changes. If you're thinking about the overall feel of the room, this look at how custom glass makes a home feel luxurious explains why these details stand out so much.
A towel still has to go somewhere, though. Hanging it over the top edge of the door looks sloppy. Tossing it on a bench or nearby vanity creates more moisture and more mess. Leaving it on the floor is worse.
A towel bar on glass isn't just about convenience. It changes how the shower gets used every day.
That's why no-drill options are so attractive. They promise function without committing you to drilling or replacing glass. The problem is that “no drill” describes the installation method, not the long-term performance.
Understanding No-Drill Towel Bars
A no drill towel bar for glass shower door is any bar designed to mount without creating new holes in the glass, tile, or wall. The appeal is straightforward. You add towel access without cutting into a finished surface.
Think of these bars as add-on hardware rather than integrated hardware. They're meant to work around the shower door, not become part of the original glass fabrication. That distinction matters because the mounting method determines how much stress the glass and the bar can safely handle over time.
What falls into this category
Most no-drill options fit into a few broad groups:
- Adhesive-mounted bars that bond a bracket directly to glass
- Suction-based bars that rely on vacuum-style grip
- Over-the-door or clamp-on styles that hook or tighten onto the panel edge
Each one solves the same problem differently. None of them behaves like a factory-installed towel bar built into the shower door hardware package.
If you're comparing styles and finishes across broader bathroom hardware collections, it can help to browse examples of bathroom towel rails to get a sense of scale, finish coordination, and bar profiles before narrowing the choice to glass-compatible options.
Why people choose them
People usually go no-drill for one of three reasons:
- They want to avoid altering the glass
- They need a temporary or lower-commitment option
- They're retrofitting an existing enclosure that wasn't ordered with a bar
That makes sense. Professional through-glass hardware is typically planned before the tempered glass is finalized. Once the shower is installed, your options become more limited. Looking through different shower glass and hardware configurations makes that clear quickly. Integrated hardware is designed as part of the system, while no-drill bars are usually an afterthought.
That doesn't make no-drill products bad. It just means you should judge them for what they are. They're accessory solutions, not structural upgrades.
Comparing Your No-Drill Options
A towel bar can look fine on day one and still be the wrong choice for a humid bathroom. I see that often in coastal and subtropical installs. The finish still looks polished, but the mount starts loosening after months of steam, daily door movement, and towels drying slowly in heavy air.
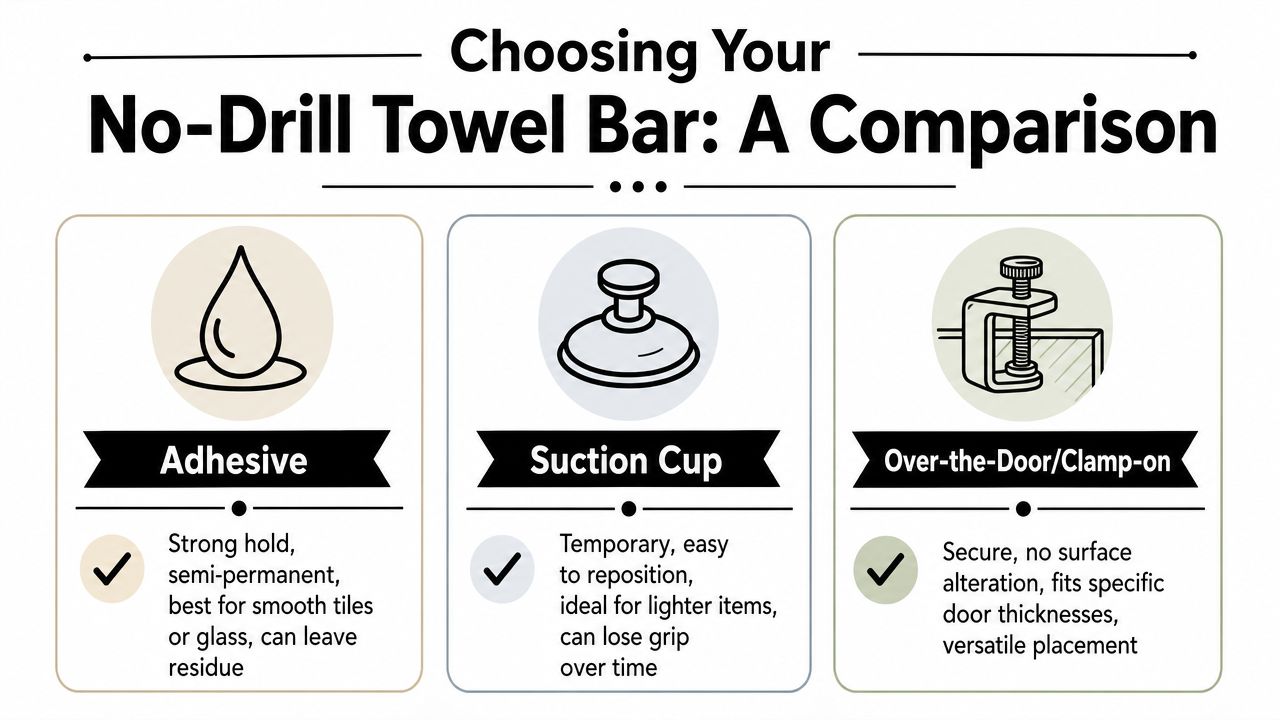
Adhesive bars
Adhesive bars usually win on appearance. On a frameless enclosure, they can look more integrated than other no-drill options, especially if the bracket is compact and the metal finish matches the hinges and handle.
The problem is long-term bond stability, not first-week appearance. In high-humidity bathrooms, adhesive pads and consumer-grade bonding systems are under constant stress from heat, condensation, cleaning products, and the repeated shock of a door opening and closing. User forums and DIY communities often report high failure rates in these conditions, with some discussions suggesting that up to 30% of adhesive bars detach within a year in steam-heavy settings. That kind of anecdotal pattern lines up with what installers see in the field. Early success does not tell you much about month nine.
Adhesive bars make the most sense for light use, fixed glass panels, and bathrooms that dry out well between showers.
Suction cup bars
Suction bars are easy to test and easy to remove. They are also the least trustworthy option for daily use on a shower door.
On perfectly clean, smooth glass, a suction bar may hold a hand towel for a while. A damp bath towel is a different load, especially on a door that gets pulled shut several times a day. Humid air also works against suction over time because any slight loss of seal turns into slippage.
I treat suction bars as temporary convenience hardware, not a long-term fixture.
Practical rule: If a falling towel bar would chip tile, scare you in the middle of the night, or leave residue to clean up, skip suction.
Over-the-door and clamp-on bars
Clamp-on and over-the-door styles solve the moisture problem better because they do not depend on a bond to the glass face. In many retrofit situations, they are the most reliable no-drill category if the glass thickness, door clearance, and edge condition all match the product.
They do come with trade-offs. You may see the hook, clamp body, gasket, or nylon insert from outside the shower. On a high-end frameless enclosure, that added hardware can look less cohesive than a bonded bar. Fit also matters a lot. Hardware that is slightly loose can rattle and shift. Hardware that is too tight can put concentrated pressure on tempered glass, which is the last thing you want on an expensive door.
For homeowners already comparing enclosure details, trim, and functional planning, a guide to shower drain pipe sizes is another useful reminder that bathroom parts need to be chosen as a system, not as isolated accessories.
Side-by-side view
| Type | Best For | Reliability (High Humidity) | Aesthetic Impact |
|---|---|---|---|
| Adhesive | Light-duty use where appearance matters most | Mixed. Often declines over time in steam-heavy bathrooms | Usually the cleanest look at first |
| Suction Cup | Temporary use and very light loads | Low for long-term daily towel use | Most visibly temporary |
| Over-the-Door/Clamp-on | Retrofit situations where door thickness is compatible | Usually better than other no-drill options if fitted correctly | Practical, but less integrated |
What actually works best
For a dry guest bath, several no-drill products can do the job well enough. For a primary shower in Southwest Florida or any bathroom that stays humid for hours, I would choose based on failure mode first and appearance second.
That usually puts suction at the bottom, adhesive in the middle with careful expectations, and a properly fitted clamp-on option at the top for no-drill reliability. If you want the clean look of built-in hardware and you expect it to stay that way for years, no-drill products have limits that are worth respecting.
Installation and DIY Safety Precautions
A failed no-drill install rarely fails because the product looked cheap in the box. It fails because the glass was not completely clean, the bracket went on slightly out of square, or the bar got tested before the bond had time to set. In a humid bath, especially in Southwest Florida, those small mistakes show up fast.
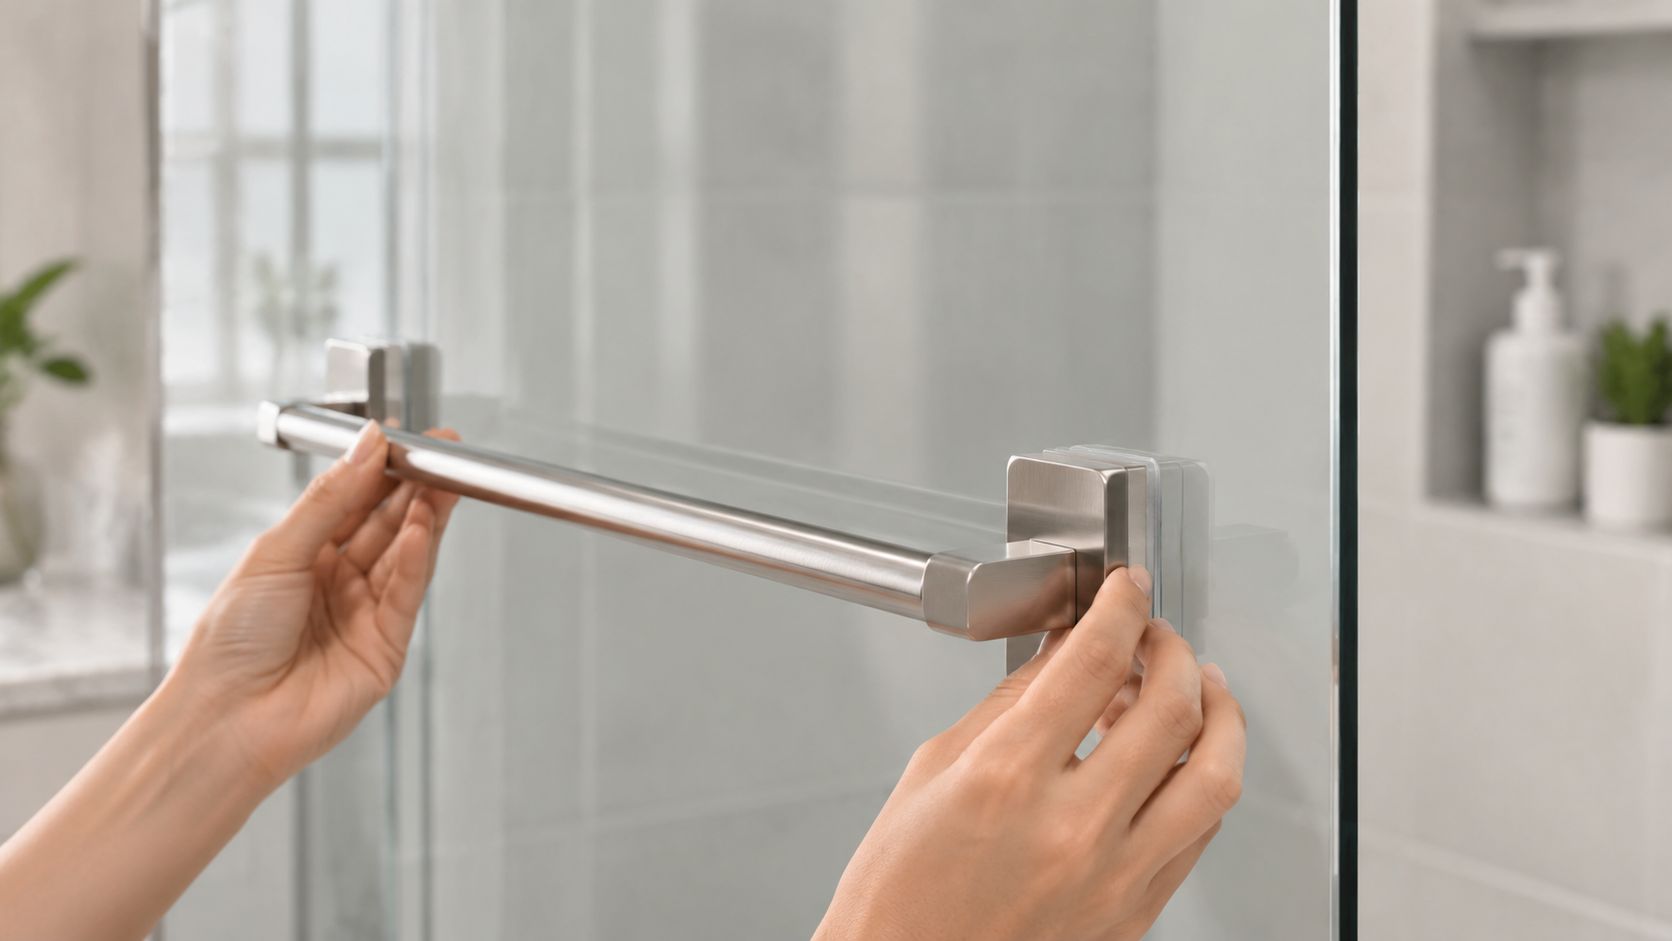
Start with surface prep
Clean glass is the whole job. Adhesive does not bond well to soap residue, invisible body oil, hard water haze, or leftover bathroom cleaner. Suction cups fail for the same reason.
Wash the target area, dry it, then wipe again with a lint-free cloth until the glass feels clean and squeak-free. If the shower glass has a factory-applied coating or aftermarket protectant, check the manufacturer instructions before you mount anything. Some coatings reduce bond strength, and that matters more on a daily-use shower than on a guest bath.
If your enclosure uses ultra-clear shower glass, mark placement carefully before final install. Smudges, crooked spacing, and visible adhesive lines tend to stand out more on low-iron glass.
Adhesive installs fail early when people rush the cure
I tell homeowners to dry-fit everything first. Confirm height, sight lines, door swing, and hand reach before you expose any adhesive. Once the bracket touches the glass, your adjustment window gets short.
For adhesive products, follow the maker's prep and cure instructions exactly. Do not assume "firm to the touch" means ready for use. In humid air, the outside of the bond can feel stable while the center is still curing, and that is a common reason bars loosen within the first few weeks.
A few habits help:
- Tape your layout first: Painter's tape gives you a straight visual reference and keeps the bracket from creeping off line during placement.
- Support the part during cure: If the product instructions allow it, use temporary tape support so the bracket does not drift under its own weight.
- Keep the room dry: Skip long hot showers during the cure window if possible. Steam can work against adhesive performance before the bond is fully developed.
- Do a light test first: Start with a hand towel, not a wet bath sheet.
For related bathroom planning details that often get overlooked during remodels, this guide to shower drain pipe sizes is a useful reminder that small specification mistakes create bigger problems later.
Treat an active shower door differently
A bar on a fixed panel has an easier life. A bar on a swinging door gets vibration, repeated pulling, and occasional slamming.
That changes how careful you need to be. Set the bar where it will not invite someone to yank the door open by the towel. Leave enough clearance from hinges, seals, and adjacent glass so the hardware does not bind during normal movement. If the door already has noticeable flex, adding an adhesive bar usually makes a marginal setup worse, not better.
A towel bar also is not a support point. If anyone in the home is likely to grab it for balance, stop and choose a different solution.
A quick visual walkthrough can help before you commit to a product:
Safety checks before first use
Watch the bar for a few days, not just the first hour.
Look for edge lift, bracket twist, clicking, or slight movement when the door opens and closes. Any of those signs mean the mount is already losing its grip. Remove the load and reassess before the hardware drops onto tile or chips the glass edge.
In my experience, high humidity does not forgive a mediocre install. A careful no-drill mount can work, but only if the prep is clean, the fit is right, and the product is used within its limits.
Checking Weight Limits and Glass Compatibility
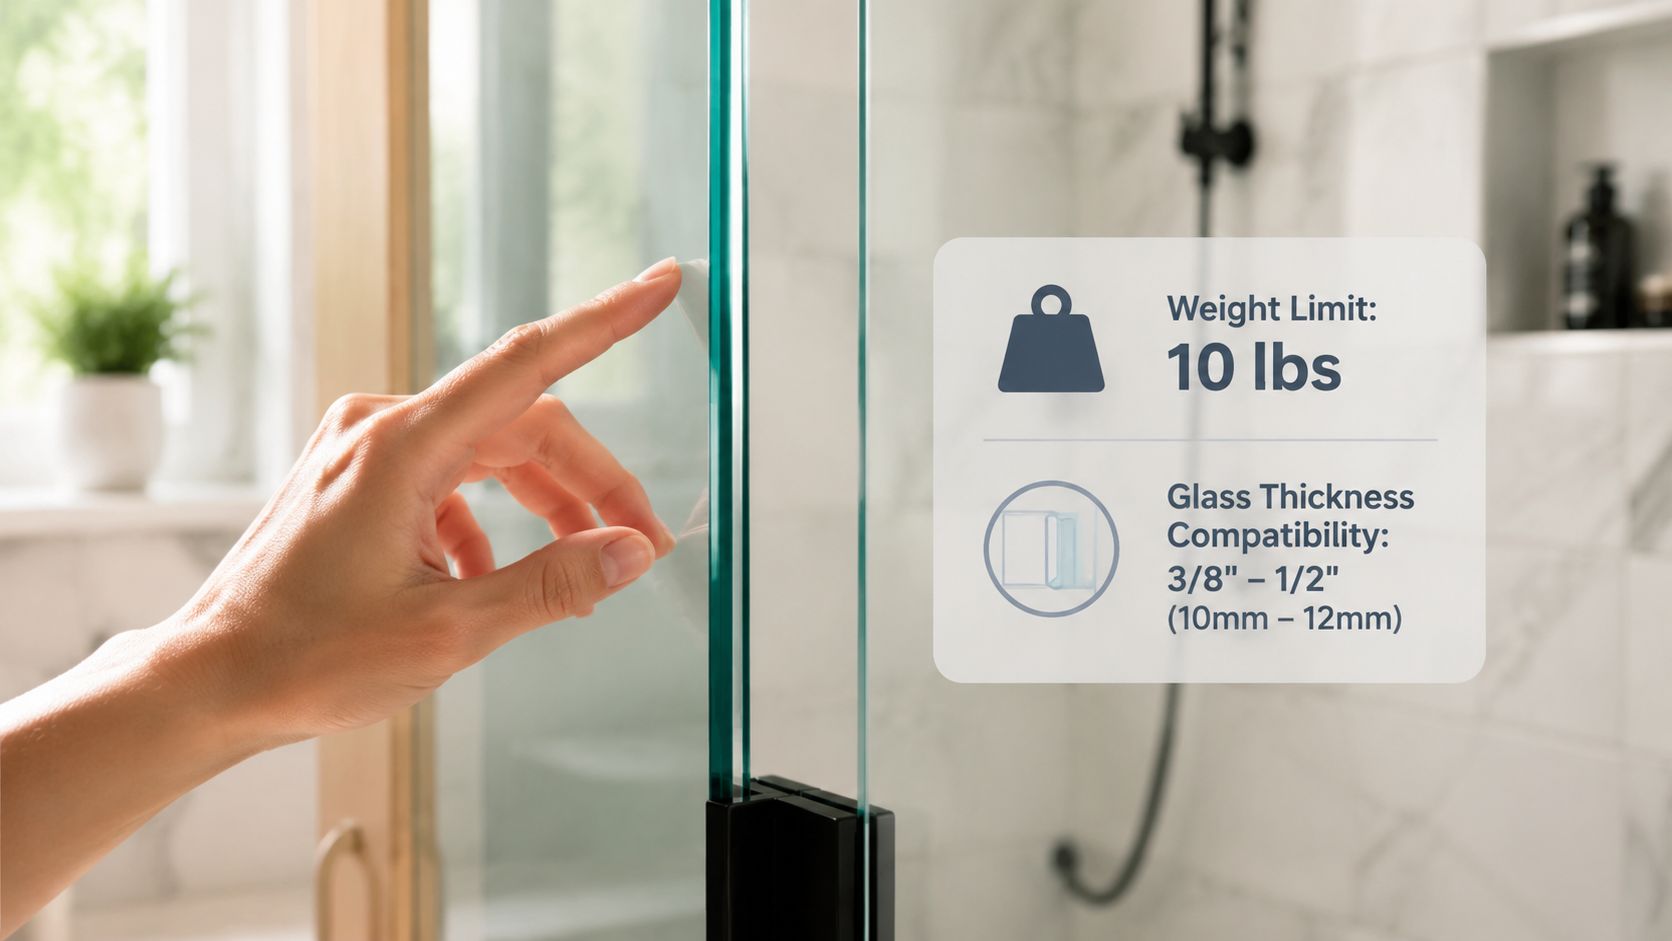
A towel bar doesn't act on the glass only by weight. It also creates a prying effect. That's the part many buyers miss.
A damp towel hanging off a bar pulls outward from the mounting point. The farther the bar projects and the more the towel bunches toward the outer edge, the more force the mount has to resist. On a moving shower door, that stress repeats every time someone opens or closes the panel.
What to check before buying
Use this checklist before you order anything:
- Glass location: Is the bar going on a fixed panel or an active door?
- Edge clearance: Will the bracket interfere with hinges, seals, or adjacent glass?
- Door movement: Does the panel flex slightly in normal use?
- Bar projection: How far will the towel sit from the glass?
- Actual use: One hand towel behaves differently than a large wet bath towel
If your enclosure uses premium low-iron material, it's worth understanding the visual and handling differences of ultra-clear shower glass before adding aftermarket hardware that may be more noticeable against it.
Fit matters as much as strength
Clamp-on products need a precise match to glass thickness and edge style. Adhesive bars need enough smooth, uninterrupted contact area. Suction products need a broad flat zone without texture or edge distortion.
A compatible bar isn't just one that can be attached. It's one that can stay attached without forcing the glass or the hardware into an awkward load path.
That's especially important on frameless systems where the clean look comes from tight tolerances. If a product only “sort of fits,” it doesn't fit.
Long-Term Care and Maintenance
Once the towel bar is in place, cleaning habits affect how long it stays put and how good it keeps looking. Aggressive scrubbing around brackets can weaken adhesive edges, knock suction seals loose, or shift protective pads on clamp-on hardware.
Use soft cloths and non-abrasive cleaners around the mount. Don't flood the bracket area with harsh chemicals and let them sit. Wipe, rinse lightly if needed, and dry the area instead of leaving cleaner trapped around the contact point.
If your shower glass develops mineral spotting, these hard water stain removal tips are helpful because the same caution applies here. Strong abrasion can solve one cosmetic problem while creating another around hardware and glass finishes.
Maintenance habits that help
- Check for movement: Grip the bar lightly during routine cleaning and feel for any shift.
- Keep edges dry: After a shower, a quick wipe around brackets helps reduce buildup.
- Protect specialty finishes: Match your cleaner to the bar finish and any glass treatment.
- Follow enclosure care guidance: Good glass care extends hardware life too, especially with frameless systems and coated surfaces. This shower door maintenance guide covers the basics well.
Small maintenance beats emergency replacement. If a bar starts to loosen, deal with it early before it drops onto tile or chips adjacent glass hardware.
When a Professional Solution Is the Right Choice
A lot of homeowners reach this point after the second or third failure. The first adhesive bar looked fine. Then the bathroom stayed damp through summer, the bracket started to creep, and the “easy fix” stopped feeling smart on an expensive glass enclosure.
That pattern matters in places like Southwest Florida, where heat, moisture, and frequent shower use put extra stress on any add-on hardware. A no-drill bar can work as a stopgap. It is rarely the best long-term answer for a high-end frameless door.
A premium towel bar is usually planned into the enclosure before the glass is tempered. Through-glass hardware mounts through pre-drilled holes with the correct washers, bushings, and gaskets, which creates even pressure on the panel and a cleaner finished look. This overview of through-glass towel bar construction shows the basic difference between integrated hardware and aftermarket accessories.

From an installer's perspective, the trade-off is simple. No-drill products save effort up front. Professionally specified hardware usually saves callbacks, replacement cost, and frustration later.
Cost is the reason many homeowners try the DIY route first. That is understandable. A professionally built frameless shower with integrated hardware costs more because the glass, hole locations, hardware selection, and door balance all have to be planned together. But if the goal is a bar that feels original to the enclosure and stays reliable in a humid bathroom, that extra planning usually pays off.
The best choice depends on your standard for the finished result. If you need something temporary in a guest bath, no-drill may be enough. If you want permanence, cleaner lines, and less risk of adhesive failure on a luxury shower door, professional hardware is the safer path.
If you are ready to price out a permanent option, request a custom shower glass quote for integrated towel bar hardware.
Frequently Asked Questions
Can I remove an adhesive towel bar later?
Usually yes, but removal can be messy. The challenge isn't just getting the bracket off. It's removing residual adhesive without scratching the glass or affecting any surrounding finish. Go slowly and avoid metal tools directly against the glass.
Can a no-drill towel bar damage coated glass?
It can, depending on the coating and the installation method. Adhesives, pressure points, and abrasive cleanup methods are the usual risks. If your glass has a specialty surface treatment, check compatibility before mounting anything.
Are these bars safe on curved glass?
In most cases, they're a poor match. Adhesive and suction products generally need flat, consistent contact. Clamp-on styles also depend on predictable edge geometry. Curved glass usually calls for more caution, not less.
Can I use a no-drill towel bar as a pull handle?
No. That's one of the quickest ways to shorten its life or create a safety problem. A towel bar should carry towel weight, not body weight or repeated door-pulling force.
Which no-drill style is the least risky?
For a humid bathroom, a well-fitted clamp-on option is often easier to trust than a weak adhesive or suction product. But the right answer still depends on your glass, your door movement, and how much visual compromise you're willing to accept.
If you want a shower towel bar solution that matches a luxury enclosure instead of looking added on later, AmeriGlass Industries can help. Their team designs and installs custom glass systems in Southwest Florida, with the kind of precise measurement and hardware planning that gives you a cleaner look and a longer-lasting result.