

You unbox the mirror, peel back the corner protectors, and hold it up to the wall. It looks right immediately. Then you find the little bag of included screws and clips, and that confidence disappears.
That reaction is healthy.
A mirror can look like simple decor, but the installation is a load-bearing decision. The wall matters. The mirror's thickness matters. The edge condition matters. A framed powder room piece and a large frameless vanity mirror don't ask the wall for the same kind of support, and they definitely don't forgive the same mistakes.
A lot of failures start before the drill comes out. Someone cleans old paint specks off the face, tosses the packaging, and assumes the included hardware must be enough. If you're refreshing an older mirror before rehanging it, Sparkle Tech's mirror paint removal tips are a useful place to start. But clean glass is only half the job. The mounting system has to match the mirror, the substrate, and the visual goal.
At AmeriGlass, this is often the starting point for many custom projects. Clients know the mirror style they want, but the primary work is translating that look into a safe installation. If you're still deciding on design direction, these mirror and specialty glass styles show how different shapes and finishes create very different mounting demands.
That Perfect Mirror Deserves a Perfect Installation
The most common mistake isn't bad drilling. It's treating every mirror like a picture frame.
A framed mirror with solid hanging points on the back can sometimes work well with D-rings and the right wall fasteners. A frameless mirror often needs edge support, cleaner alignment, and more thought about how pressure is transferred into the wall. Oversized mirrors raise the stakes further. If the hardware lets the panel shift, rack, or rest unevenly, the glass edge becomes the weak point.
What people usually notice first
Most homeowners focus on what they can see:
- Finish color: chrome, matte black, brushed nickel
- Visibility: hidden hardware versus exposed hardware
- Shape compatibility: round, rectangular, beveled, framed, frameless
Those matter. They just aren't the first questions a seasoned installer asks.
What actually decides the job
The first questions are more practical:
- How heavy is the mirror?
- What is the wall made of?
- Where will the load go once the mirror is hung?
- Does the hardware support the edge, the back, or both?
- Will the installation stay stable in a bathroom, hallway, gym, or commercial setting?
The mirror doesn't fall because it looked fine on day one. It falls because the load path was wrong from the start.
That's why mirror mounting hardware can't be chosen from a finish board alone. Good installations disappear visually, but they're engineered behind the glass.
Why Wall Hardware Is More Than Just a Hook
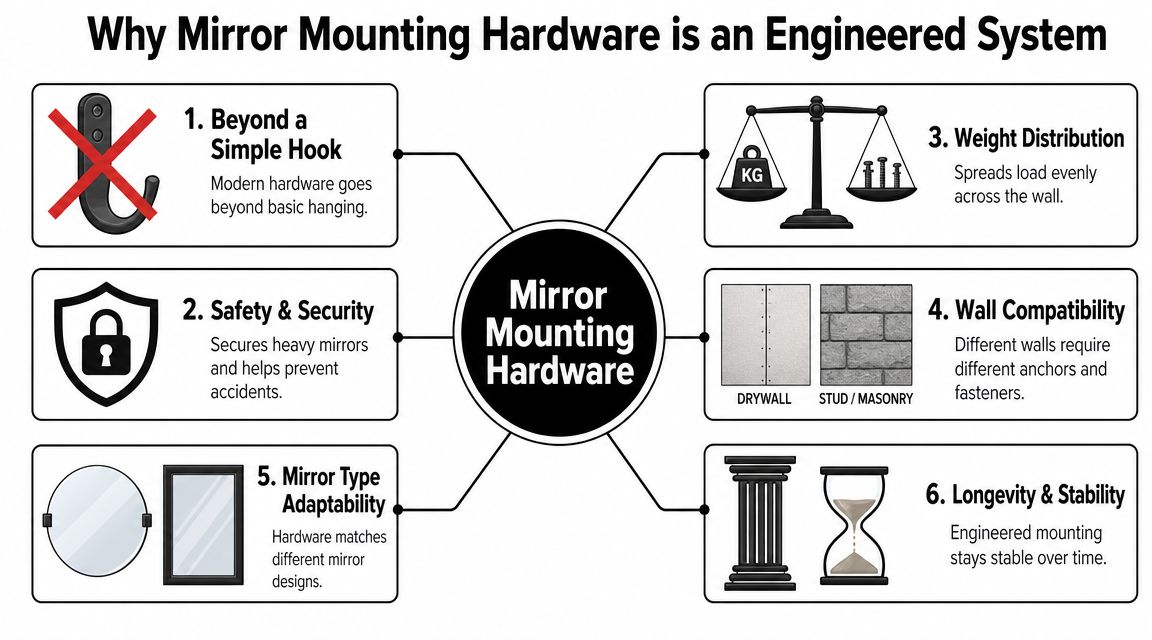
Modern mirror mounting hardware isn't a bag of parts. It's a system.
If you wouldn't put scooter tires on a work truck, you shouldn't hang a heavy mirror with hardware selected for convenience instead of capacity. The principle is the same. The load has to match the hardware, and the hardware has to match the surface carrying that load.
Major retail installation guidance reflects that shift. Mirror mounting has moved from simple hangers and nails toward a broader set of load-specific options, and retailers now stress that the mirror's weight determines the right anchor or mounting system, including cleats, bracket systems, and other heavy-duty approaches for larger pieces, as noted in Lowe's heavy mirror hanging guidance.
The system has to do several jobs at once
A proper mirror mount has to handle more than vertical weight.
- Carry the load: the wall fastener and bracket have to support the mirror without creep or pullout.
- Control movement: a mirror that can slide, pivot, or bounce against the wall will eventually stress hardware and glass.
- Protect the edge: frameless mirrors are especially sensitive to pressure points.
- Stay aligned: a clean reveal matters, especially above vanities and in commercial interiors.
Why the old thinking fails
The old approach was simple. Find center, drive a screw, hang the item.
That works for lightweight decor. It doesn't work reliably for a category that now includes large-format bathroom mirrors, frameless panels, decorative statement pieces, and specialty installations. Once mirrors got larger and design moved toward cleaner edges and minimal framing, the hardware had to become more precise.
Field rule: If the mounting choice was based only on what came in the box, the decision probably wasn't finished.
That's the mindset shift. You're not just attaching a mirror to a wall. You're building a stable connection between glass, hardware, and structure.
Your Guide to Common Mirror Mounting Hardware
When clients ask what hardware they need, the answer is usually, “Which problem are we solving?” Different hardware types solve different installation problems.
French cleats and Z-clips
These are the invisible-strength option for many heavy wall installations. One component attaches to the wall, the mating component attaches to the mirror assembly or backing, and the parts lock together. They're useful when you want strong support with a low-profile appearance.
They aren't magic, though. Cleats still depend on accurate layout, flat walls, and appropriate fastening into the substrate. If the wall is badly out of plane, the cleat may hold the mirror but leave you fighting a visible gap.
J-channels and bottom support tracks
A J-channel gives the mirror a place to sit. This is common on larger frameless installations because it establishes a continuous bearing point along the bottom edge instead of asking a few isolated clips to do all the work.
That bottom support often pairs well with top clips or retainers. It's a practical answer when you want clean lines and better edge support.
Mirror clips
Clips are common because they're straightforward, affordable, and available in different finishes and materials. But clip sizing is where casual installers get into trouble.
Technical product data shows why. One commercially sold metal mirror clip kit is specified for mirrors up to 36 x 48 inches and up to 10 kg, with a 0.5 cm depth and a 2.4 x 3.2 cm footprint, and another steel clip product is designed for 1/4-inch-thick mirrors, according to this mirror clip product data. That tells you something important. Clip geometry, glass thickness, and total weight have to work together.
If the clip is too shallow, too loose, or wrong for the glass thickness, the edge can slip or take pressure where it shouldn't.
Standoff barrels
Standoffs are less about hiding hardware and more about making the hardware part of the design. They hold the mirror off the wall slightly and create a floating, architectural look.
They work well in commercial interiors, signage-style applications, and modern residential spaces. They're less forgiving when the wall is uneven, and they demand careful hole placement if the mirror is fabricated for exposed hardware.
Adhesive and hybrid systems
Adhesive can play a role, but it shouldn't be treated like a universal shortcut. In the field, it's often part of a system, not the whole system. If the job depends entirely on glue and hope, the design needs another look.
Mirror Mounting Hardware Comparison
| Hardware Type | Typical Weight Limit | Visibility | Best For |
|---|---|---|---|
| French cleats | Varies by product and wall condition | Low | Heavy framed mirrors, concealed support |
| J-channel | Varies by channel, fasteners, and substrate | Low to medium | Large frameless mirrors with bottom edge support |
| Mirror clips | Product-specific | Medium | Small to medium frameless mirrors when sized correctly |
| Standoff barrels | Product-specific | High | Decorative floating installations, commercial design features |
| Adhesive with mechanical support | System-specific | Low | Clean-look installations where supplemental retention is used |
If you're comparing hardware and fabrication options for a broader glass project, AmeriGlass product offerings give a practical view of where mirrors fit alongside other custom glass applications.
Matching Hardware to Your Mirror and Wall
The right hardware choice starts with one question. Where does the load go after the mirror is on the wall?
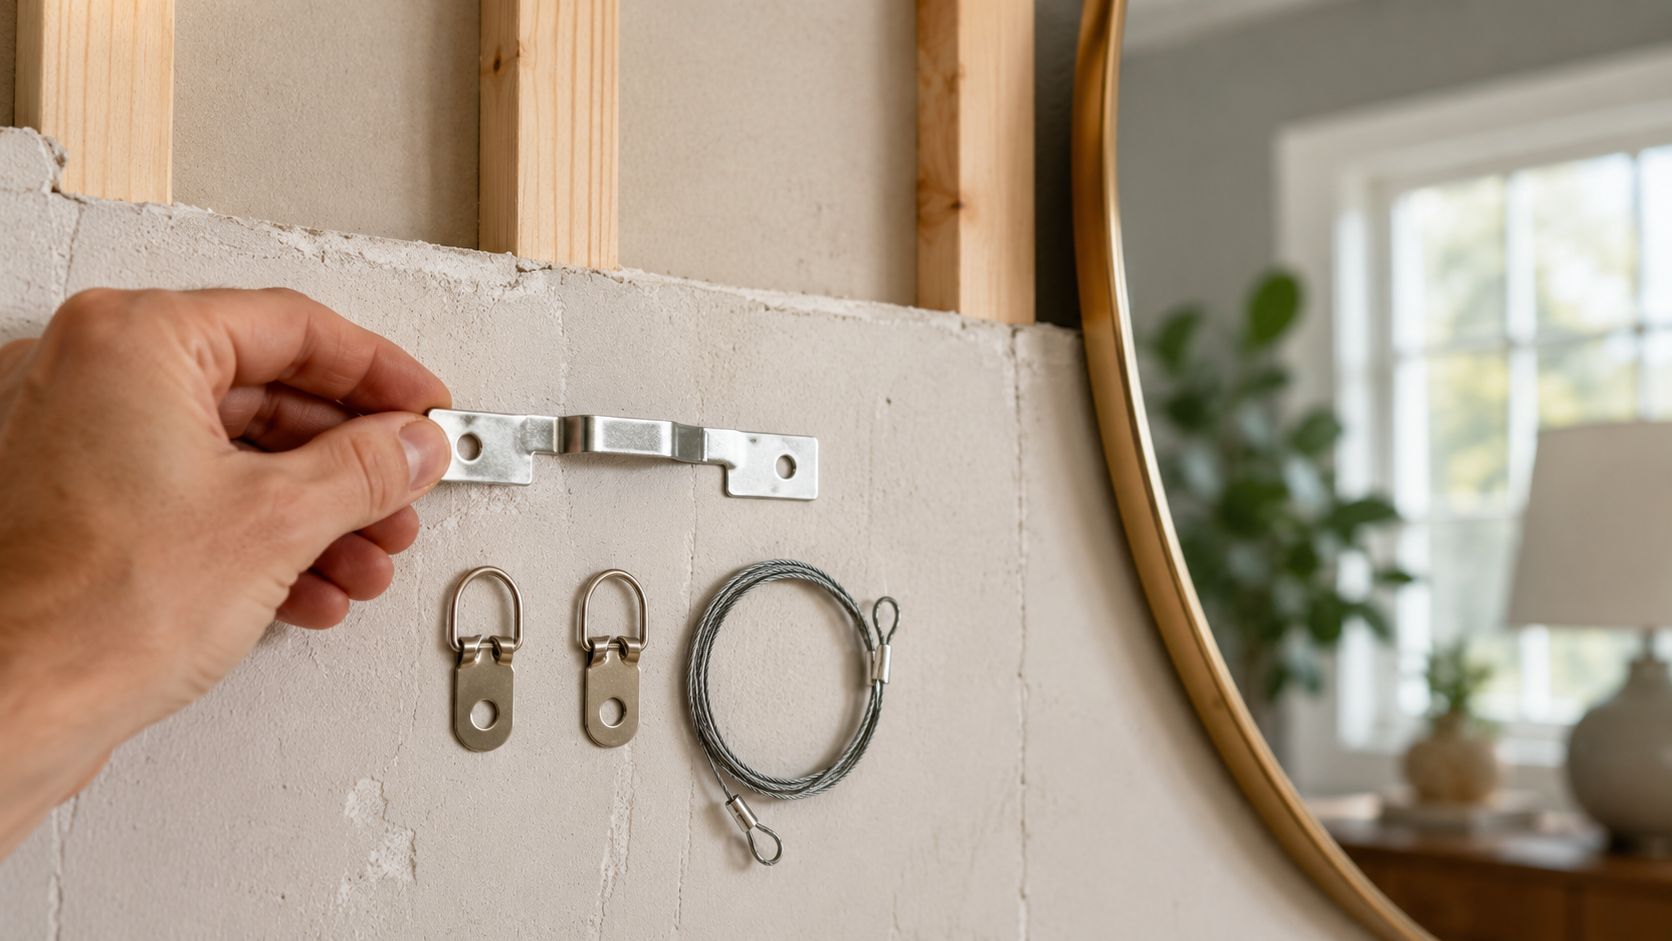
If the answer is “mostly into drywall,” stop there and rethink it. Drywall is often part of the assembly, but it shouldn't be treated as the whole structural plan for a demanding mirror install.
Read the mirror first
A frameless mirror behaves differently from a framed one. With frameless glass, the perimeter matters more because that's where clips, holders, or channels usually engage. For these installations, the load path should focus on edge support instead of adhesive alone. Commercial systems commonly use clips, top-and-bottom holders, or swivel screws, and wall anchors are recommended when studs aren't available so the installed capacity matches the mirror and wall type, as shown in Lowe's mirror mounting system guidance.
Glass thickness matters too. Thin glass in oversized dimensions can punish bad clip selection. Thicker glass can create a different fit problem if the hardware throat wasn't chosen correctly.
Then read the wall
The wall tells you what kind of fastener strategy is available.
- Drywall over studs: best case when you can hit framing where support is needed
- Plaster: often less forgiving to drill and more prone to surface damage during layout errors
- Tile over substrate: requires careful drilling and solid planning before breaking the waterproof surface
- Concrete or masonry: often very secure once properly fastened, but slower and less flexible to adjust
The key is shear. Most wall-mounted mirrors don't just pull straight out. They place downward force on the hardware while also trying to shift slightly away from the wall if the support points are poorly arranged.
Hardware failure often starts as movement, not collapse. A mirror settles, a clip loosens, a fastener starts working the wall, and the problem grows quietly.
What support should feel like
The mirror should feel seated, controlled, and stable. Not springy. Not dependent on one hero fastener. Not pinched hard at one edge while floating at the other.
If you want a clear visual of how installers think about brackets, hang points, and support hardware, this walkthrough is useful before committing to the layout:
For design-driven projects, material clarity can also influence the mounting decision. A large vanity or feature mirror made with ultra-clear glass tends to expose alignment errors more readily because the finished look is so crisp.
Safety Codes and Commercial Project Standards
Commercial mirror work needs a stricter mindset because the risk is different. A mirror in a private powder room and a mirror in a hotel corridor, fitness room, retail fitting area, or office restroom do not live under the same conditions.
Higher traffic means more contact, more cleaning, more vibration, more opportunities for impact, and more liability if something goes wrong. In those settings, hardware choice isn't only about whether the mirror stays up. It's about whether the assembly remains safe and functional under regular use.
Function can drive the hardware choice
Specialty mirrors make this obvious. Convex safety mirrors in commercial environments need the right field of view, and that means the mount often has to allow controlled adjustment. A specialty safety mirror source recommends a 5 to 15 degree downward tilt toward the line of approach, with the exact angle depending on the site, as explained in this convex mirror mounting guidance.
That's a good reminder for any commercial spec. Sometimes the best mount isn't the one that disappears most cleanly. It's the one that lets the installer dial in orientation safely and keep it there.
What commercial teams should insist on
- Substrate verification: don't assume the wall was built exactly as the drawings suggest.
- Appropriate mirror type: public-facing areas often require safety-minded glass choices and backing decisions.
- Tamper resistance: exposed hardware may need to resist casual interference.
- Serviceability: maintenance teams need installations they can inspect and, when necessary, adjust without guessing.
In commercial work, “good enough” hardware becomes a liability issue fast.
For contractors and property managers, code compliance isn't a box to check late. It belongs in the design and submittal conversation from the beginning.
Choosing the Right Approach for Your Project
More hardware names aren't needed; a decision filter is.
If you're a homeowner
A DIY install can make sense when the mirror is modest in size, the wall condition is straightforward, and the mounting method is clear before you start. The project stops being DIY-friendly when you're uncertain about the wall structure, the hardware rating, or how the load is shared.
Use this quick gut check:
- You know the wall type: not a guess, but confirmed.
- You understand the support method: clips, cleat, channel, or another defined system.
- You have help lifting and positioning the mirror: especially for frameless panels.
- You're willing to stop if the wall tells you something different during layout: hollow spots, tile complications, hidden obstructions.
A useful way to think about risk is to remove the hazard at the highest level possible, not just react to it at the end. That's the same logic behind hierarchy of control examples. In mirror work, that often means changing the mounting approach before the mirror is ever lifted.
If you're an interior designer
Hardware changes the look. Hidden support gives you a cleaner reveal, but exposed standoffs can become part of the architecture. The trick is not forcing a visual idea onto a wall or mirror that won't support it elegantly.
If the design depends on razor-clean lines, coordinate the fabrication and mounting method together. Don't leave hardware decisions until after the mirror arrives.
If you're a general contractor
You need repeatability, substrate awareness, and fewer surprises in the field. That matters even more when the project includes unusual mirrors.
A real-world example of a 500-lb antique mirror installation required stud mapping, custom angle brackets, countersunk fasteners, and on-site trimming to clear obstructions, as shown in this oversized mirror installation example. That's the dividing line between retail hardware selection and actual installation engineering.
For residential clients pushing toward a luxury look, these ideas on how glass work can make a home feel luxurious also show why the mounting method should support the design intent instead of compromising it at the last minute.
When Precision and Peace of Mind Are Paramount
Knowing the hardware is important. Executing the installation correctly is what protects the mirror, the wall, and the people using the space.
Large vanity mirrors, gym mirrors, wall-to-wall applications, and custom decorative pieces don't leave much room for rough measurements or improvised fastening. The reveal has to be clean. The support has to be deliberate. The finished installation has to stay quiet and stable over time.
That's where professional installation earns its value. Licensed and insured technicians bring layout discipline, fabrication awareness, and jobsite judgment that off-the-shelf instructions can't replace. When the mirror is expensive, oversized, custom-cut, or going into a demanding environment, that precision matters more than the price of the hardware itself.
If your project has moved past simple clips and guesswork, requesting a quote is the practical next step.
If you're planning a custom mirror, a frameless installation, or a project where the wall and hardware need to work together cleanly, AmeriGlass Industries can help you sort out the right approach before a beautiful mirror becomes a costly mistake.