

You usually notice it one morning in a small, irritating way. The frameless shower door that used to glide cleanly now kisses the tile at the bottom corner. Or it closes, but not quite. A thin gap shows on the strike side, and after the shower, there's a little puddle outside the curb that wasn't there before.
That's the point where most homeowners split into two camps. One group grabs an Allen wrench and starts turning screws at random. The other gives up and assumes the whole enclosure was installed wrong. Both reactions can make the problem worse.
A lot of frameless shower door issues do respond to careful adjustment. A lot of them also don't. The difference is diagnosis. Heavy glass, precision hinges, and real-world wall conditions leave very little room for guesswork. The smart approach is to make the small corrections that are safe, stop before the glass is carrying stress, and know when the issue is beyond adjustment.
That Annoying Gap A Frameless Door That Needs Help
A frameless shower door rarely fails all at once. It drifts.
First, the latch side doesn't line up the way it used to. Then the bottom sweep starts brushing the curb a little harder. Then you hear that dull thump in the corner, or you see water getting past the seal. The enclosure still looks beautiful, but it no longer feels precise.
This aspect carries greater importance than generally realized. Frameless systems aren't loose-fitting products. They're engineered assemblies. Good installation guidance treats plumb, square, and level conditions as essential, and C.R. Laurence's technical material stresses proper measuring, identifying deviations from plumb or level, and staying within manufacturer specifications for weight and door-width limits. That precision matters because large frameless units can weigh as much as 170 pounds according to the installation guidance summarized from C.R. Laurence technical documentation.
What the symptoms usually mean
A door that drags doesn't always have the same root cause as a door that leaks.
- Corner drag at the bottom: often points to sag or hinge alignment drift.
- An even-looking door with a leak on one side: often points to seal contact, not major hinge movement.
- A door that closes differently depending on how hard you push it: can mean the geometry is slightly off and the seals aren't meeting consistently.
- A widening gap that keeps returning: often signals something deeper than a simple tweak.
Practical rule: If the door changed gradually, a minor frameless shower door adjustment may help. If it has never closed correctly, start by suspecting installation geometry.
There's also a design reality homeowners miss. Frameless enclosures depend on the surrounding surfaces. If the wall leans, the curb pitches incorrectly, or the hardware was set out of square, adjustment only compensates so far. It won't rewrite the opening.
That's why builders and homeowners often pair a door with fixed glass and splash control details from the start. If you want to see how surrounding glass elements affect water containment, look at fixed splash guards. The point isn't style alone. The whole enclosure has to work together.
Your Essential Toolkit for a Safe and Successful Adjustment
The fastest way to turn a minor alignment issue into broken glass is to work without support. Heavy frameless doors don't forgive rushed handling.
Most public content on these doors barely addresses tool choice or over-adjustment risk. One repair tutorial specifically warns against lifting by the handle and recommends a suction cup, shims, and loosening hinge screws only partially, with the door supported throughout the process, as shown in this repair walkthrough on safe heavy-glass handling.
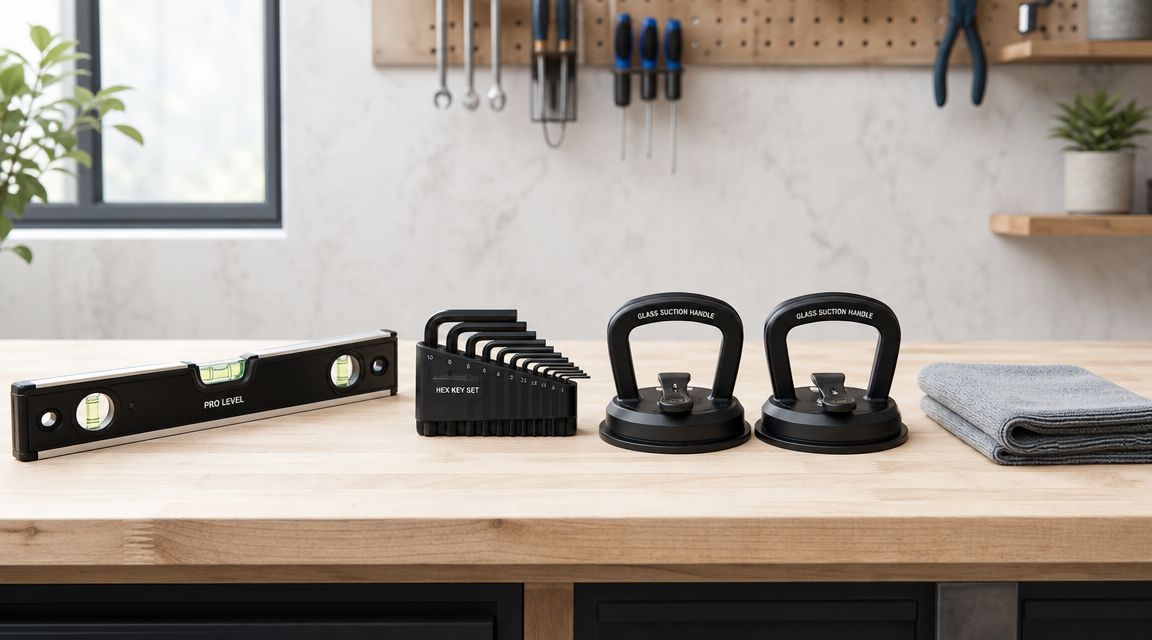
The tools that actually matter
You don't need a truck full of glass equipment for a minor adjustment, but you do need the right basics.
- Correct hex keys or Allen wrenches: Hinges vary. Sloppy-fit tools round out screw heads and create a second repair.
- A reliable level: You need to compare the door, the wall, and the curb. Your eye isn't enough.
- Wood or composite shims: These support the door at the bottom during hinge loosening.
- A glass suction cup: This gives you control of the panel without pulling on the handle.
- Soft cloths or moving blankets: Protect tile and hardware finishes.
- A flashlight: It helps you read gaps and seal contact along the strike edge and bottom sweep.
If you're still identifying what style of enclosure or hardware you have, it helps to compare systems and components before touching anything. AmeriGlass includes frameless door options among its glass product categories, which can help homeowners recognize the type of setup they're working on.
Safety rules that aren't optional
Glass techs follow sequence for a reason. The panel has to be controlled before the screws lose tension.
Use this checklist before you turn a single fastener:
| Item | Why it matters |
|---|---|
| Have a second person present | One person stabilizes, the other adjusts |
| Support the door from below | Prevents sudden drop and hinge stress |
| Use the suction cup on glass, not the handle | The handle isn't a lifting point |
| Loosen only enough to move the panel | Too much play can shift the door unpredictably |
| Clear the floor area | You need a stable stance and unobstructed movement |
Never let the full door weight hang on partially loosened hinges while you figure out your next move.
What doesn't work
A few common homeowner moves almost always backfire:
- Forcing the door closed to “train” the seal
- Cranking every hinge screw tighter
- Lifting from the pull handle
- Adjusting without checking whether the wall or curb is out of true
Those approaches treat symptoms with brute force. Frameless shower door adjustment works when it's patient, supported, and measured.
Correcting Door Sag and Hinge Alignment
Sag is a frequently suspected problem, and often the suspicion is correct. The latch-side top gap gets wider, the bottom opposite corner starts dragging, and the swing no longer feels balanced.
The fix isn't dramatic. It's controlled.
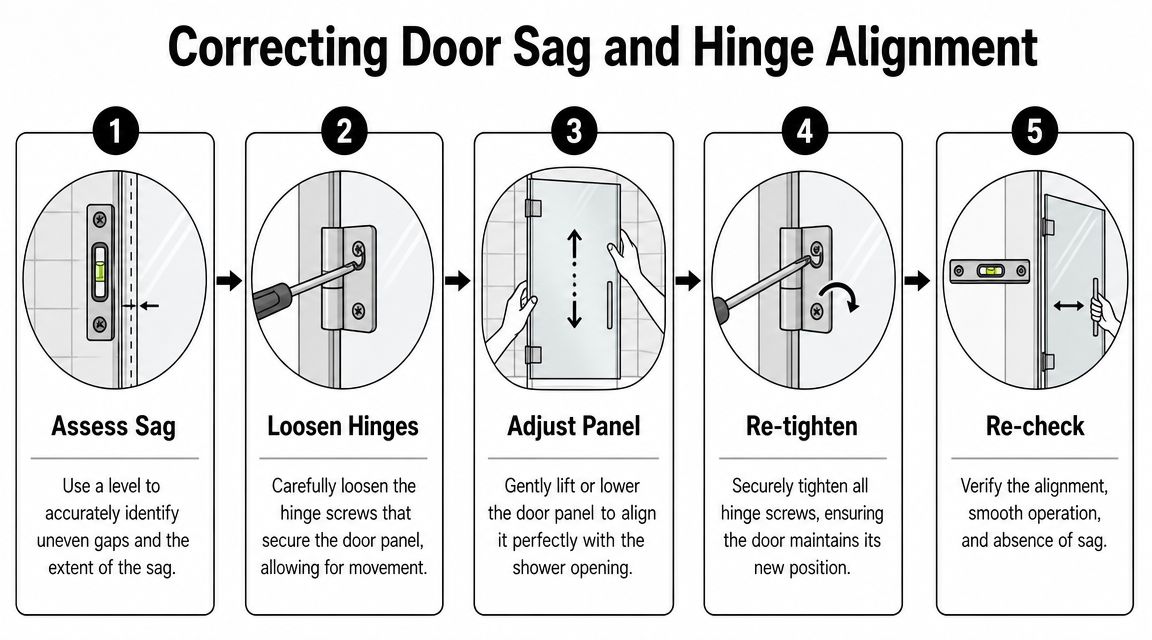
Start with diagnosis before movement
Check three things before touching the hinges:
- Gap consistency along the strike side.
- Bottom sweep contact across the curb.
- Whether the hinge-side glass edge still looks parallel to the wall.
If the gaps are uneven in a way that suggests the panel has rotated slightly, hinge adjustment is a reasonable next step. If the whole opening looks out of square, stop and reassess before moving hardware.
For homeowners comparing common configurations, this is easiest to visualize on a single shower door layout, where the swing, seal line, and hinge side are easy to isolate.
A visual reference can help if you've never seen the process done in sequence:
The adjustment sequence pros use
One detailed hinge guide recommends making vertical and horizontal changes in quarter-turn steps, then testing after each change, because small corrections have a noticeable effect on heavy glass. That matters when a frameless door can weigh around 170 pounds, where a tiny shift at the hinge can change swing, closure force, and bottom sweep contact, as described in this quarter-turn hinge adjustment guide.
Use this order:
- Set shims under the door first: Build support under the sagging side until the panel is carried from below.
- Loosen the hinge set screws slightly: Don't remove them. You want controlled movement, not a free-floating panel.
- Make one small correction: Think quarter-turn, then stop.
- Re-snug the hardware enough to test: Don't leave it loose and swing the door.
- Open and close the door slowly: Watch the top gap, bottom clearance, and strike-side contact.
A good adjustment feels almost boring. Small move, test, repeat.
How to tell if you're correcting the right direction
If the bottom outer corner drags, you're usually trying to restore height and square at the latch side. If the door misses the seal or closes too deep into it, you may need a slight in-and-out correction rather than a pure lift.
Signs you're moving the panel the wrong way:
- The swing gets heavier instead of smoother.
- The gap improves at the top but gets worse at the bottom.
- The sweep starts scraping harder in a different spot.
- The latch side meets the seal with impact instead of a gentle draw.
Tightening matters as much as adjusting
A misaligned door often comes from loose hardware, but overtightening creates its own problems. Guidance from installer and hardware sources converges on a controlled reset process: loosen locking or set screws, move the panel inward or outward to restore the seal, then retighten firmly without excessive force. The same guidance warns that too much tightening can warp hinge plates or stress safety glass, and recommends a final water test plus 10+ open-close cycles to confirm smooth, leak-free operation, as outlined in this hinge reset and testing guide.
If the door improves after one or two measured corrections, you're in safe territory. If you need repeated larger movements to get a temporary result, that's usually the point where adjustment stops being maintenance and starts becoming diagnosis.
Fine-Tuning Seals and Gaps for a Watertight Enclosure
Once the panel hangs correctly, the job isn't done. The door still has to seal without bouncing, rubbing, or leaving a water path.
That final tuning is where many DIY attempts fall apart. People focus on the visible sag, fix it halfway, and ignore the bottom sweep, strike seal, or hinge-side reveal. Then they wonder why the puddle is still there.
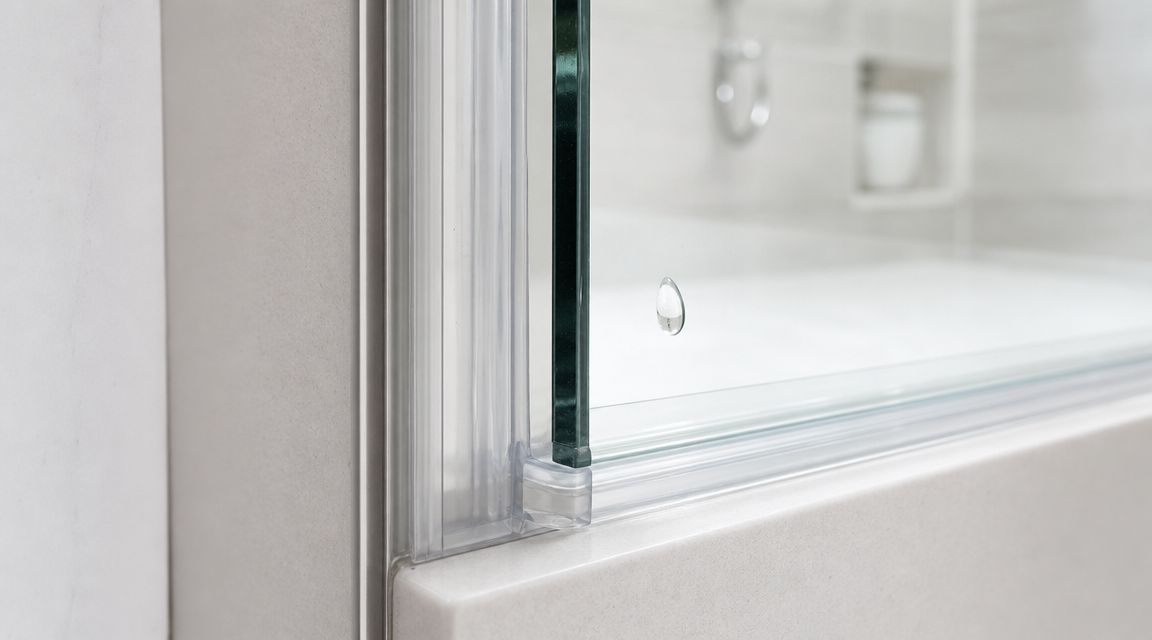
Read the leak before you change the seal
The location of the water tells you a lot.
- Water near the outer bottom corner: often points to sweep contact or door sag that wasn't fully corrected.
- Water along the latch side: often points to poor strike-side seal contact.
- Intermittent drips after the shower ends: can mean water is running around a misdirected edge rather than pushing directly through a gap.
Before replacing any vinyl, clean the seals and inspect them for curling, hardening, or partial detachment. Soap film can stop a seal from seating properly, and a bent sweep can redirect water outward.
How to fine-tune without creating a new problem
A properly adjusted seal shouldn't require a hard shove to close the door. It should meet with light, even contact.
Use this sequence:
Close the door gently and inspect contact points
Look for one section touching hard while another floats open.Check the bottom sweep while the door is stationary
If it's folded under, twisted, or dragging hard, fix that before adjusting hinges again.Make a slight in-and-out hinge correction if needed
This can improve strike-side contact without changing overall height.Test with actual water
A dry close isn't enough. Real leak checking matters.
Seals should draw together. They shouldn't slam, bind, or spring the door back open.
If your setup includes side panels, the relationship between the door and adjoining glass matters just as much as the hinge setting. Homeowners with multi-panel layouts can better understand those closure lines by looking at inline door and panel configurations.
Don't ignore the room around the shower
A small leak isn't just a glass problem. Bathrooms hold humidity, and repeated moisture outside the enclosure can become a maintenance issue in drywall, trim, and nearby flooring. If you're already dealing with water escape, this guide on mold prevention for Florida homeowners is worth reading because it addresses what to do after recurring moisture shows up around a bathroom leak.
What doesn't work here is overcompressing the seal. Homeowners often think tighter must be better. On frameless doors, too much pressure can make the door rebound, wear the vinyl early, and transfer unnecessary stress back into the hinge side.
Preventative Maintenance for Lasting Performance
The best frameless shower door adjustment is the one you don't need to make again for a long time.
Most alignment problems start small. A little hinge movement. A sweep that twists. Mineral buildup that changes how the seal meets the glass. Left alone, those minor changes turn into drag, leaks, and hardware strain.
The monthly check that saves trouble
A simple inspection takes only a few minutes.
- Watch the swing: Open and close the door slowly. It should move smoothly and settle predictably.
- Look at the gaps: The reveal shouldn't suddenly look different from top to bottom.
- Check hardware feel: If a handle, clamp, or hinge cover feels loose, don't ignore it.
- Inspect vinyl parts: Cloudy, brittle, or bent sweeps usually don't improve on their own.
- Wipe water off hardware and lower glass edges: Less residue means fewer closure issues.
Cleaning habits that help instead of harm
Avoid abrasive pads, harsh scraping, and anything that can nick hardware finishes or damage protective glass coatings. Use non-abrasive cleaning methods and soft cloths. Rinse residue off the bottom edge and around hinge areas where buildup tends to collect.
What matters most is consistency. Gentle cleaning done regularly beats occasional aggressive scrubbing.
Why maintenance matters on frameless systems
Frameless doors don't have bulky framing to hide movement. That's part of why they look so clean, and part of why neglect shows up fast. Homeowners who treat the enclosure like a precision assembly usually catch a problem while it's still a minor correction. Homeowners who wait until the door drags or leaks are often dealing with wear in more than one place.
A smooth, dry-closing door is the early warning system. If that feel changes, check it then, not after months of forcing it.
When a DIY Adjustment Is Not Enough Call a Professional
The hardest part of frameless shower door adjustment isn't turning screws. It's knowing when to stop.
Some problems look adjustable but aren't. A door can sag because a hinge shifted. It can also appear to sag because the wall is out of plumb, the curb isn't true, the mounting surface moved, or the original layout never had the geometry it needed. Installers point out that repeated tweaking is often a sign the original installation geometry is wrong, especially when walls or curbs are out of plumb, and that kind of issue won't be solved by simple hinge tightening, as explained in this installer guide to aligned shower doors.
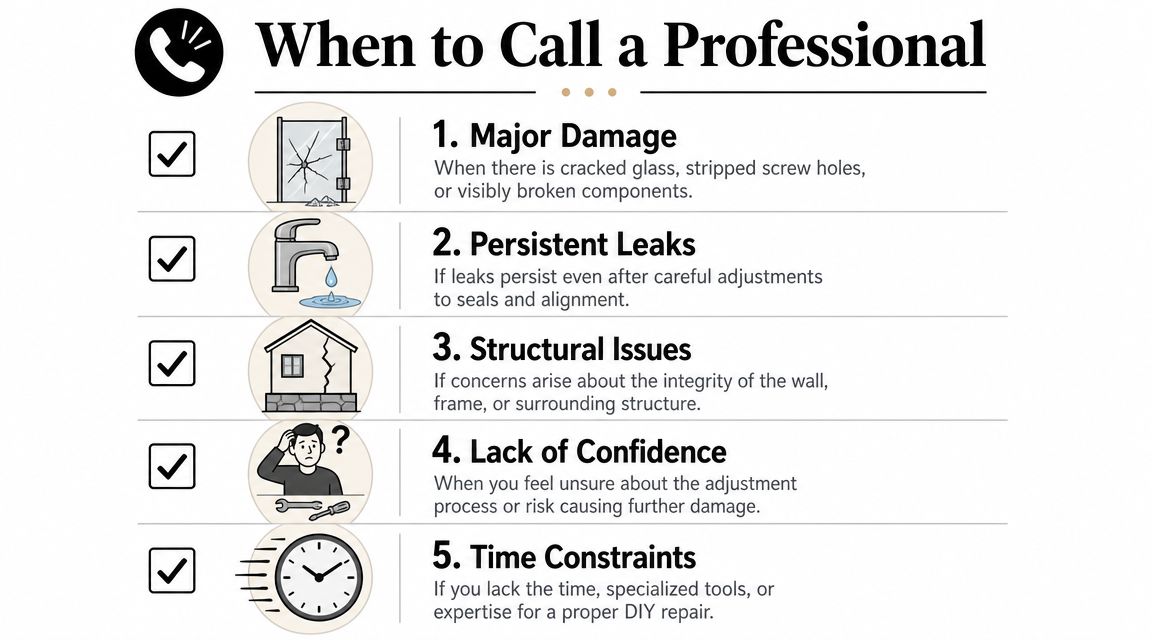
Red flags that move this out of DIY territory
Use a simple decision test. If the issue is minor, stable, and clearly tied to hardware drift, careful adjustment makes sense. If you see any of these, stop.
- Visible glass damage: Chips, cracks, or impact points mean no more adjustments.
- Stripped screws or deformed hinges: The hardware may no longer hold alignment safely.
- Tile movement around mounts: If the wall substrate is shifting, the problem isn't with the door itself.
- The door keeps going out of alignment: Repeating the same fix is a clue.
- You can't support the panel correctly: Lack of control is reason enough to walk away.
The practical boundary
Here's the bridge between pure DIY advice and “call someone” advice. Safe homeowner work usually includes cleaning seals, checking contact points, supporting the panel properly, and making very small hinge corrections. Professional work starts when the panel needs deeper re-setting, the opening itself is suspect, or the hardware may need replacement.
That same logic applies to broader bath work. If the room is being remodeled or structural decisions affect waterproofing and finish quality, it helps to review expert tips for your bathroom reno so the enclosure isn't treated as an isolated product when it depends on the surrounding build.
If you're adjusting the same door again and again, you're probably not adjusting the door. You're compensating for something else.
For Southwest Florida homeowners dealing with recurring sag, leak issues, or an opening that may not be plumb, the safer path is a site diagnosis by a glass specialist. AmeriGlass handles frameless shower door installation in Fort Myers, Florida, and that kind of service is where the root cause gets separated from the symptom before more stress is put on the glass.
If your shower door is dragging, leaking, or never quite closes the same way twice, a careful adjustment may solve it. If the problem keeps returning, the enclosure needs a proper diagnosis. AmeriGlass Industries works with homeowners across Southwest Florida on frameless shower doors, glass alignment issues, and full enclosure solutions with precise measurement and safe installation practices.
Door still out of alignment? AmeriGlass Industries adjusts and repairs frameless doors through our shower door repair service across Naples, Fort Myers, Bonita Springs and Cape Coral. Call (239) 426-6884.