

You've got the new mirror leaning against the bathroom wall. The vanity is in, the tile looks sharp, and the frameless glass is exactly the clean look you wanted. Then the situation becomes apparent. There's no frame to hide a bad cut, no trim to forgive a crooked line, and no room for a weak anchor if the wall isn't as solid as it looks.
That's where frameless mirror mounting separates into two very different jobs. One is a careful installation that stays level, holds tight, and still looks clean years later. The other is a project that seems fine on day one, then starts shifting, desilvering, or stressing the wall once Southwest Florida humidity gets involved.
In Naples and Fort Myers, that difference matters more than most homeowners expect. Bathrooms stay damp, many walls aren't simple drywall, and surface condition can make or break the install before the mirror ever touches the wall. A frameless mirror can absolutely be a smart DIY project, but only when the wall, hardware, and mounting plan all agree with each other.
The Pro's Mindset for Flawless Mirror Mounting
A frameless mirror looks simple because all the complexity is hidden. That's what makes it unforgiving.
With a framed mirror, the frame helps conceal tiny alignment issues and spreads some stress around the perimeter. A frameless mirror doesn't give you that cushion. Every clip location, every anchor choice, and every surface flaw matters because the glass and its backing take the load directly.
I've seen the same pattern more than once. A homeowner buys a beautiful mirror, opens the box, holds it up over the vanity, and thinks the hard part is lifting it. It usually isn't. The hard part is judging the wall accurately before drilling the first hole.
What pros notice first
The first question isn't “Where do I want it?” It's “What is this wall capable of holding?”
That means checking whether the wall is drywall, block, tile over drywall, or a patched surface that looks solid but isn't. It also means looking at where moisture collects, whether the vanity lighting leaves enough room, and whether the mirror size creates pressure points that need better hardware than the cheap kit in the box.
Practical rule: Treat frameless mirror mounting like finish carpentry with glass. The cleaner the look, the less margin for error.
A sharp DIY homeowner usually has the tools to install a mirror. The bigger issue is patience. Rushed installs fail in predictable ways. Clips go slightly out of level. Anchors land in weak material. Adhesive gets used like caulk instead of as a controlled support system.
The right mindset saves the mirror
The professionals who get this right consistently tend to think the same way:
- They respect the glass. Frameless edges chip more easily than people expect during handling.
- They plan the weight path. The wall and hardware need a clear way to carry the load without asking the glass backing to compensate.
- They assume the wall may be lying. Fresh paint, texture, and tile can hide weak substrate.
- They slow down before the permanent steps. Once adhesive is on the back or holes are drilled in the wrong place, the correction gets expensive fast.
That's the right mindset for a lasting install in any house. In Southwest Florida, where damp air and mixed wall materials add complications, it isn't just good practice. It's the difference between a mirror that stays crisp and one that slowly turns into a callback.
Layout and Prep Work The Foundation of a Secure Mirror
A frameless mirror install starts on paper and on the wall, not with hardware in your hand. In Naples and Fort Myers homes, I see more trouble from bad layout and poor surface prep than from the actual mounting step. The mirror is usually fine. The wall conditions and the measurements are what cause the callback.
Set the position based on the room, not a generic guess
Start by deciding where the mirror needs to live in relation to the vanity, faucet, backsplash, and light fixture. The goal is a mirror that looks centered, clears the splash zone, and gives a comfortable sightline for the people using it every day.
There are common placement ranges for bathroom mirrors, but treat them as a starting point only. Tall vanities, thick backsplashes, under-mounted lighting, and off-center plumbing all change the final layout. In Southwest Florida, I also check whether the wall has any signs of past moisture around the vanity before I commit to height and width marks.
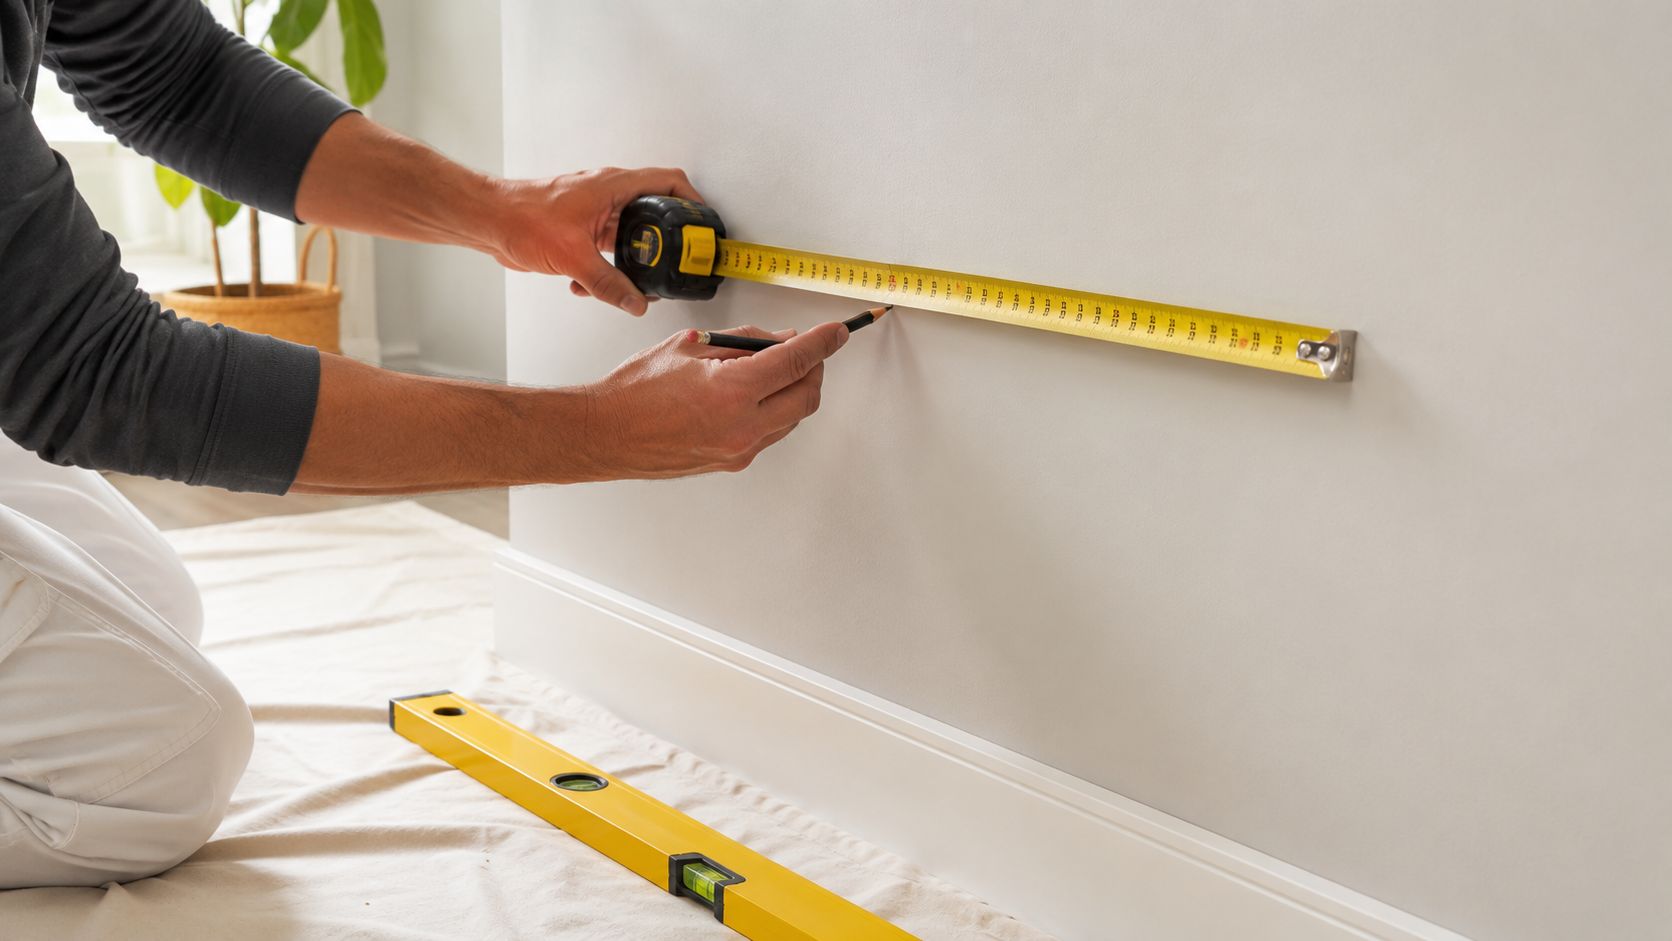
If you are still deciding on shape and proportions, review different mirror and specialty glass styles before you lock in the footprint. Style affects placement more than homeowners expect, especially over double vanities or narrow sink walls.
Mark the wall with install marks, not rough guesses
Good layout marks answer three questions. Where is the true center? Where will the bottom support line sit? What nearby element will make the mirror look crooked if you ignore it?
Use this sequence:
- Mark the vanity centerline. Measure the vanity itself, not the room, and transfer that true center to the wall.
- Lay out the mirror width from center. Mark both side edges so you can check reveal and spacing before drilling.
- Draw a level reference line. Use a real level to mark the bottom edge or clip line.
- Dry-check the surroundings. Look at sconces, faucet alignment, switch plates, backsplash height, and medicine cabinet doors if there are any nearby.
A vanity top can be slightly off even in a well-finished bathroom. If you follow the vanity instead of a level line, the mirror will show the error every time you walk into the room.
Check the wall before you trust it
A common point of failure in DIY installs is assuming the wall is solid because it looks finished. Fresh paint can hide patched drywall. Tile can hide weak backer. Texture can throw off clip alignment if you do not account for it.
Use a stud finder on drywall and confirm anything questionable before you drill. On tile, inspect for loose spots, hairline cracks, or hollow sound around the planned anchor points. In older Southwest Florida bathrooms, I pay close attention to walls near exterior block construction, furred-out surfaces, and areas that have seen years of humid air and repeated repainting. Those walls do not all behave the same.
Then prep the surface like the adhesive or hardware depends on it, because it does.
- Remove residue. Soap film, dust, hairspray buildup, and paint chalk weaken bond strength.
- Check firmness. Press around anchor locations. Crumbling drywall paper or soft tile backing is a stop sign.
- Let the wall dry fully. Bathroom walls in SW Florida can hold moisture longer than they look like they do.
- Keep marks clean. Light, exact marks make drilling and clip placement more accurate.
Prep quality shows up in the finished look
Anyone can hold a mirror against a wall. A clean install depends on layout lines that are level, support points that land in material with real holding strength, and a surface that is dry and stable.
That is the part DIY homeowners tend to underestimate. If the wall is questionable, the tile is brittle, or the substrate does not give you a trustworthy anchor plan, stopping before the first hole is often the smart decision. In this climate, caution saves glass.
Choosing Your Mounting Method Clips Adhesive or Both
Mounting method is where a clean-looking mirror either stays put for years or starts showing problems a few months into daily bathroom use. In Naples and Fort Myers, I do not choose clips, adhesive, or a hybrid by appearance alone. I choose based on mirror size, wall condition, moisture exposure, and whether the wall gives me a support plan I trust.
There are three workable options. Clips only, adhesive only, or clips plus adhesive. Each has a place. Each also has a failure point if it is used on the wrong wall or with the wrong mirror.
What each method does well
Use the method that matches the wall as much as the glass.
| Method | Best For | Pros | Cons |
|---|---|---|---|
| Clips | Small to medium mirrors, installs where future removal matters, walls that can hold anchors properly | Visible mechanical support, easier service later, no cure time | Hardware stays visible, clip alignment has to be exact, poor anchors loosen over time |
| Adhesive | Clean sightlines on flat, sound surfaces with the right mirror-safe product | No visible edge hardware, clean finished look | Removal is difficult, bond depends on prep and wall condition, wrong adhesive can damage mirror backing |
| Clips plus adhesive | Most vanity mirrors and long-term bathroom installs | Mechanical support during install, better resistance to small movement, cleaner look with fewer exposed clips | Placement has to be right the first time, more steps, not ideal on weak or damp substrates |
For homeowners sorting through hardware choices, mirror mounting products and glass solutions help show the difference between light-duty clip kits and support hardware built for larger bathroom mirrors.
Clips are simple, but only if the wall is dependable
Clips work well when the mirror is modest in size and the anchor points land in material with real holding strength. Bottom clips carry the load. Top clips keep the mirror from tipping or walking forward. If the lower fasteners are weak, the whole setup is living on borrowed time.
That is the part many DIY installs miss in Southwest Florida. Drywall near a shower, a furred-out block wall, or tile over questionable backing can all hold a screw today and still fail early. A clip-only install on a bad substrate is not conservative. It is risky.
For heavier mirrors, small plastic clips can also create point-load problems. A bottom channel or heavier support hardware often spreads weight better and reduces stress at a few tiny contact points.
Adhesive works, but only with the right product and the right wall
Adhesive gives the cleanest look, which is why homeowners ask for it. The problem is that a clean look does not correct a bad surface. If the wall is out of plane, still holding moisture, or covered in old residue, adhesive will not forgive it.
Use a mirror-safe mastic, not a leftover construction adhesive from the garage. Some general adhesives can attack the mirror backing and show up later as black edge damage or silver loss. In a humid bathroom, that mistake gets expensive.
I also stay cautious about adhesive-only installs in Florida bathrooms unless the wall is flat, dry, and stable. Adhesive can hold very well, but if the substrate is suspect, the bond is only as good as what it is stuck to.
The hybrid method is usually the safest call
For many vanity mirrors, clips plus mirror-safe adhesive is the method that gives the best margin for error and the best long-term result. The clips provide immediate physical support. The adhesive limits movement and helps the mirror sit tight to the wall once cured.
That combination matters in humid rooms where materials expand, contract, and stay under more stress than they would in a dry interior space. It also gives a cleaner finished look because you can often use fewer visible clips without asking adhesive to do all the work.
A DIY homeowner can handle this method on a sound wall with a manageable mirror and a clear anchor plan. If the mirror is large, the wall is questionable, or the install is over brittle tile or stone, that is usually the point where calling a pro makes more sense than pushing through. One cracked tile, one failed anchor, or one bad adhesive choice can turn a straightforward mirror install into wall repair and replacement glass.
Executing the Installation Safely and Accurately
This is the point where patience matters most. By now, the wall should be marked, the hardware should match the mirror, and the surface should be ready. The install itself should feel deliberate, not improvised.
Start with the one step that gets skipped most often. It's also the one that prevents the ugliest mistakes.
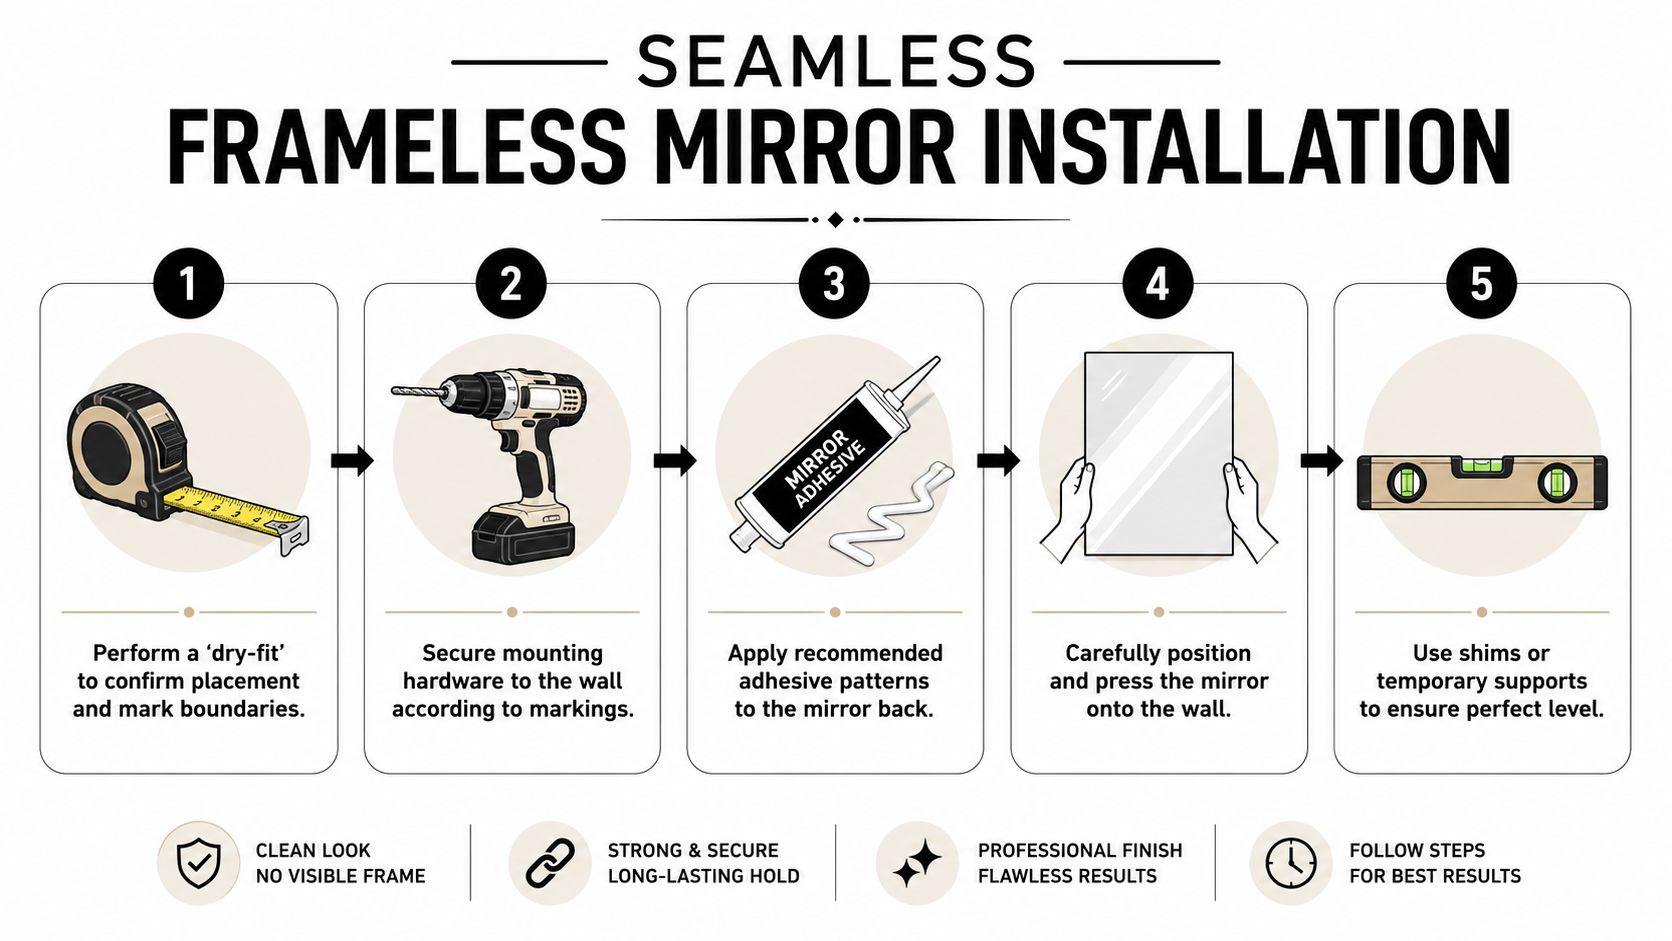
Dry-fit before anything permanent
Professional mirror installers require a dry-fit. The mirror is positioned against the wall to verify alignment before adhesive is applied, and Walker Glass notes that skipping this step is the most common cause of misalignment and installation failure.
That matters even more in bathrooms where outlets, light bars, backsplash lines, and slightly uneven walls can expose an error immediately.
Set the mirror in place with help. Check the reveal left and right. Confirm the bottom line, top clearance, and visual relationship to the faucet and lighting. If something feels off now, it will look worse once it's fixed in place.
Installation sequence that keeps control
A calm sequence works better than speed.
- Stage the area first. Put down a padded blanket or drop cloth. Keep gloves on so the edges stay clean and easier to grip.
- Install the bottom supports. Whether you're using clips or a channel, this support has to be level because the mirror will follow it.
- Test the mirror in the supports. Don't tighten anything permanently until you know the glass seats cleanly.
- Set top or side retention hardware. Leave enough flexibility to place the mirror without forcing the glass.
- Apply mirror-safe adhesive if your method calls for it. Keep the pattern controlled and consistent. Avoid random heavy blobs that create pressure points.
- Place and press carefully. Let the mechanical supports do their job. You're seating the mirror, not wrestling it into submission.
For homeowners planning other precision glass work in the home, the same handling discipline applies to projects like frameless shower door installation in Fort Myers, where alignment errors show immediately.
Use a helper before you need one
If you can't comfortably lift the mirror, hold it in place, and still check level, it's already a two-person job.
That's not just about weight. It's about control. One person can guide the bottom edge into clips or a channel while the other watches top clearance and keeps the glass from twisting. Frameless mirrors don't tolerate awkward diagonal loading well during placement.
Here's a useful visual reference before the final set:
Final adjustments matter
After placement, check level again. Don't assume the mirror stayed true just because the support line was level. Tighten clips evenly. If the system uses temporary support while adhesive cures, don't rush removal.
A professional-looking mirror usually comes from small corrections made early, not heroic fixes made late.
Wipe fingerprints from the edges, but don't soak the perimeter with cleaner right away. Let the installation settle according to the adhesive and hardware requirements you selected. The cleaner the execution here, the less likely you'll be troubleshooting movement later.
Why SW Florida Humidity Changes Everything
Mount a frameless mirror in a Naples or Fort Myers bathroom and the room starts testing your work on day one. Hot showers, long cooling cycles, and air that stays damp for months put stress on the parts you do not see first. The glass usually holds up. The problems start at the edges, behind the mirror, and in the wall surface carrying the load.
Humidity changes installation decisions before the mirror ever goes on the wall. A surface can look dry and still hold enough moisture, soap film, or paint weakness to shorten the life of the bond. In Southwest Florida, that is one of the biggest differences between a mirror that stays clean-looking and one that starts blackening at the edge or loosening in spots a year or two later.
Moisture affects more than the room
Warm, humid air finds cool surfaces. If the wall, tile, or cavity behind the mirror is hitting condensation conditions, the backside of the installation lives in a harsher environment than the front. For a clear explanation of how that happens inside building assemblies, Airtight Spray Foam Insulation's dew point insights are worth reading.
That is why local installers get picky about what looks like minor prep. We check for paint that powders under tape, patched areas that never cured right, and walls that stay cool and damp longer than they should. Mirror backing fails from the perimeter inward, so edge exposure matters more here than many homeowners expect.
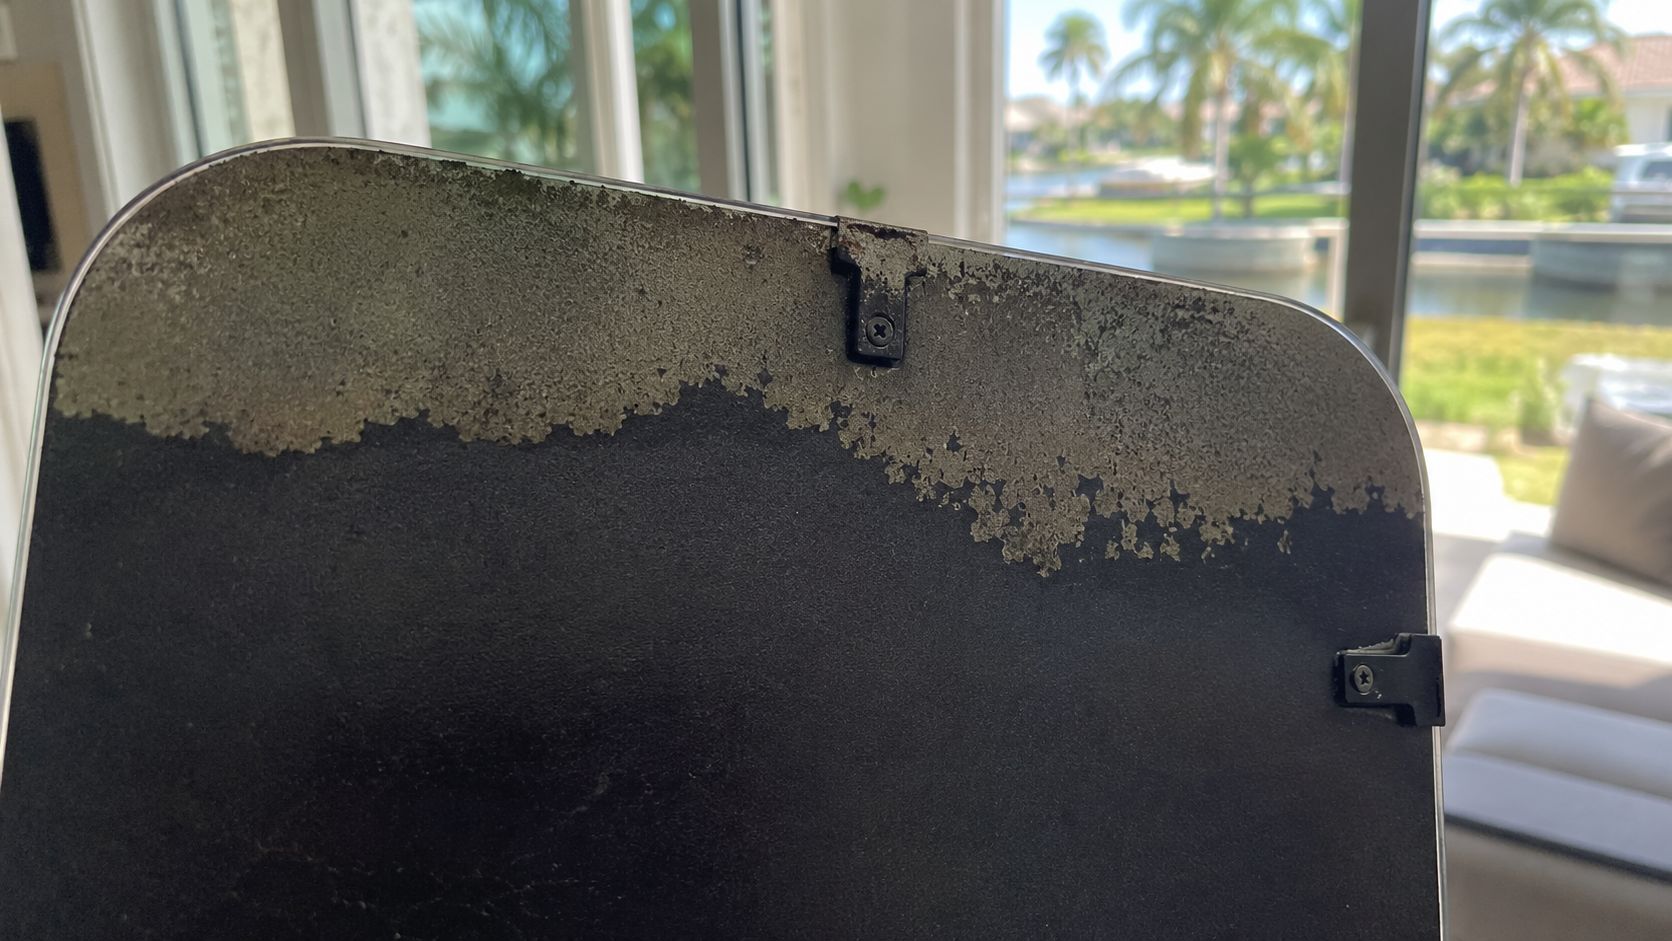
Product choice matters too. In this climate, I do not like gambling on bargain adhesive or light hardware if the bathroom sees daily steam. Mirror-safe adhesive, proper spacing, and mechanical support where the wall calls for it give the installation more margin when the room stays wet.
Wall type changes the risk
A lot of online mirror advice assumes clean drywall over wood studs. That is not how many SW Florida bathrooms are built.
Concrete block, tile over masonry, old skim coats, and repaired walls are common in Naples and Fort Myers homes. Each one changes how the mirror should be mounted. A fastener that works fine in drywall can be useless in block. A glossy tile face may need a different approach than painted board. A patched wall can pass a quick visual check and still fail under the steady pull of adhesive in a humid bath.
When facing certain conditions, DIY can stop making sense. If you are not fully sure what is behind the finish surface, or the wall shows past moisture issues, it is smarter to slow down and reassess before hanging a heavy sheet of glass.
Humidity also punishes bathrooms with poor airflow. Homeowners dealing with that pattern should pay attention to shower door maintenance practices because the same moisture habits that cloud glass and wear hardware also shorten the life of mirror installations.
Local standards need to be stricter
In Southwest Florida, the safer approach is to install for years of steam, cooling, and cleaning cycles, not for the first week after the mirror goes up. That means a cleaner substrate, better judgment about wall condition, and less trust in generic hardware kits.
That extra caution is not overkill here. It is what keeps a frameless mirror looking sharp in a real SWFL bathroom.
Finishing Touches and When to Call AmeriGlass
Once the mirror is mounted, don't walk away and call it done. The last part of the job is checking whether the installation behaves the way it should.
A frameless mirror should look still. Not almost still. If it rocks, clicks, flexes, or shows uneven pressure at the clips, something in the support system needs attention before the bathroom goes back into normal use.
Post-install checks that matter
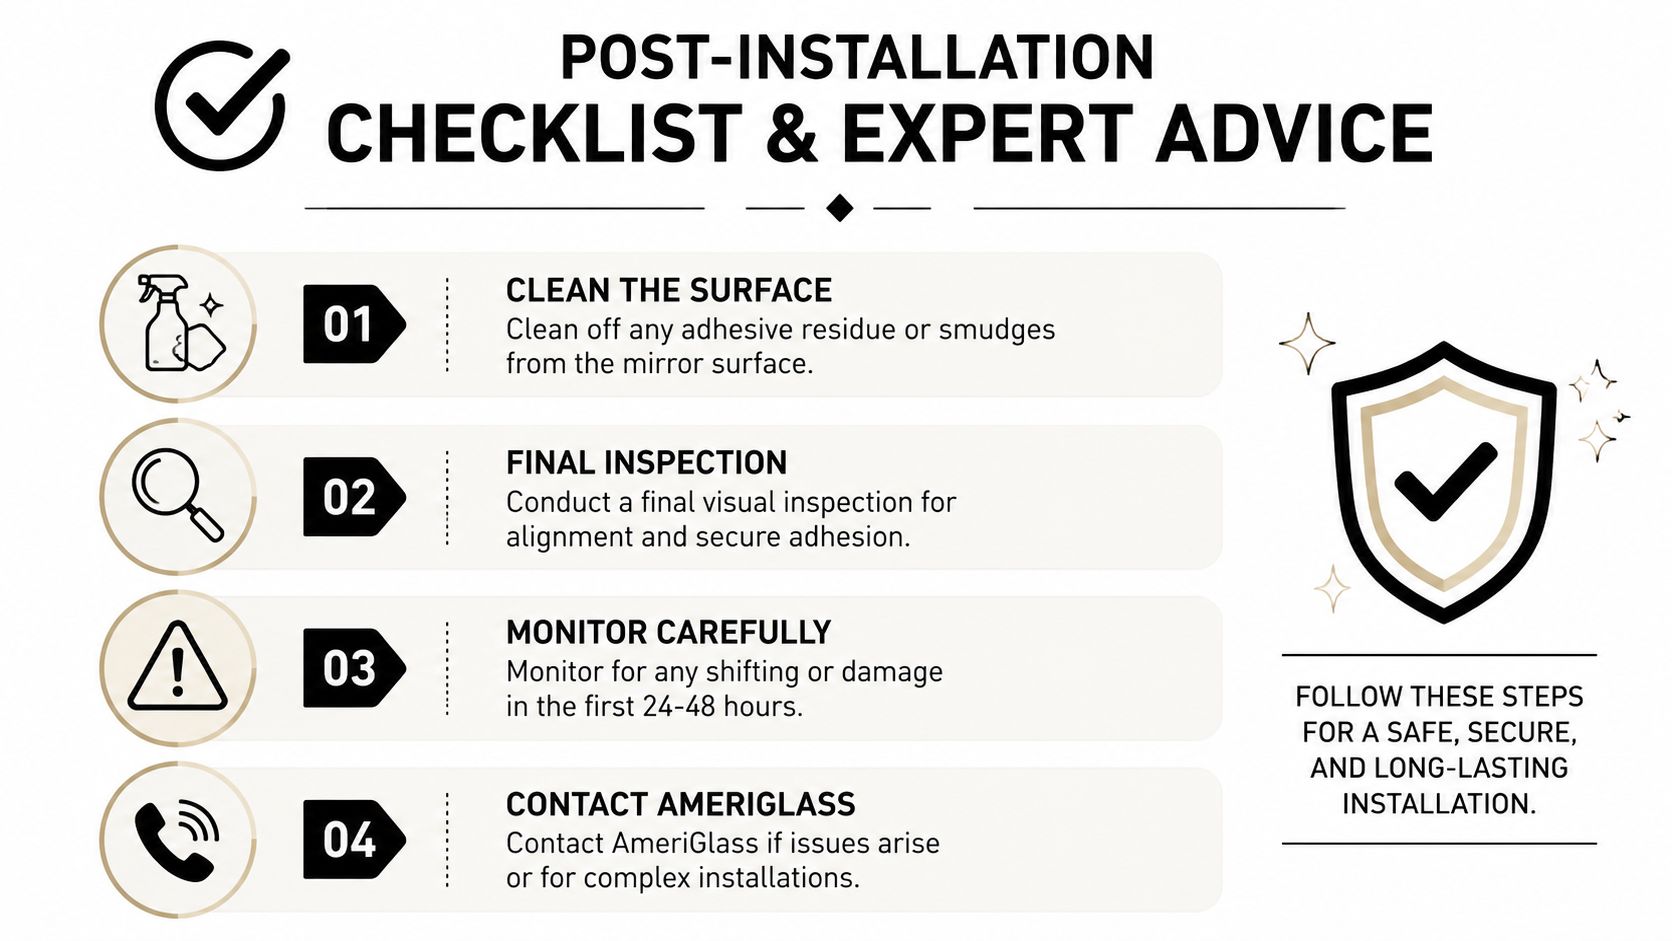
Do a disciplined final review:
- Clean carefully: Remove fingerprints, pencil marks, and any visible residue without flooding the edges.
- Inspect the sight lines: Step back and look at the mirror in relation to the vanity, sconces, and backsplash. Tiny errors show best from across the room.
- Check the hardware feel: Clips should be snug, not crushing. The mirror should feel supported, not pinched.
- Watch the first day or two: Any shift, gap change, or new wobble deserves immediate attention.
If a mirror needs to be “babied” after installation, it wasn't really finished.
Know when the DIY line has been crossed
Some installs stop being reasonable DIY projects even if the steps seem straightforward.
The most obvious cases are poor wall conditions. Verified guidance for difficult surfaces notes that on chalky or textured walls, standard DIY advice often falls short, and for heavy mirrors, drywall anchors alone will fail over time, making professional assessment the safer path, as discussed in this wall-condition Q&A on JustAnswer.
That's the moment to stop and reassess if you run into any of these:
The wall surface powders or flakes
Paint chalking, weak skim coat, or damaged drywall can make good hardware perform badly.
There's no reliable anchor path
If your clip locations miss studs and the wall condition is questionable, you're stacking one risk on another.
The mirror is large enough that handling it feels awkward
If placement requires balancing, twisting, or forcing the glass into hardware, the install is already unsafe.
The wall material isn't what you expected
Tile over unknown substrate, block, patched plumbing walls, and mixed materials all change the fastening strategy.
The smartest finish is an honest call
A sharp DIY homeowner doesn't prove anything by pushing through a bad setup. The true win is knowing whether the wall, mirror, and mounting method are compatible.
If you're confident in the prep, the support points are solid, and the mirror is sitting dead level with no movement, you're probably in good shape. If not, it's better to pause before a nice mirror becomes broken glass and wall repair.
For complex installs, unusual wall conditions, or mirrors that need precise professional handling, request a custom glass and mirror quote before the risk gets expensive.
If you want frameless mirror mounting done with precise measurement, clean installation, and materials suited to Southwest Florida conditions, contact AmeriGlass Industries. Their team handles custom mirrors, difficult wall conditions, and high-finish installations across Naples, Fort Myers, and surrounding areas.