

You know that feeling when you walk into a bathroom and it just breathes? Chances are, it has a frameless glass shower. This isn't just about swapping out a shower curtain; it's a genuine upgrade that transforms a bathroom from purely functional to a bright, spa-like escape. It’s easily the most popular choice for homeowners who want to make a cramped space feel open and luxurious.
The Art of the Invisible Upgrade
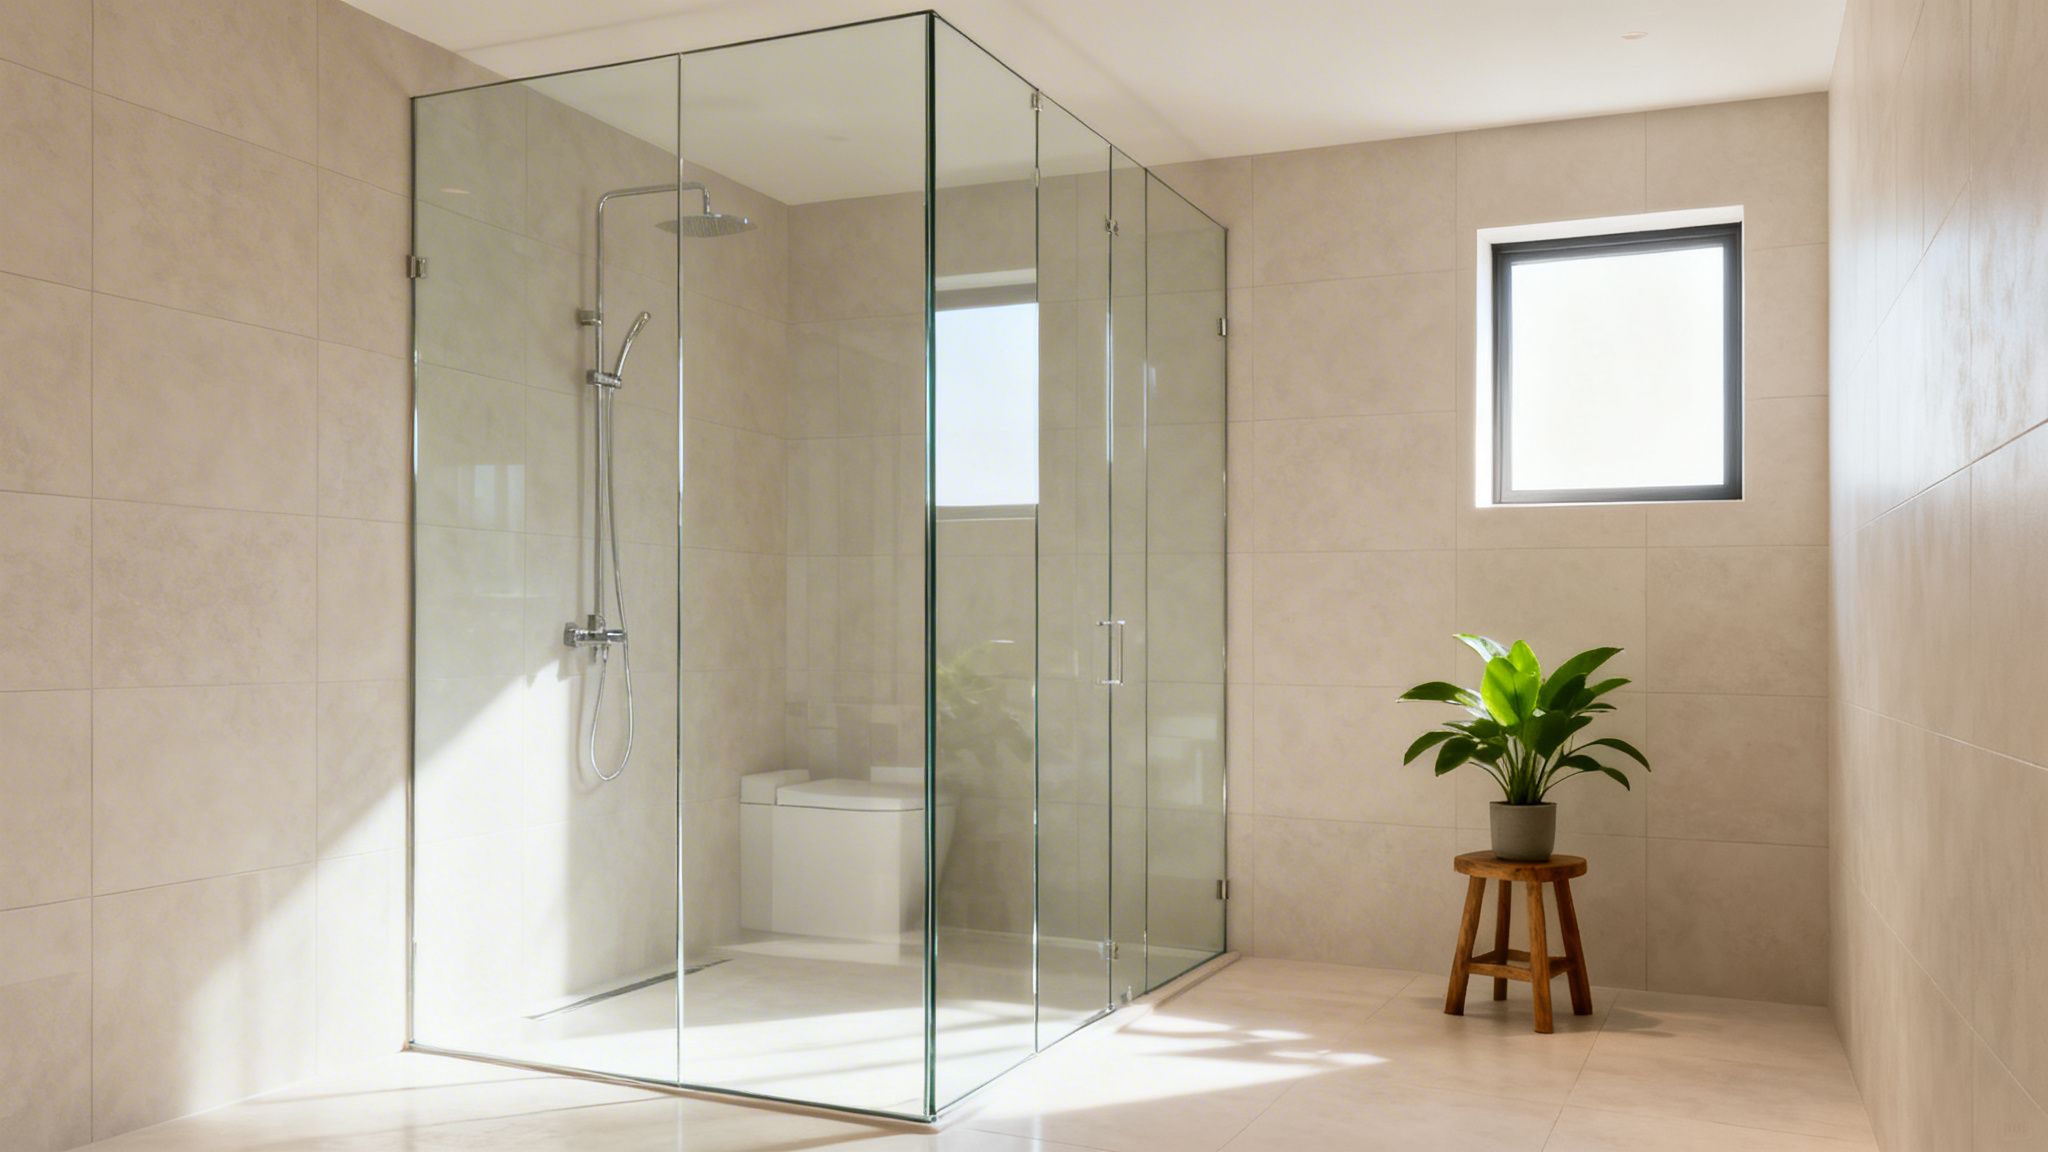
There’s a simple trick of the eye at play here. When you get rid of the bulky metal frames that box in traditional showers, your gaze can travel right across the room without interruption. This immediately creates an illusion of more space, a powerful effect in smaller guest baths or master bathrooms where every inch matters.
Beyond that, frameless glass lets light pour through the entire room. An old, framed enclosure can create dark corners and make a bathroom feel gloomy. A clear glass shower, on the other hand, acts almost like an extra window, brightening the whole space and showing off the beautiful tilework you invested in. Your design and lighting finally get to shine.
More Than Just a Pretty Face
This upgrade is also one of the smartest investments you can make, adding real, tangible value to your home. Especially in a hot real estate market like Southwest Florida, a modern, beautifully finished bathroom is a huge selling point. A frameless shower tells buyers your home is updated and high-quality, setting it apart from properties with dated fixtures.
The numbers back this up. The U.S. shower glass door market is on track to more than double its 2019 value, projected to hit $6,781.9 million by 2030. While a new frameless door can cost anywhere from $300 to $3,000 for the materials alone, its massive market share proves homeowners recognize the long-term value.
At AmeriGlass Industries, we see this firsthand every day. Clients are always floored by how one project can completely redefine their bathroom's atmosphere, turning it into their own personal retreat.
Why Professional Installation is Non-Negotiable
Getting that perfectly clean, "invisible" look is deceptively difficult. A successful frameless glass shower doors installation lives and dies by the precision of its measurements and a deep understanding of how to handle walls and floors that are never perfectly level. The tiny details are what separate a professional job from a leaky, frustrating DIY attempt.
A professional touch guarantees:
- Perfect Alignment: Gaps between the glass panels are minimal and uniform, which is key to preventing leaks and achieving that crisp, clean aesthetic.
- Structural Integrity: These heavy glass panels need to be anchored securely into wall studs. This isn't just for looks; it's a critical safety measure.
- A Flawless Finish: From the perfectly placed hardware to the clean, almost invisible bead of silicone, the finish is what makes it look truly custom.
This is where local experience in places like Naples, Fort Myers, and Bonita Springs really pays off. A seasoned installer knows how to anticipate problems, like an uneven shower curb or tricky tile layouts, ensuring the final product isn't just stunning but also built to last. You can learn more about how a professional glass company can make your home feel luxurious in our related article.
Planning Your Project Like a Professional
A flawless frameless glass shower installation is won or lost long before you ever touch a drill. I can't stress this enough: your success is 90% preparation and only 10% execution. This planning phase is your chance to catch and solve problems on paper—not on your brand-new, very expensive glass panels.
Before you even think about ordering glass, you need to become an expert on your own bathroom.
Your first mission is to play detective. Most homes, even brand-new ones, have walls that aren't perfectly plumb (vertical) or curbs that aren't perfectly level (horizontal). These tiny imperfections are the number one killer of DIY shower projects. Grab a good 4-foot level and check every single surface the glass will touch: the walls, the curb, and any pony walls involved.
See a bubble that isn't dead center? You've found an out-of-plumb or out-of-level condition. A slight lean might be something you can work with, but a major one will demand custom-cut glass or special hardware to make it right. If you ignore it, you’re setting yourself up for uneven gaps, a door that swings on its own, and a leaky mess.
Mastering Your Measurements
There is absolutely no room for error here. A flimsy, retractable tape measure just won’t cut it; it can easily introduce mistakes. You need a high-quality, rigid tape measure for this job. Always, and I mean always, measure to the nearest 1/16th of an inch.
No matter the layout, you must measure the width at three key points:
- The Top: Right where the top edge of the glass will sit.
- The Middle: Roughly halfway up the height of the enclosure.
- The Bottom: Directly on the shower curb or floor where the glass will rest.
Don't ever assume these three numbers will be the same. I've seen it time and again—a difference of 1/8-inch or more from top to bottom means your walls are leaning. Always write down the smallest of the three measurements for each opening. You can always shim a gap that's a little too big, but you can't make the glass smaller once it's cut.
If you're tackling a large project, understanding the nuances of big glass structures is key. For a different perspective that can still offer some great insights, check out this excellent guide on glass partition walls.
Essential Tools and Materials Checklist
Gathering everything beforehand is key. Here's a no-fluff list of exactly what you need for a professional-grade installation.
| Category | Item | Pro-Tip / Specification |
|---|---|---|
| Measurement & Layout | Heavy-Duty Tape Measure | A 25-foot rigid tape is best. Avoid flimsy, cheap ones. |
| Measurement & Layout | 4-Foot or 6-Foot Level | The longer the level, the more accurate your plumb/level readings. |
| Measurement & Layout | Laser Level | Optional but highly recommended for establishing perfect horizontal lines. |
| Installation | Cordless Drill/Driver | A model with an adjustable clutch helps prevent over-tightening. |
| Installation | Diamond-Tipped Drill Bits | Absolutely essential for drilling into tile or stone. |
| Installation | Caulking Gun | A high-quality, drip-free model will save you a lot of headaches. |
| Installation | Rubber Mallet | For gently tapping glass into U-channels or setting blocks. |
| Safety | Safety Glasses | Non-negotiable. Glass chips are a serious hazard. |
| Safety | Heavy-Duty Gloves | Look for cut-resistant gloves to protect your hands. |
| Materials | 100% Silicone Sealant | Mildew-resistant and specifically designed for kitchens and baths. |
| Materials | Denatured Alcohol | For cleaning glass and tile surfaces before applying silicone. |
| Materials | Setting Blocks | Small rubber or neoprene blocks to cushion the glass. |
| Materials | Painters' Tape | For marking layouts and protecting surfaces. |
Having this kit ready to go separates a smooth project from a frustrating one. Trust me on this.
Choosing Your Glass Thickness and Type
With precise measurements in hand, you can finally think about the star of the show: the glass itself. The two main thicknesses for frameless showers are 3/8-inch and 1/2-inch. While 3/8-inch is a fantastic, industry-standard choice, 1/2-inch glass feels incredibly solid and luxurious. That extra weight gives it a substantial presence you can feel every single time you open the door.
Next up is the type of glass. You'll choose between standard clear and ultra-clear (also known as low-iron) glass. Standard glass has a subtle green hue from its natural iron content, which you can easily see on the edge. This can slightly tint the appearance of your beautiful new tile.
Ultra-clear glass, on the other hand, has most of that iron removed. The result is a stunningly clear panel that lets the true colors of your tile and bathroom design shine through. The difference is night and day. If you’ve invested time and money into picking the perfect tile, you can read our detailed comparison of standard vs. ultra-clear glass to see why it’s worth protecting that choice.
Choosing the right glass is more than just a technical detail; it's a design decision. Ultra-clear glass ensures your bathroom's color palette remains pure and unaltered, which is crucial for achieving that bright, airy, high-end aesthetic.
This focus on quality is why frameless designs are exploding in popularity. They've become the clear favorite, now making up over 40% of all shower door installations in luxury homes. With the global market projected to hit $2.5 billion in 2025, the move toward minimalist, premium materials is undeniable.
Why Protective Coatings Are a Must in Florida
Finally, let's talk about protective coatings. Here in Southwest Florida, our hard water is brutal. It leaves behind mineral deposits and water spots that can permanently etch your glass, making it look cloudy over time. A factory-applied coating like Diamond-Fusion is a total game-changer.
This isn't just a spray-on treatment; it creates an ultra-slick, hydrophobic surface at a microscopic level. Water literally beads up and rolls right off, taking minerals and soap scum with it. This slashes your cleaning time and stops that dull, grimy buildup before it ever starts. While it adds a bit to the upfront cost, it protects your investment for years and is an essential upgrade, not a luxury.
From Box to Beautiful: The Installation
That moment the truck pulls up with your custom glass is both exciting and a little nerve-wracking. The vision is about to become a reality, and it's time to shift from planning to doing. Let's walk through this the way our pros handle it every day, sharing the kind of tips you only learn from experience.
Your very first job is the most critical: unpack and inspect everything. Find a soft surface—a blanket or even the cardboard packaging will do—but never lay glass directly on hard tile. With gloves on, run your hands carefully along every polished edge and check the corners for any dings. Look closely for scratches or imperfections that could have happened in shipping. Then, inventory your hardware kit. Do you have all the hinges, clamps, and handles? Is the finish correct?
This isn't just unpacking; it's your last chance for quality control. Finding a chip now is an easy fix with a phone call. Finding it after you've started drilling holes in your tile is a full-blown disaster that stops the entire project.
Setting the Stage for Drilling
Once you've confirmed every piece is perfect, it's time to map out the installation right on your shower walls and curb. This is where you get to see it all come together before making anything permanent. I always use painter's tape to mark the exact footprint of the fixed panels and to visualize the door's swing path. It's a simple way to double-check your clearances and make sure everything feels right.
When it comes to marking your drill holes for hinges and clamps, a grease pencil or a simple dry-erase marker is your best friend. They leave a clear, bold mark on the tile that you can easily see, and it wipes away completely with a bit of denatured alcohol when you're done. It's so much better than a pencil you can barely see or, worse, a permanent marker that can stain your grout for good.
This three-step process—assessing your space, taking precise measurements, and choosing the right components—is the bedrock of a flawless installation.
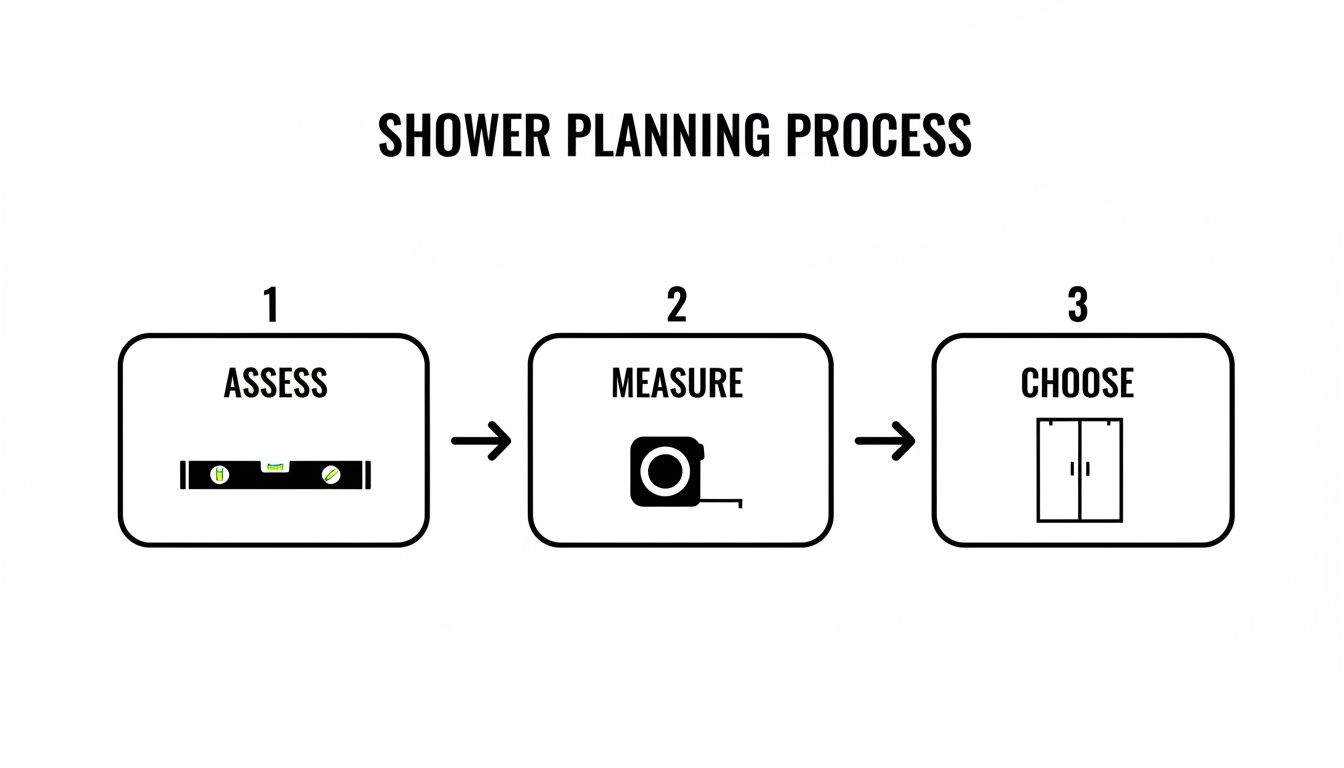
As the diagram shows, each step logically follows the last. Skipping ahead is how you end up with costly mistakes and a lot of frustration.
The Art of Drilling Into Tile
Drilling into tile, especially tough modern porcelain, is what gives most DIYers nightmares. This is where a beautiful project can go sideways with one costly crack. But the secret isn't brute force; it's all about having the right tool and a patient hand.
You need a diamond-tipped drill bit made specifically for glass and tile. Don't even think about using a standard masonry bit—it will skate across the surface, chip the glaze, and almost certainly crack the tile when you apply pressure.
Here’s the technique we swear by:
- Start Slow. Set your drill to a very low speed and use only gentle pressure. Think of it as patiently grinding through the hard glaze, not punching a hole in it.
- Get a Foothold. To keep the bit from "walking" on you, start drilling at a 45-degree angle to create a small crescent-shaped divot. Once you have that tiny notch, you can slowly pivot the drill up to 90 degrees and it will stay put.
- Keep It Cool. Heat is the enemy. Keep a spray bottle of cool water nearby and give the drill site a little spritz every few seconds. This prevents the bit and the tile from overheating, which is what causes most stress cracks.
- Ease Up at the End. The moment you feel the bit break through the back of the tile, you're golden. You can switch to a regular drill bit to go through the backer board or wall stud behind it if you need to.
Taking your time here turns the riskiest part of the job into a controlled, predictable process. Rushing is the most expensive mistake you can make.
Setting Your Panels and Hanging the Door
Listen to me on this: this is a two-person job. Full stop. A standard tempered glass door can easily weigh over 75 pounds. Trying to maneuver that into place by yourself isn't just a bad idea, it's downright dangerous.
Begin with your fixed glass panels. Place small, 1/8-inch rubber or plastic setting blocks on the curb right where the glass will sit. These little blocks are non-negotiable; they protect the glass edge from the hard tile and create the perfect, uniform gap you'll need for silicone later.
Pro Tip: Always, always dry-fit everything first. Place your fixed panels into their clamps or U-channels and hang the door on its hinges before a single drop of silicone is applied. Check your gaps and make sure everything is perfectly aligned. It’s a thousand times easier to nudge a clamp now than it is to cut out cured silicone later.
With your fixed panels sitting on their blocks and perfectly plumb (use that level!), you can gently tighten them down. If you're using clamps, snug them up. If you're using U-channels, the silicone will provide the final bond.
Now, with your helper, lift the door and set it into the wall-mounted hinges. Follow the manufacturer's guide for securing the hinge plates. Once it's secure, give the door a few slow swings. It should move freely, without any binding or sagging.
The Final Seal for a Watertight Finish
The last real step is applying the silicone and seals. This is what makes your shower not just beautiful, but completely watertight. Before you even pick up the caulk gun, wipe down every joint—where glass meets tile and glass meets glass—with denatured alcohol. This gets rid of any dust or finger oils and ensures a perfect bond.
Make sure you're using a high-quality, 100% mildew-resistant silicone designed for bathrooms. Cut the nozzle tip at a slight angle to create a small opening. Apply one smooth, continuous bead along the base and vertical joints of the fixed panels.
For that perfectly crisp, professional-looking line, lay painter's tape on both sides of the joint, run your bead of silicone, smooth it with a caulking tool or a wet fingertip, and then immediately pull the tape away.
Finally, press the clear polycarbonate seals onto the edges of the door—one for the bottom sweep and one for the strike side to close the gap. Now for the hardest part: let the silicone cure for a full 24 hours before using the shower. Don't rush it. This curing time is what creates the durable, waterproof seal that will last for years.
A project like this is a significant undertaking. If you're weighing your options, our work on frameless shower doors glass installation in Fort Myers Beach FL demonstrates what true professional craftsmanship looks like.
When Things Don't Go Perfectly: Problems and Safety
Alright, let's talk about what happens when things don't go perfectly to plan. Because in the real world of home renovations, they rarely do. No matter how carefully you measure, you’re bound to run into a wall that’s not quite straight or a curb with a mind of its own.
This isn’t a reason to panic. It’s just part of the process. The difference between a DIY disaster and a professional-looking installation is knowing how to handle these little curveballs. We'll walk through the most common hiccups and, just as importantly, cover the safety rules that are absolutely non-negotiable.
Troubleshooting Common Installation Hurdles
So, you’ve got your fixed panel in the U-channel, you pull out your level, and… it’s perfect. But when you look at the wall, you see a glaring, wedge-shaped gap. This is the classic out-of-plumb wall, and it happens all the time. You’ve got a couple of pro-level tricks up your sleeve here.
For a small gap, your best friend is a tapered vinyl shim. These are thin, flexible plastic strips you can slide right in between the wall and your U-channel or clamp. Just snug them in before you tighten everything down and trim the excess with a utility knife. It’s a clean, solid fix that’s virtually invisible.
If the gap is more significant—say, over 1/8-inch—you’ll want to reach for clear silicone. This is where a little patience pays off. Run a line of painter's tape along the tile and another along the edge of the glass to get super clean lines. Then, apply a generous, steady bead of silicone to completely fill the void. Tool it with a wet finger or a finishing tool, pull the tape, and you’ll have a seamless, watertight seal that makes the wall's imperfection disappear.
And what if your shower curb has a slight slope? A major slope that sends water running out of the shower is a much bigger problem, but minor ones are manageable. If you’re dealing with a dip of less than 1/16-inch, you can often correct it with your setting blocks. Simply use a standard 1/8-inch block on the high side and a shorter 1/16-inch block on the low side. This will keep the top of your glass panel perfectly level, and the flexible vinyl seal at the bottom of the door will easily close the small gap.
Glass Handling and Safety: This Is Non-Negotiable
Tempered glass is incredibly tough stuff, but it demands respect. It can take a surprising amount of force head-on, but its edges are its Achilles' heel. A sharp knock on an edge or corner is all it takes to make the entire panel explode into thousands of tiny, pebble-like pieces. It’s a safety feature designed to prevent deadly shards, but it means you have to handle it with extreme care.
Here are the absolute must-follow rules:
- You Need a Helper: This isn't a suggestion. A single glass panel can easily weigh 75-100+ pounds. Trying to lift, carry, and position one by yourself is a recipe for disaster. Always work with a partner.
- Gear Up: At the very least, you need cut-resistant gloves and safety glasses. Your hands and eyes are too valuable to risk.
- Protect the Edges: Never, ever set the glass directly on a hard surface. Don't let it touch tile, concrete, or stone. Always use your rubber or plastic setting blocks, some scrap wood, or even the cardboard packaging to cushion the edges and corners.
I've seen it happen more times than I can count. The number one cause of glass breaking during an install is a tiny, seemingly harmless tap of a corner against the tile floor. Treat the corners of the glass like they're made of eggshells—because when it comes to impact, they might as well be.
Don't Guess on Building Codes
Your responsibility for safety doesn't end when the last screw is tightened. Local building codes are in place for a reason, and they are very clear about shower enclosures. In Florida, any glass used in a "hazardous location" like a shower must be certified safety glass.
This means the glass has to be tempered and meet specific safety standards, like those outlined in ANSI Z97.1. This isn't optional. Using regular annealed glass is a huge code violation and, more importantly, a massive danger to your family.
Reputable glass suppliers make this easy. Your panels will arrive with a small, permanent etching in one of the corners (we call it a "bug"). This is the official certification mark that proves it’s tempered safety glass. An inspector will look for it, and you should too. For our clients in Southwest Florida, we ensure every piece of glass we install is fully compliant, giving you total peace of mind.
Keeping Your Glass Crystal Clear for Years
Alright, your stunning new shower is in, and it looks incredible. The final piece of a successful frameless glass shower doors installation is knowing how to protect that investment. The secret to long-term beauty isn't complicated; it just comes down to a few simple habits that stop hard water and soap scum in their tracks.
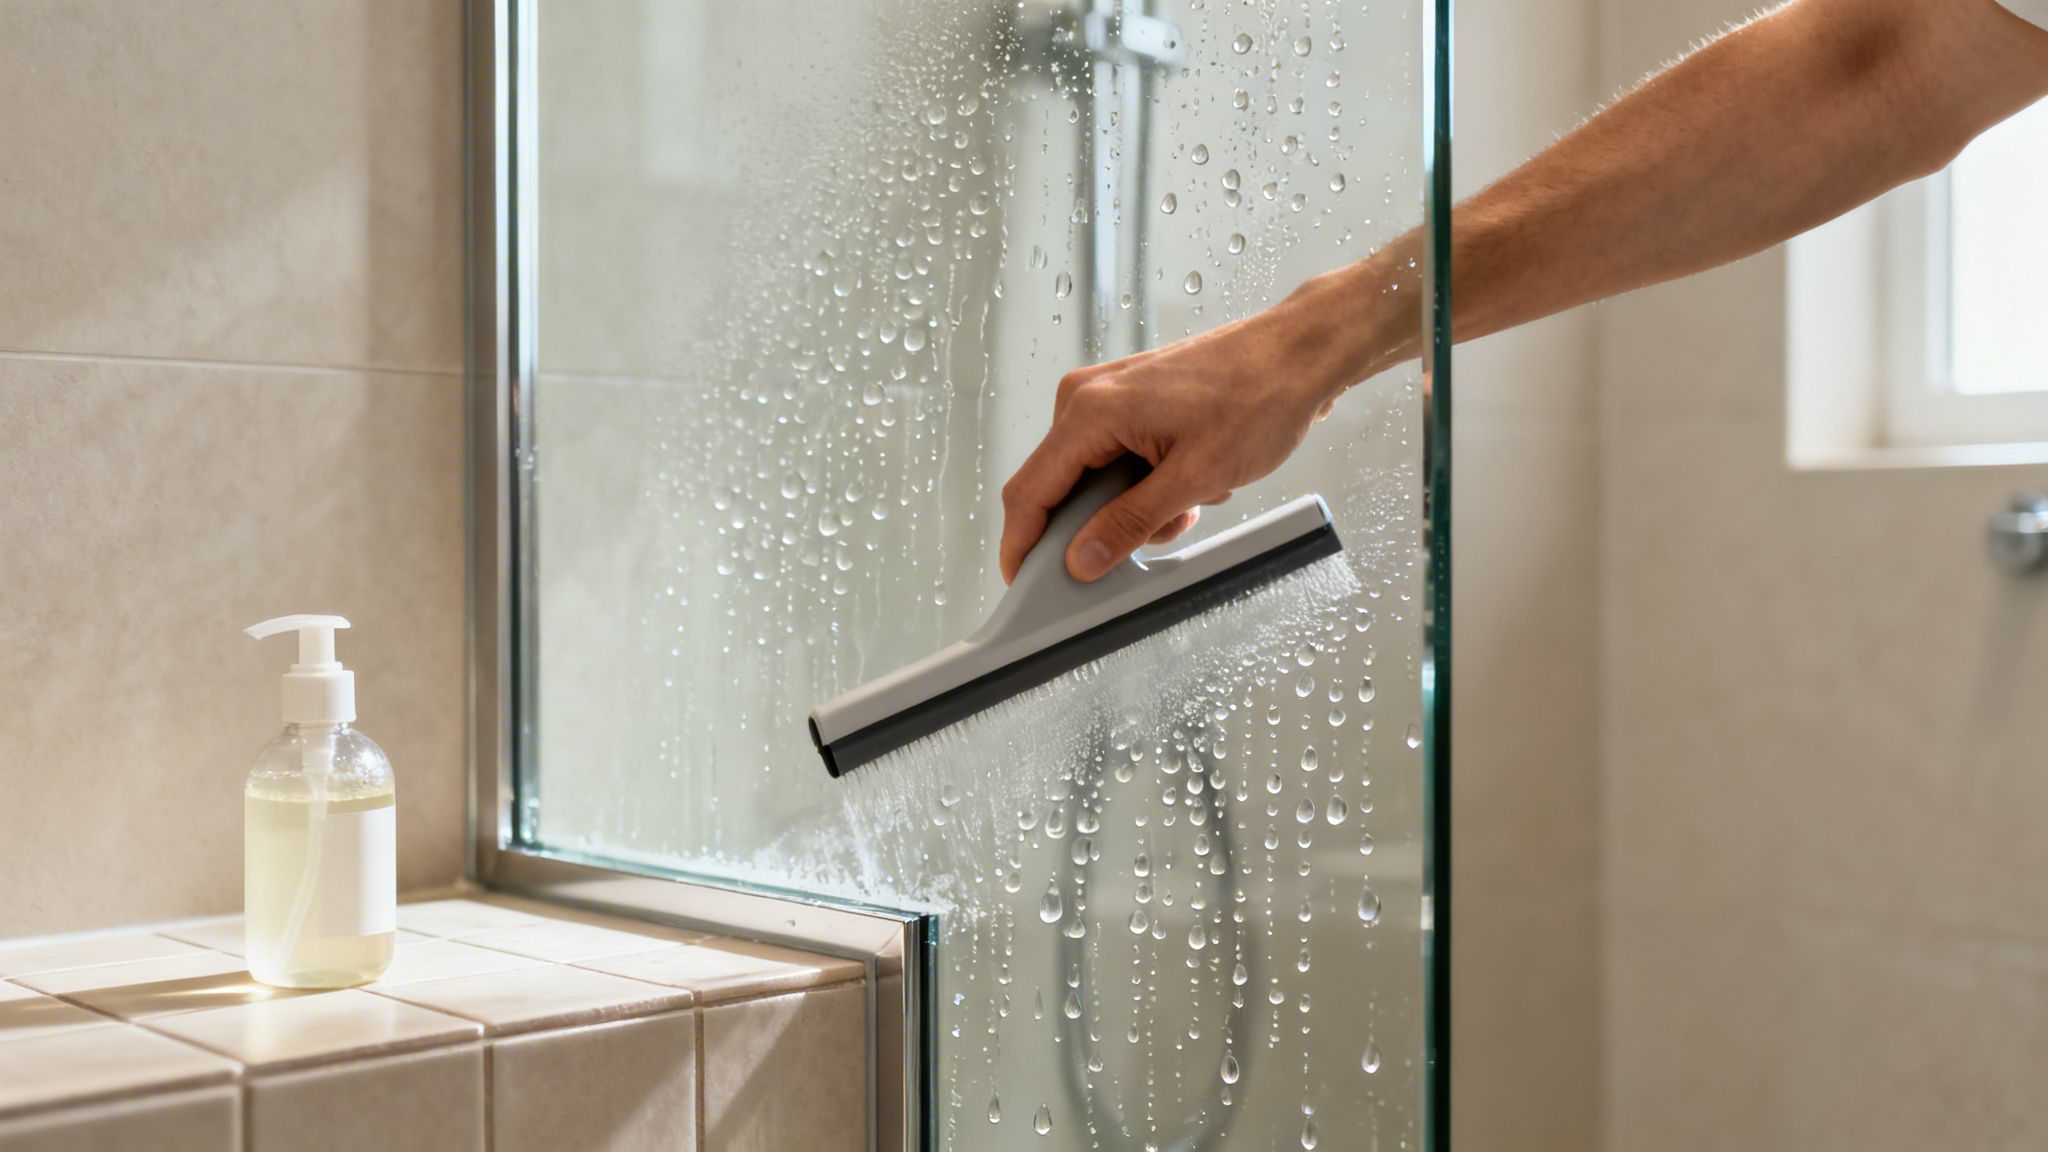
I can’t stress this enough: get a good quality squeegee and use it after every single shower. It takes less than 30 seconds. This one tiny action physically removes the water droplets before they can evaporate and leave behind those chalky, damaging mineral deposits. Making this a daily ritual is, without a doubt, the number one way to prevent that cloudy, etched look that plagues so much glass.
The Power of Protective Coatings
While a squeegee is your best daily habit, a professionally applied protective coating is the ultimate upgrade—especially for us here in Southwest Florida, where hard water is a constant battle.
Treatments like Diamond-Fusion aren’t just a simple polish you wipe on. They actually bond with the glass on a molecular level, creating an ultra-slick, hydrophobic surface. Water literally can't stick to it. Instead, it beads up and zips right off, taking minerals and soap residue with it. This means way less scrubbing for you and glass that stays pristine with very little effort.
This desire for low-maintenance luxury is a big reason why these high-end shower features are booming. Homeowners are doing their homework online, and it shows. By 2026, it's projected that online sales will account for 28% of the frameless door market, as people digitally research and choose these products for their homes. You can learn more about this trend and market growth on PR Newswire.
Cleaners That Can Ruin Your Glass
What you don’t use on your glass is just as critical as what you do. So many common household cleaners will cause irreversible damage to the glass and the hardware.
Stay far, far away from anything abrasive. This means powdered cleansers like Comet, scrubby sponges, and definitely no steel wool. They create thousands of microscopic scratches in the glass surface, which then become perfect little traps for soap scum and minerals. Once that happens, the glass will never truly look clean again.
You also have to be careful with harsh chemicals. The following products can strip off protective coatings and eat away at the finish on your beautiful new hinges and handle:
- Vinegar-based cleaners: That high acidity is terrible for hardware finishes over time.
- Ammonia or bleach: They're just too aggressive and can damage both the glass and the silicone seals.
- Abrasive creams or powders: As mentioned, these will permanently scratch the glass.
Honestly, all you really need is a simple, pH-neutral glass cleaner or even a few drops of dish soap in warm water for the occasional deeper clean. When you pair that gentle approach with a daily squeegee habit, your shower will look just as good in five years as it does today.
For a more detailed breakdown, be sure to check out our complete guide on essential shower door maintenance tips.
When to Trust the Pros in Southwest Florida
I get it. Tackling a DIY frameless glass shower doors installation feels like a great way to save a few bucks and earn some serious bragging rights. And while this guide gives you a solid game plan, the smartest tool you have is knowing when to leave it on the shelf.
Honestly, some situations have "call a pro" written all over them. There’s a huge difference between a straightforward project and one that’s a disaster waiting to happen. If you put a level on your walls and it looks like a ski slope, or your shower curb is anything but perfectly flat, that’s not a simple adjustment. For an experienced installer, that's just a Tuesday. We see those "imperfections" and know exactly how to template and custom-cut the glass to make it fit perfectly.
Red Flags That Point to Calling a Pro
Some shower designs are just a different beast entirely. It’s one thing to hang a single door; it’s another to engineer a complex glass structure. You have to be brutally honest with yourself about where that line is.
Here are a few scenarios where I’d tell any homeowner to put down the drill and pick up the phone:
- Complex Multi-Panel Designs: Trying to perfectly align a door, a fixed panel, and a return panel is a geometric nightmare if you haven't done it a hundred times. The slightest mistake throws the whole thing off.
- Steam Shower Enclosures: These aren't just shower doors; they're fully sealed systems. One tiny gap and you’re dealing with moisture escaping where it shouldn't, which is a recipe for mold.
- Heavy 1/2-Inch Glass: That beautiful, beefy 1/2-inch glass is incredibly heavy. I mean really heavy. It’s not just about lifting it; it’s about setting it with precision without it getting away from you.
- Uncertain Wall Support: If you're not 100% sure you've found a solid stud to anchor those heavy glass panels, you're gambling with a catastrophic failure. Guessing isn't an option.
The real value of a professional isn't just their ability to do the work; it's their ability to foresee and solve problems you don't even know exist yet. It's the peace of mind that comes from knowing the job will be done right, guaranteed.
The AmeriGlass Advantage in Southwest Florida
Here in Southwest Florida, bringing in a local, licensed team like ours at AmeriGlass Industries is about more than just getting the glass up. It’s an investment in a perfect, worry-free result. From Naples to Fort Myers and Bonita Springs, our technicians have seen every kind of weird wall and wonky curb imaginable.
We don't just show up with a tape measure. We use high-tech laser measurement tools to map every nuance of your shower opening. That data lets us fabricate glass panels that are custom-fit down to the millimeter. No unsightly gaps, no excessive silicone trying to hide mistakes—just clean lines and a flawless fit. It's this commitment to detail that earns us our reputation, and while guides on how to get more online reviews can explain the mechanics, we believe our work speaks for itself. You can explore the AmeriGlass Industries story and our values to see why we're so passionate about what we do.
At the end of the day, a professional installation means certainty. It’s knowing your home is in good hands, your safety is the top priority, and your new shower will be something you love looking at and using for years.
Think your project might be one for the pros? Give us a call. We're happy to provide a free estimate with no pressure. Let's make sure your new shower is perfect.
Common Questions We Hear in the Field
It's only natural to have a few questions before diving into a project like this. Over the years, we've heard them all. Here are the answers to some of the most common things people ask about installing a frameless glass shower.
How Long Does the Installation Really Take?
On our end, a professional crew can usually wrap up a standard single door or an inline door-and-panel setup in about 2-4 hours. If you're looking at something more complex, like a 90-degree corner shower with return panels, it's best to plan on it taking most of the day.
Now, if you're taking this on as a DIY project, give yourself some grace. I always tell homeowners to block out a full weekend. That way, you won't feel rushed while triple-checking your measurements, drilling carefully, and, most importantly, giving the silicone plenty of time to cure properly.
Can I Put a Frameless Door on My Fiberglass Shower Stall?
The short answer is yes, but it comes with a huge warning. The sheer weight of a frameless glass door means the hinges have to anchor into solid wood studs behind the wall. Most one-piece fiberglass stalls simply don't have that built-in structural support.
Trying to hang that heavy glass directly onto the fiberglass shell is a recipe for disaster. You risk cracking the entire unit or having the door fail completely. If there isn't proper wood backing in place, it absolutely must be added first. Honestly, because of this risk, we always recommend calling a professional for any installation involving a fiberglass surround.
The single most critical piece of a frameless installation is making sure the wall can hold the weight. A pro will know exactly how to check the substrate behind your tile or fiberglass to ensure a secure fit that lasts for decades.
Just How Waterproof Is a Frameless Shower?
Frameless showers are engineered to be incredibly water-resistant, but they aren't meant to be 100% waterproof like a submarine. A traditional framed shower has a bulky metal frame and seals that create a complete barrier.
A frameless design, on the other hand, achieves its clean look by using discreet, clear polycarbonate seals at the bottom and sides of the door. When the shower curb is sloped correctly and the glass is measured and cut with precision, this system does a fantastic job of keeping water where it belongs during normal use.
Ready to skip the guesswork and get a perfect result the first time? At AmeriGlass Industries, our licensed technicians rely on laser measurements and decades of hands-on experience to guarantee a flawless fit for your Southwest Florida home. Get your free, no-obligation estimate today!