
Ready to tackle that old swinging shower door? It's a totally doable DIY project, but it's not one to rush. At its core, you'll be detaching the glass panel from its hinges, taking apart any frame, and then scraping away the old, gunky sealant.
The two most important rules here are safety and preventing damage. Seriously. These glass doors are way heavier and more awkward than they look, so this is a two-person job, no exceptions.
Your Game Plan for Swinging Shower Door Removal
So, you're ready for an update. Whether your current door is leaky, hopelessly cloudy, or just clashing with your new bathroom vibe, taking it down yourself is a great first step in any remodel. Think of this as your roadmap to getting it done right, whether you're dealing with an older framed door or a more modern frameless style.
Before you even think about picking up a tool, lay down some heavy blankets or thick towels in the tub and on the bathroom floor. A dropped screw can chip tile, and a slipped glass panel can cause a disaster. This simple prep step is non-negotiable and saves a world of headaches.
What to Consider Before You Start
Taking a moment to plan can save you hours of frustration. Are you just swapping out the door, or is this part of a bigger renovation? Getting a handle on the scope and understanding the true cost of a bathroom remodel will help you figure out where this piece fits into your overall budget.
The job's difficulty really comes down to a few things:
- Door Style: Is it a frameless door, held on by just a couple of sleek hinges? Or is it an older style encased in a full metal frame that's been siliconed to the walls for decades? Framed doors mean you'll be spending more time with a utility knife cutting through old caulk.
- Hinge Type: Look closely at how the door swings. Does it pivot on pins at the top and bottom, or is it mounted with hinges on the side, like a regular door? Knowing which you have determines exactly how it comes off.
- Climate Impact: Here in Southwest Florida, the humidity can make silicone and caulk bond to tile and metal with a vengeance. After years of heat and moisture, that seal can be incredibly stubborn to break.
Insider Tip: Don't underestimate old sealant. A frame that looks simple can be practically glued to the wall. A heat gun on a low, gentle setting is my secret weapon for softening up that old, crusty adhesive before I even try to pry anything loose.
A clean, careful removal is the perfect setup for a beautiful new installation. If you're looking for ideas on what to do next, seeing a professional frameless shower door installation in Fort Myers, Florida can give you some great inspiration for upgrading your space.
Setting the Stage for a Safe Removal
Before you even think about picking up a tool, let's talk about what really matters. The prep work is, without a doubt, the most critical part of this entire process. It’s what separates a smooth, clean removal from a disastrous one that ends with a scratched tub, shattered tile, or worse.
Think of it this way: you’re about to handle a big, heavy, and awkward piece of glass in a small, hard-surfaced room. Your first job is to create a soft, safe zone.
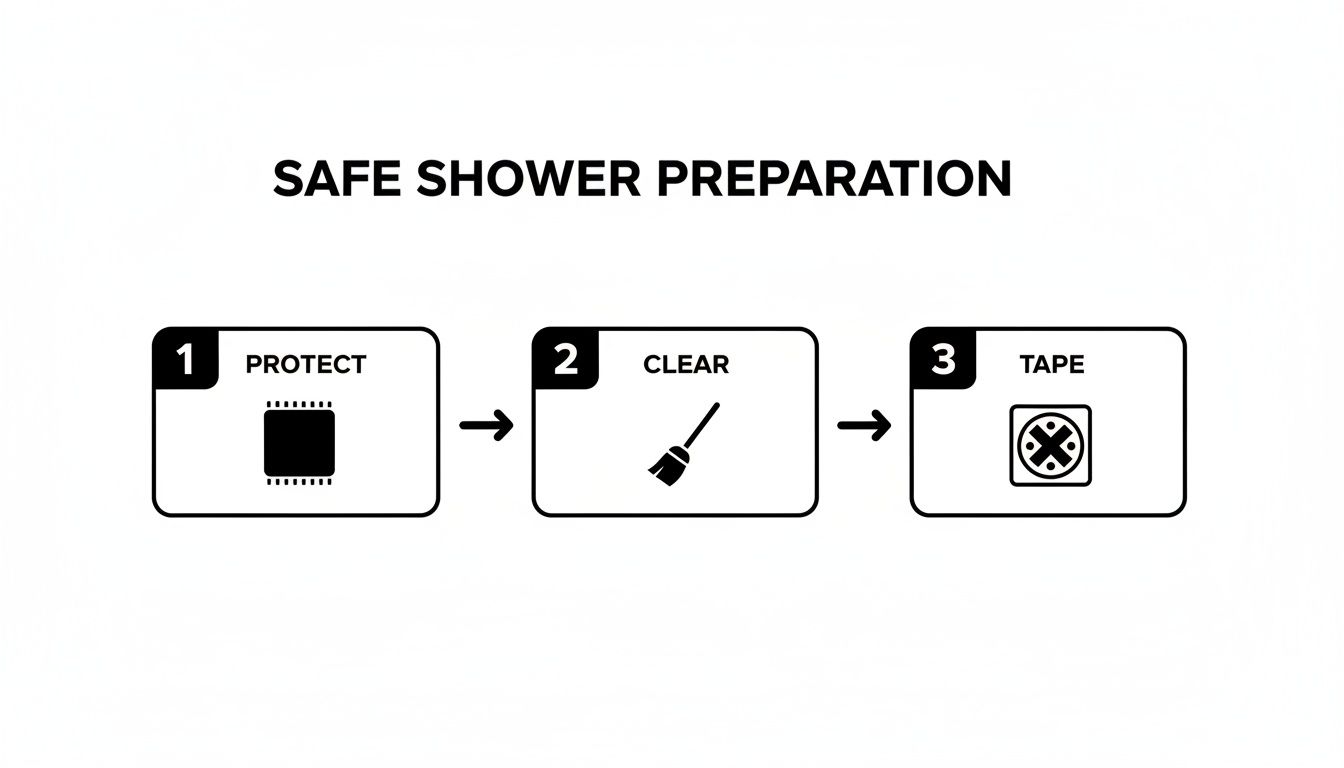
Grab some old, heavy blankets, thick towels, or even a few layers of cardboard. You need to completely cover the floor of your shower stall or bathtub. Don't stop there—extend that protection out onto the bathroom floor. This gives you a safe spot to set the door down once it's free.
Clear the Decks for Safety
With your surfaces protected, it's time to get everything else out of the way. You and your helper will need room to maneuver.
That means clearing the entire area of potential trip hazards. Bath mats, scales, laundry baskets, trash cans—move them out of the room completely. Also, make sure to clear off all the shampoos, soaps, and bottles from the tub ledge or shower caddy. The last thing you want is to be wrestling with a 50-pound glass panel and trip over a bath mat.
Here’s a pro tip that can save you a world of hurt later on: tape over your shower drain. A couple of strips of painter's tape or duct tape will do the trick. This simple move prevents tiny screws, washers, or chunks of old sealant from disappearing down the drain and causing a major plumbing issue.
A controlled environment is a safe environment. Spending just ten minutes prepping the space can literally save you hundreds, if not thousands, of dollars in potential repairs. Don't be tempted to skip this part.
A Quick Word on Universal Safety
While a shower door presents its own unique challenges, the basic safety rules here apply to a lot of DIY projects around the house. The idea of securing the object you're working on, protecting everything around it, and having a clear path is universal. In fact, you can see similar principles in other guides on safe door removal techniques for different home appliances.
The core lesson is always the same: patience and preparation are your best tools. When you set the stage properly, you’re not just getting ready to remove a door—you’re ensuring the whole project is handled professionally from start to finish.
Safely Detaching the Glass Door Panel
Alright, your prep work is done, and the area is clear. Now for the main event: getting that heavy glass panel off its hinges. This is where your focus—and especially your helper—is absolutely critical. Lifting a solid pane of glass is a delicate dance, and you need to be precise.
How you approach this really comes down to the kind of hinges you're dealing with. Some doors have two or three separate hinges along the side, just like a regular door in your house. Others are attached with a long, continuous "piano" hinge that runs from top to bottom.
Before you even think about touching a screw, make sure you've followed these essential prep steps.
Getting this part right—protecting the area, clearing your path, and taping the glass—creates a safe zone. It drastically cuts down the risk of something going wrong when you're in the middle of the most difficult part of the job.
Executing the Two-Person Lift
I can't stress this enough: this is not a solo job. One person's only task is to support the full weight of the glass door. They need to hold it steady and prevent it from shifting an inch. The other person is on tool duty, carefully taking out the screws.
Get your partner in position to brace the door, holding it firmly on both sides. They need to anticipate the door's weight shifting once that last screw comes loose. Talk to each other! A simple "I'm starting on the bottom hinge now" or "Okay, one screw left" makes all the difference.
The person with the screwdriver should start taking out the screws from the hinges. For doors with standard side hinges, always begin with the bottom hinge and work your way up.
A Pro Tip From the Field: When you get to the top hinge, take out the bottom screws first, but leave one of the top screws in, just a few turns. This little trick holds the door securely while you and your partner get a final, solid grip, stopping it from suddenly dropping or swinging away from the frame.
When you're both set, go ahead and remove that last screw.
Handling Different Hinge Types
The exact steps change a bit depending on the hardware.
- Standard Side Hinges: This is the most common setup. Just stick to the bottom-to-top removal method we just covered. The moment that last screw is out, the door is completely free and held only by your partner.
- Pivot Hinges: These doors swing on pins at the very top and bottom corners. You'll usually find a set screw on the top pivot bracket. Loosen that, and you should be able to lift the entire door up and off the bottom pivot pin.
- Piano Hinges: These have a ton of screws, but the strategy is the same. Your partner supports the weight while you start at the bottom and work your way up, removing every screw.
Moving the Glass Panel Safely
With the door free, you now have to get it out of the bathroom—which can be more awkward than the removal itself. Always carry the door vertically. Tempered glass is incredibly strong on its face but shockingly fragile on its edges and corners. One good bump on a tile floor, and it can shatter.
Move slowly. Be deliberate. And if you're looking for some inspiration for what to do with the space now, take a look at some modern custom mirror and specialty glass styles to get ideas for your bathroom's next chapter.
Gently set the old door panel down in a safe spot where it won't get bumped or kicked. Leaning it against a wall on a piece of cardboard or an old blanket is perfect. Now, you're ready to tackle the frame.
Dismantling the Shower Door Frame
Okay, the heavy glass panel is safely out of the way. Good job. Now, you’re left looking at the metal skeleton still attached to your shower. That frame might look simple, but it’s often the most stubborn part of the entire job. It’s held in place by hidden screws and what feels like superglue, but is actually just years of hardened silicone. Don't worry, a methodical approach will get it off cleanly.
Find and Expose Every Screw
Your first mission is a bit of detective work. You need to find every single mounting screw holding that frame to the wall. Manufacturers have a knack for hiding them.
Start by looking for small, plastic decorative caps along the vertical and bottom frame pieces. Just pop these off with a flathead screwdriver to reveal the screws hiding underneath. If you don't see any caps, the screws are probably just buried under a thick bead of caulk.
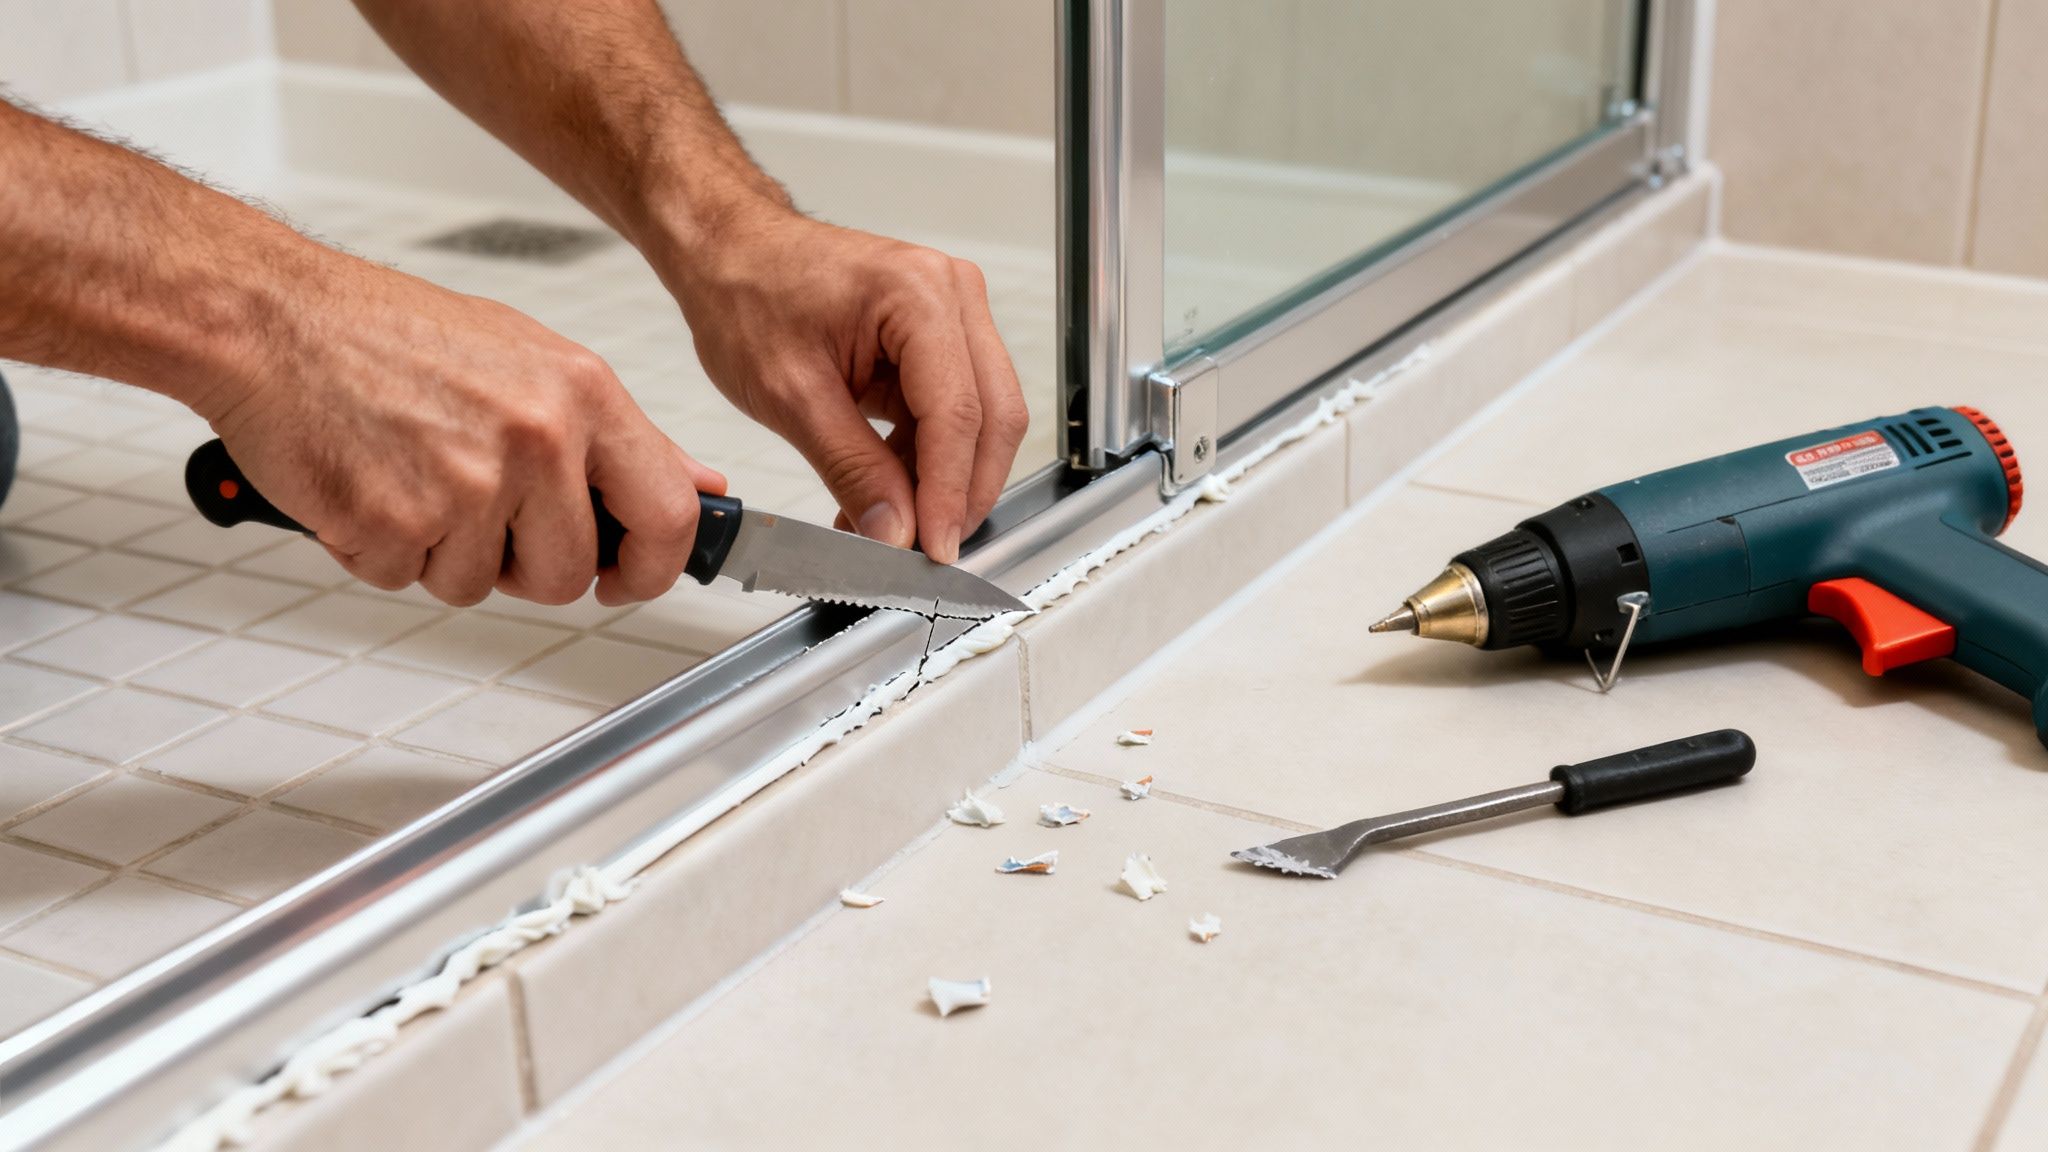
Slice Through That Old Sealant
Once you’ve spotted all the screws, hold off on removing them just yet. That frame is still glued to the wall by that old, crusty sealant. You have to break that bond first.
Grab a sharp utility knife and carefully score the silicone where the metal frame meets your tile or shower surround. Keep your blade at a low angle to avoid scratching the finish on your tile. This isn't a race—it takes patience. You'll likely need to make several passes to cut all the way through the bead.
Insider Tip for Stubborn Adhesive: Is that old caulk rock-hard and your utility knife is barely making a dent? Time to bring in a little heat. A heat gun on a low setting (or even a hairdryer in a pinch) can be a lifesaver. Gently warm the sealant along the frame. This softens it up, making it dramatically easier to slice through and pry away.
With the sealant scored, you can finally go ahead and remove all the mounting screws. I suggest keeping them in a small cup or magnetic tray so they don’t end up lost down the drain.
Prying the Frame Loose
Even with the screws gone and the sealant cut, the frame will probably put up a fight. This is where a stiff putty knife comes in handy.
Gently wedge the blade between the frame and the wall, starting at a top corner. Work your way down, slowly prying the frame away. The key here is to be gentle and avoid applying too much force in one spot, which could crack a tile.
As you pull the frame off, you’ll probably see the plastic wall anchors left behind in the tile. You can usually yank these out with a pair of pliers. If one breaks off flush with the wall, don’t panic. Just use a hammer and a nail set to tap the leftover piece into the wall cavity, out of sight.
This kind of careful removal is a core skill for any bathroom remodel. It's a task undertaken frequently, considering professionals are a huge part of the $5 to $7 billion global shower replacement market. Homeowners in North America alone account for up to 40% of that spending.
Doing it right sets the stage for a flawless new installation, protecting your home's value. Once your new door is in, you'll want to keep it looking great. For our best advice, check out our guide on essential shower door maintenance.
Giving It That Professional Finish
You’ve got the heavy lifting done—the door and frame are out. But don't pack up your tools just yet. This last bit of detail work is what truly makes the difference between a rough DIY job and a clean, professional-looking result.
Your main goal now is to prep the surface for whatever you have planned next, whether it’s a sleek new frameless door, a simple shower curtain, or retiling the space. That starts with getting rid of every last bit of old silicone. If you leave any of that filmy residue behind, the new sealant won’t create that perfect, watertight bond you need to prevent leaks down the road.
Getting Rid of That Stubborn Silicone Film
After you pull the frame off, you’ll see a ghostly outline of where it used to sit. It’s usually a nasty combination of old caulk, soap scum, and mineral deposits. This is where a plastic razor blade or a stiff putty knife becomes your best friend.
Get the blade at a low angle and carefully scrape away the thickest parts of the residue. The key is to be firm but gentle to avoid scratching your tile or fiberglass surround.
For the thin, stubborn film left behind, you've got a couple of choices. You can grab a commercial silicone remover from the hardware store, which works great but definitely requires you to open a window for ventilation. A simpler, and often just as effective, method is using mineral spirits.
- On Tile: Just dampen a rag with mineral spirits and start scrubbing. The solvent does a fantastic job of breaking down the last of the silicone so you can wipe it clean.
- On Fiberglass/Acrylic: You need to be a bit more careful here. Find a small, hidden spot to test the mineral spirits first to make sure it doesn't haze or damage the finish. If it's all clear, go ahead and scrub lightly.
I can't stress this enough: Never use a metal scraper on a fiberglass or acrylic shower. You will leave deep, permanent scratches. Stick with plastic tools for these surfaces to keep them looking good.
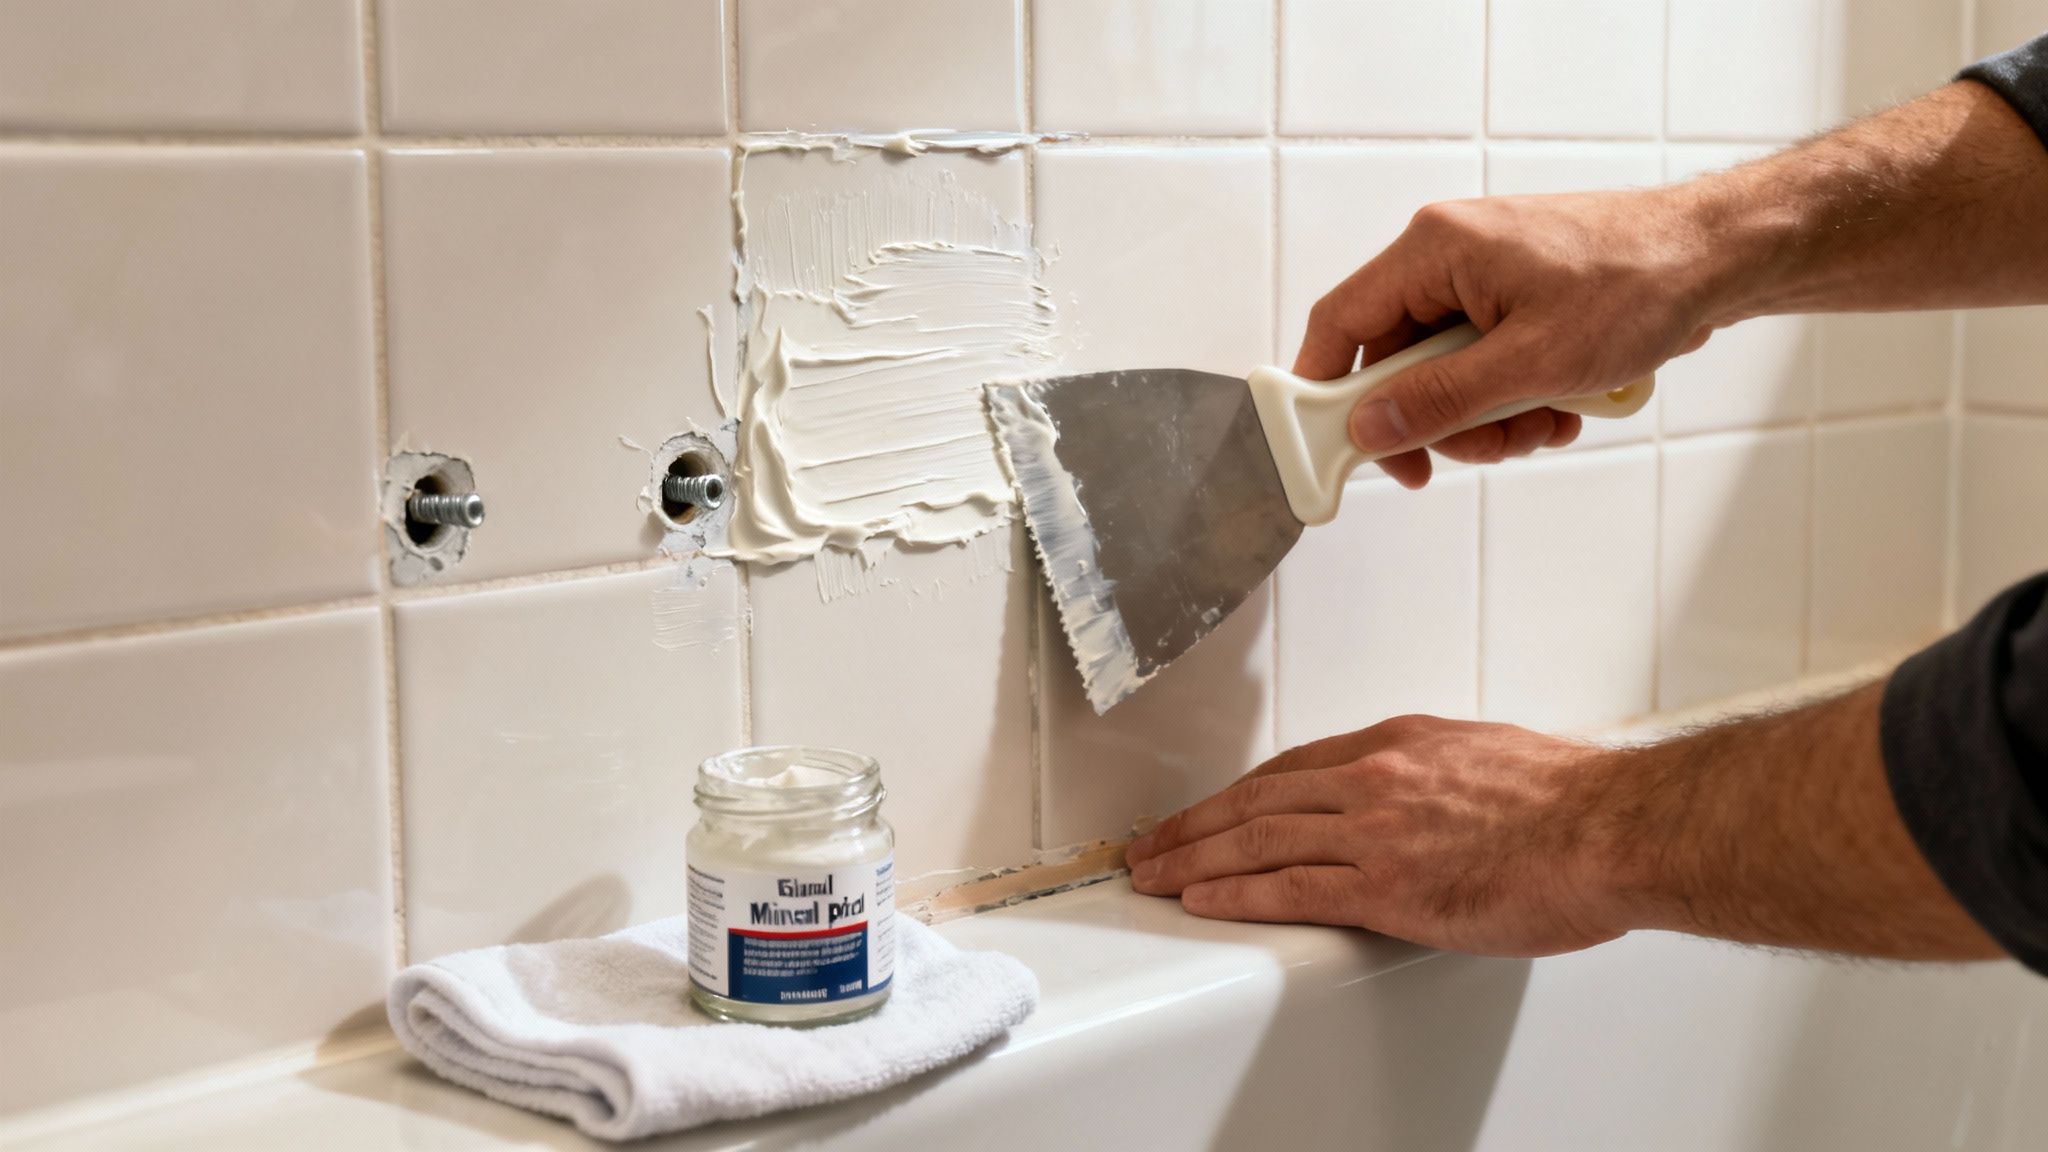
Patching Up the Old Screw Holes
Now that the surfaces are clean, you’ll be staring at a few empty screw holes. It’s tempting to ignore them, but don't. Leaving them open is like putting out a welcome mat for water to seep behind your walls, which is a recipe for mold and rot.
For holes in tile, your best bet is a waterproof epoxy or a grout that’s color-matched to your existing grout lines. Mix a small batch, press it firmly into each hole with a putty knife, and scrape the surface flush. If the holes went into drywall instead, a quality waterproof spackle will work perfectly.
This quick repair not only looks a million times better but is absolutely essential for creating a clean slate. It's the perfect foundation if you're thinking about an upgrade, and learning about how a glass company can make your home feel luxurious can give you some amazing ideas for that fresh, new space.
What to Do With the Old Door
Finally, you're left with an old shower door and its aluminum frame. The frame is almost always recyclable, so check with your local waste management to see if they have a metal recycling program.
The tempered glass panel, on the other hand, is a different story. Because of how it's treated, most residential recycling programs won't take it. Your best option is to call a local glass company (like us here at AmeriGlass!) or a construction debris disposal service to make sure it’s handled safely and correctly.
Knowing When to Call a Professional
There's a real sense of accomplishment that comes with successfully tackling a DIY project like removing an old shower door. But knowing your limits is just as important as knowing how to use a drill. Sometimes, the smartest move is to step back and call in a pro, especially when a simple project has the potential to turn into a costly mistake.
Before you go all-in, give your shower an honest assessment. Is the frame a mess of rust and corrosion? Those screws are probably seized tight, and trying to muscle them out is a great way to crack a tile. A professional has seen this a thousand times and has the right tools and tricks to get it done without damaging your bathroom.
Red Flags That Point to a Pro
Some situations just scream "call for backup." If you run into any of these, it’s probably a good time to put the tools down and pick up the phone.
- Heavy Frameless Glass: Those beautiful, modern frameless doors are no joke. They’re often made of incredibly thick tempered glass, and a single panel can easily weigh 70 pounds or more. Trying to handle that much weight in a slippery, cramped bathroom is a recipe for disaster.
- Complex or Custom Setups: Does your door belong to a larger, custom-built enclosure with multiple glass panels? These systems are engineered to work together. Yanking one piece out the wrong way can throw the whole structure off, making it unstable and unsafe.
- Delicate or High-End Tile: If your door is mounted on expensive marble, porcelain, or that one-of-a-kind mosaic you love, the risk factor skyrockets. One slip of a screwdriver can cause a chip or crack that’s impossible to repair perfectly. A pro is insured for this very reason.
Handing off a tough removal isn't giving up. It's a smart decision to protect your home and yourself. A professional gets the job done right, leaving you with a clean slate for your beautiful new installation.
The Value of Professional Expertise
There’s a reason the shower door market is huge—it’s projected to reach US$ 39.5 billion globally by 2034. Homeowners know that some jobs are just worth paying for. In North America alone, the market is expected to hit USD 7,151.7 million by 2030. You can discover more about these market trends here. People value a job done right.
When you hire an expert, you’re not just paying for a pair of hands. You’re paying for experience, precision, and the peace of mind that comes from knowing the heavy lifting is handled. They’ll deal with any surprises that pop up and make sure the old door vanishes without a trace.
Here in Southwest Florida, that also means bringing in a team that knows how our humidity and salt air can affect sealants and hardware over time. If you're on the fence, why not get a clear picture of what's involved? You can request a free, no-obligation quote from us to help you make the best choice.
For a flawless finish from start to finish, trust the experts at AmeriGlass Industries. We specialize in the precise, safe removal of old shower doors and the perfect installation of new ones, ensuring your bathroom renovation is a complete success. Find out more at https://ameriglassindustries.com.